
Follow along as we break ground on Building Our Home - Step One: Excavation, Slab Prep & Foundation Walls! In this first step of the build, we share the process of excavation, slab-on-grade prep, and pouring foundation walls - with tips, photos, and what to expect.

Disclaimer: this post may contain affiliate links, and every purchase made through these links will give me a small commission (at absolutely no extra cost for you!) AS AN AMAZON ASSOCIATE AND REWARDSTYLE MEMBER, I EARN FROM QUALIFYING PURCHASES. See Privacy Policy for additional info.
After months (or years!) of dreaming, planning, and designing, the day finally came - we broke ground on our new home! There's something surreal about watching heavy machinery roll onto what was once just an open lot and start shaping it into the foundation of your future. This first stage might not be the most glamorous, but it's one of the most important. Everything that comes next depends on getting this part right.
We chose a slab-on-grade foundation, which means our concrete slab would be poured directly onto the ground after proper excavation and prep. Before that could happen, the lot had to be cleared, soil leveled, and trenches dug for plumbing and footings. The process moved quickly but came with a steep learning curve - from understanding soil compaction to waterproofing foundation walls, we were thrown into the deep end of home construction. Thankfully, my husband knows exactly what he's doing - his experience made a huge difference during this stage!
In this post, I'm walking through the key milestones of this phase - excavation, slab prep, and pouring foundation walls - with photos, notes from the field, and what we wish we'd known going in. If you're thinking about building or just curious about how a house goes from dirt to structure, here's a peek behind the scenes at how it all begins!
Step 1: Breaking Ground
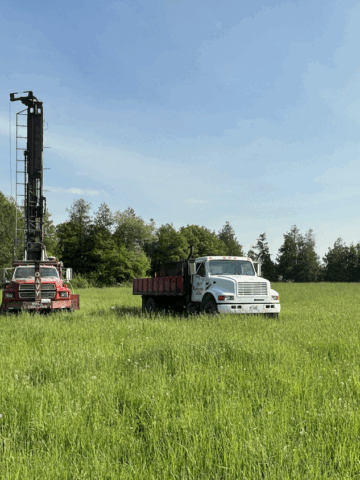
The day we broke ground was both exciting and nerve-wracking. After all the planning, it was finally happening! My husband marked out the footprint of the house, and excavation began almost immediately. Watching the first scoop of earth being removed made it all feel real - the dirt, the machines, the noise - it was the first physical sign of our dream becoming reality!
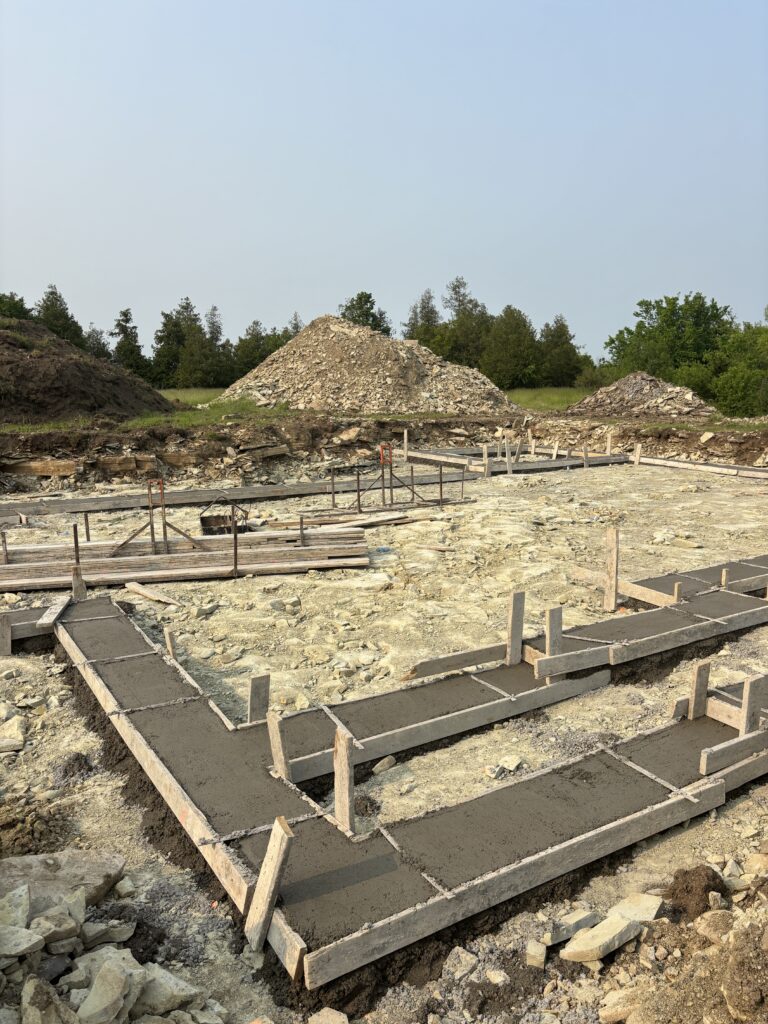
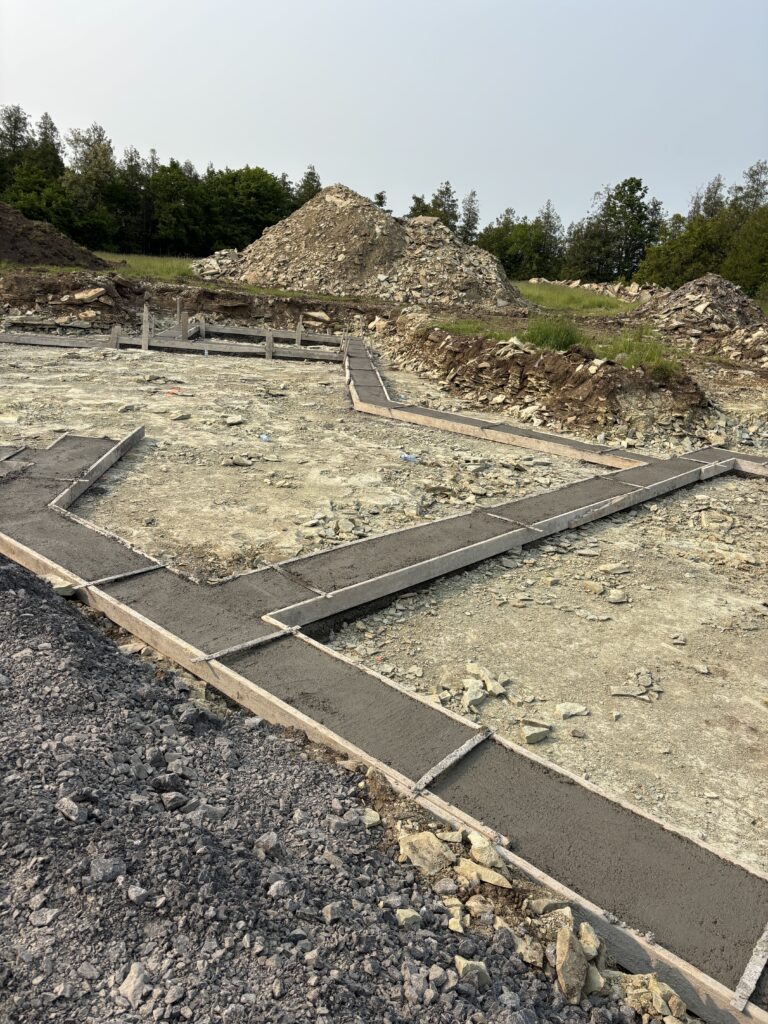
Excavation involved digging down to the proper depth for our slab-on-grade foundation. This meant removing topsoil, leveling the site, and creating a stable, compacted base. The soil type on our lot dictated how much digging and backfilling was needed. There was also a lot of limestone in our land so they needed to dig that out too. Once the space was leveled and compacted, we were ready for the next phase: prepping for the slab.


Step 2: Preparing for the Slab
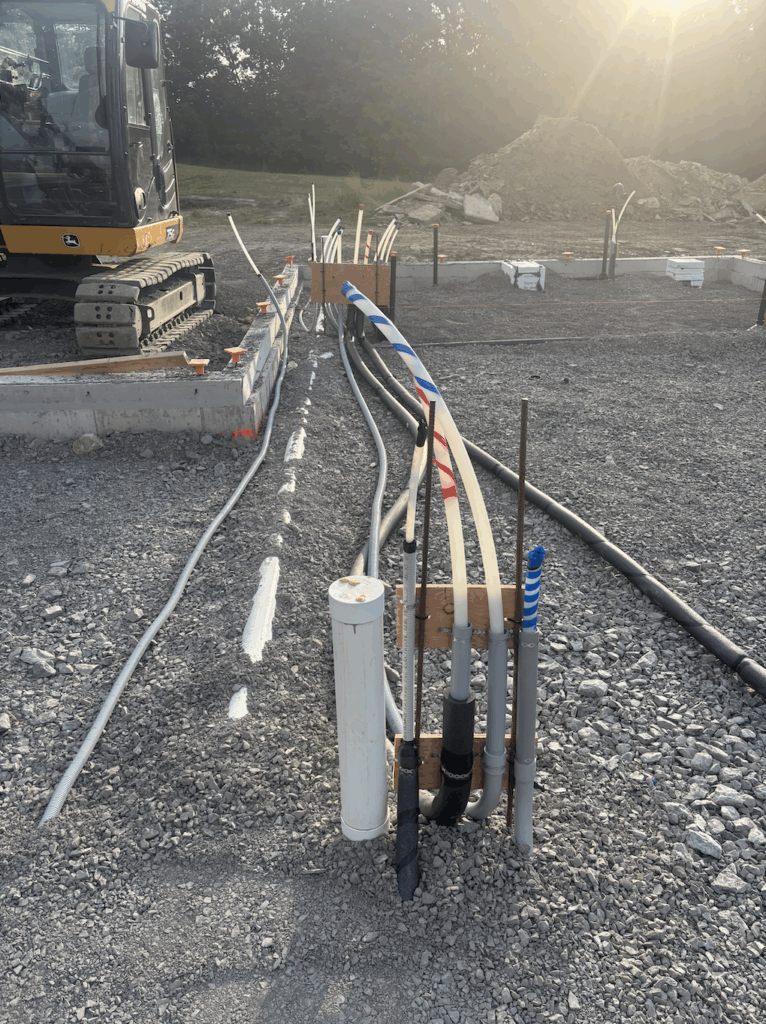
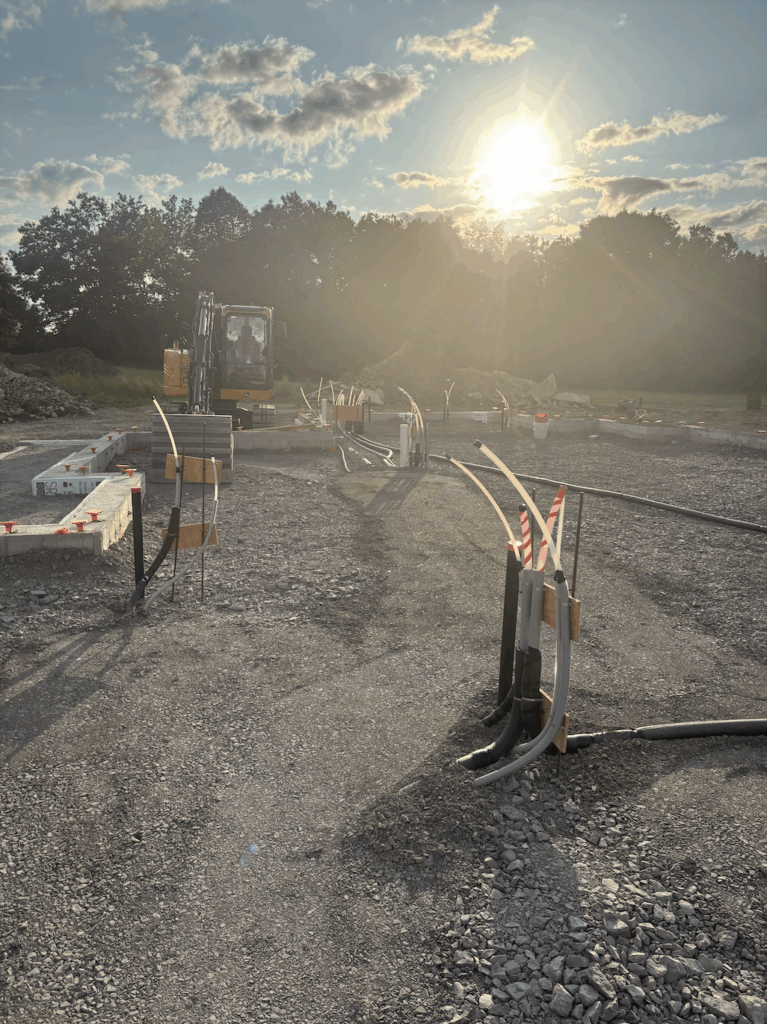
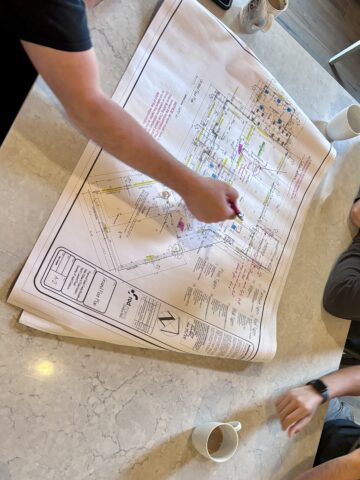
Before concrete could be poured, there was a surprising amount of prep work. First came trenching for utilities - plumbing and electrical lines were laid down in the dirt. Then came gravel and a moisture barrier to protect the slab from ground moisture. On top of that, we added rigid foam insulation and rebar or wire mesh for reinforcement, depending on the engineer's design.
It was important that everything was perfectly level and that all measurements were precise - this slab would be the literal base for our home. We also had to have inspections done before concrete could be poured to make sure everything met local building codes. It felt like a lot of steps!

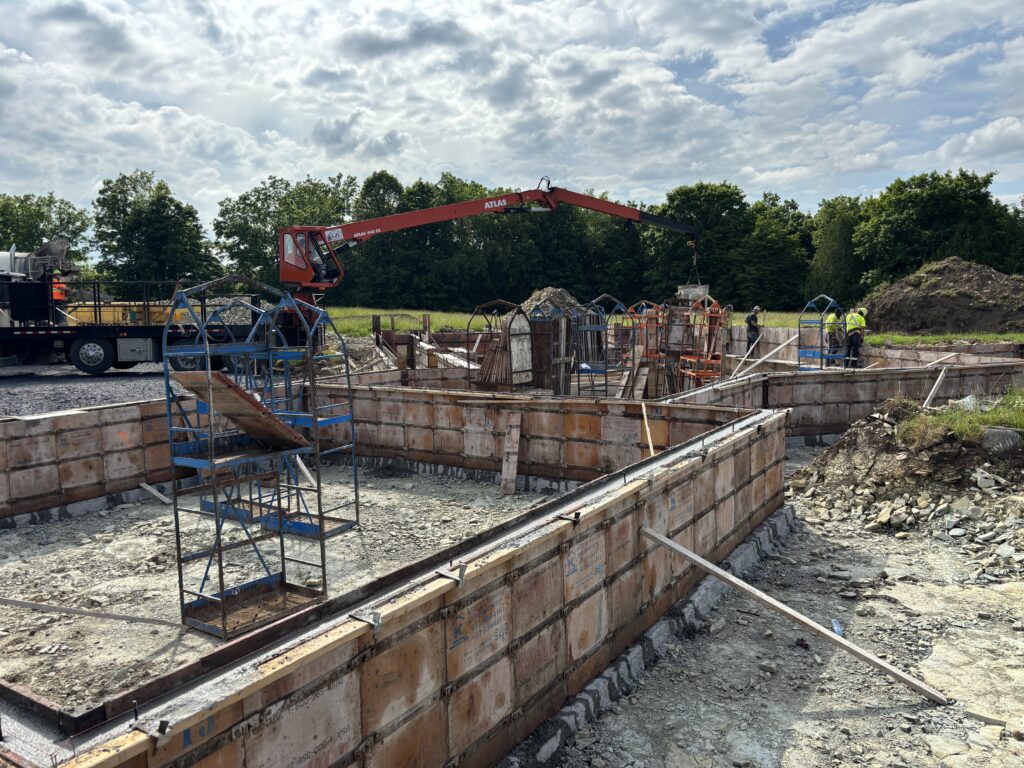
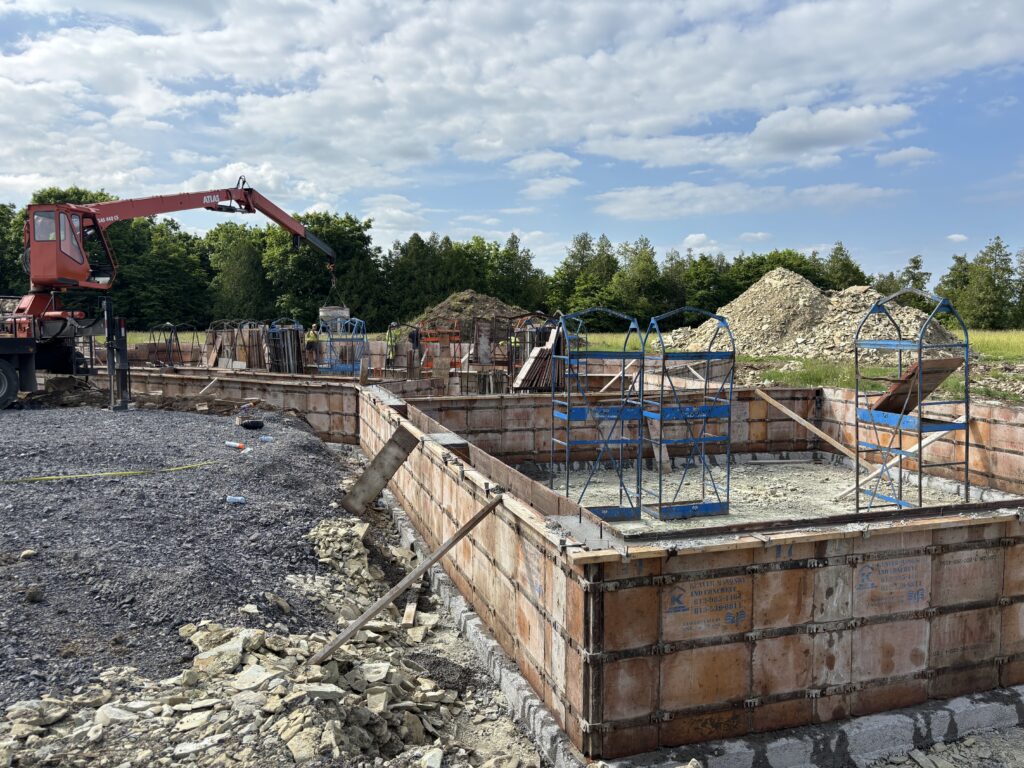

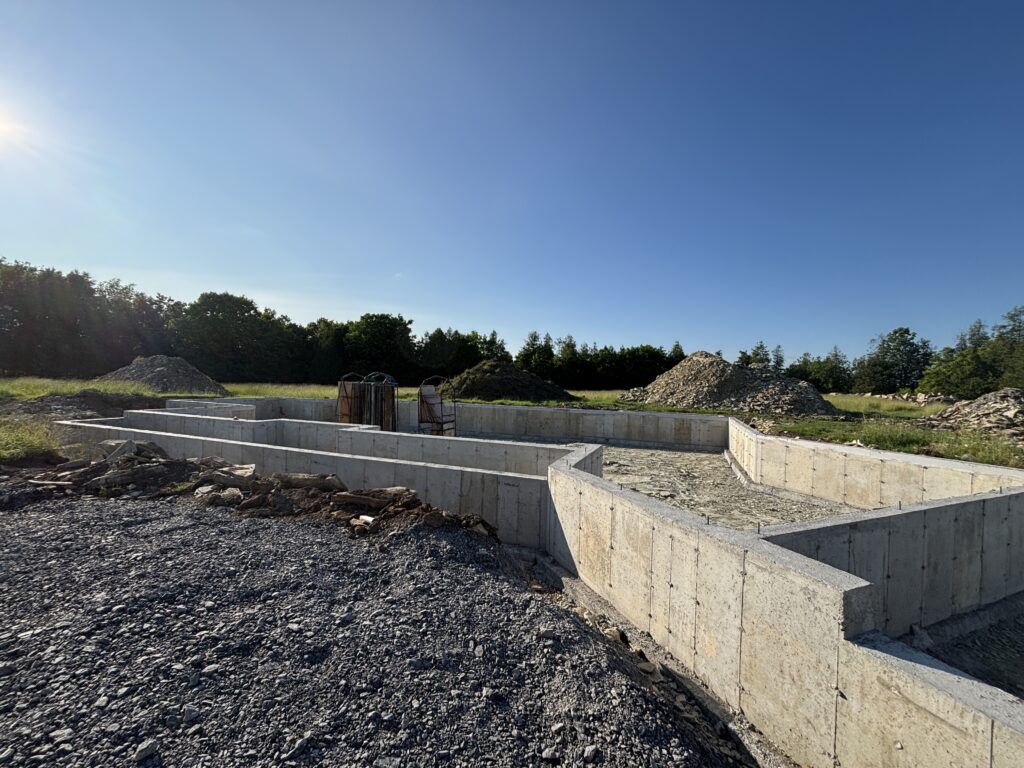
Step 3: Pouring Foundation Walls
In our case, we had some foundation walls poured along the perimeter to create protection and support. These were formed with wooden molds and reinforced with steel rebar. Once poured, we had to wait a few days for the concrete to cure before the forms were removed.
Seeing those first concrete walls go up felt monumental! It was the first time we could see the actual shape of the house taking form. We walked the site that day, stepping into what would eventually be our living room, kitchen, and bedrooms - even if it was just concrete and dirt at that point, it felt magical.
What We Learned
This phase taught us that the foundation isn't just a physical base - it's also the emotional foundation of the entire process. It's where things start to feel real. I learned to trust my husband's experience, ask questions early, and be flexible when weather or inspections slowed things down. Here are a few takeaways:
- Double-check your house placement on the lot before digging starts. Make sure it is exactly where you want it!
- Site work moves fast - be ready with decisions ahead of time.
- Moisture barriers and insulation matter, especially in climates with frost.
- Don't skip inspections. They're essential, even if they slow things down. We need them for our builders mortgage and with our township.
💡 Pro Tip: Take photos at every stage!
Timeline Snapshot
This part of the build moved faster than I expected, but still came with a few surprises. From excavation to poured foundation, here's how it went for us:
- Timeline:
- Excavation & grading: 2-3 days
- Utility trenches & slab prep: 1 week
- Inspections & adjustments: 2-3 days
- Foundation walls poured & cured: ~1 week
- Total: ~2.5 to 3 weeks
Our biggest tip here? Build in buffer time and budget. Foundations are not where you want to cut corners. Everything needs to be perfect!
Tools, Teams & Trades
We couldn't have done this part without a solid team. From the excavation crew to the concrete specialists, we relied on experienced trades to make sure everything was level, square, and structurally sound.
- Excavation contractor: Cleared and prepped the site
- Plumber & electrician: Laid in-ground lines before the pour
- Concrete crew: Formed and poured the slab and foundation walls
- Building inspector: Approved site work before pouring
- My Husband: Site Contractor, making sure everyone knows where to be and when! He is so good at organizing everyone so things run seamlessly and smoothly!
I was amazed by how much work these crews accomplished in just a few days - it gave me a whole new appreciation for the skilled hands building our home.


Tips & Advice for Starting Your Home Build
Whether you're planning your own home build or just curious about the process, the foundation stage sets the tone for everything that follows. Here are some tips we'd share with anyone starting this journey:
- Have your permits and approvals ready before breaking ground.
Delays at this stage can be expensive once machines are on-site and ready to go. - Be on-site if you can - especially during excavation. Mistakes in layout or elevation can be hard to fix later. Being present helps catch issues early.
- Communicate clearly with your builder and trades. Ask questions and don't assume everyone is on the same page - it's better to clarify than correct.
- Expect weather delays. Rain, frost, or even extreme heat can impact excavation and concrete work. Build in extra time if possible.
- Document everything. Take photos during trenching and slab prep - you'll be glad to have a visual record before it's all covered up.
- Understand your foundation type. Each option (slab-on-grade, crawl space, basement) has pros and cons. Make sure the one you choose fits your climate, soil, and long-term plans.
FAQs About the Foundation Stage
Q: Why did you choose a slab-on-grade foundation?
We have had three major basement floods in our current house, and it has cost a lot to fix. We never wanted to go through that again, so we opted for no basement in this house! We do have a family/playroom upstairs for the kids. Otherwise, we realized a basement just wasn't necessary for our lifestyle.
Q: How long does it take for concrete to cure?
Most concrete cures are enough to build on in 7 days, but full strength is reached at around 28 days.
Q: Can you pour a foundation in the winter?
Yes - but it requires special techniques and heated blankets to prevent cracking. We didn't start until May when the weather was warm but not extremely hot yet.
Q: What if you change your mind after excavation?
Changes are expensive after digging starts - make sure your plans are final beforehand!
Foundation Stage Checklist: What to Do Before You Break Ground ✅
Paperwork & Prep
- Final house plans approved by your builder
- Building permits obtained
- Lot survey completed and staked out
- Utility locations marked (hydro, gas, water, etc.)
- Site access confirmed for large machinery
Excavation & Site Work
- Clear lot of trees, stumps, debris
- Grade and level the build site
- Dig trenches for footings, plumbing, and utilities
- Inspect soil and add gravel base if needed
- Schedule and pass pre-pour inspections
Slab & Foundation Prep
- Install moisture barrier
- Add rigid foam insulation (if needed for slab-on-grade)
- Set up rebar or wire mesh for reinforcement
- Confirm placement of plumbing and electrical rough-ins
- Double-check measurements and elevation for accuracy
Pour & Cure
- Form foundation walls (if applicable)
- Pour concrete for slab and/or walls
- Allow proper curing time (usually 7-10 days minimum)
- Remove forms and clean up site
- Confirm everything is level, square, and ready for framing
📥 Download the Printable Checklist Here📥

Want a copy to keep on hand?
Click here to download the Printable Foundation Stage Checklist ⬇️⬇️⬇️⬇️⬇️
Up Next: Framing! 🔨
With the foundation poured and cured, it was finally time to go vertical - and wow, what a difference a few days can make! In the next part of our home build series, I'll share what it was like to see the first walls go up, how the framing crew worked their magic, and the moment we walked through the layout for the very first time. From wood deliveries to standing in our future kitchen, this stage brought the floor plan to life in the most exciting way. You can read all about our framing process here!
Conclusion: Laying the Groundwork for What's to Come
The foundation stage may not be the most glamorous part of building a home, but it's easily one of the most important. Every wall, floor, and finish that comes later depends on the strength and precision of this early work. From digging and grading to pouring concrete, we gained a whole new appreciation for what it takes to create a solid base - both literally and figuratively - for our future home.
Looking back, this phase taught us a lot about patience, preparation, and trusting the process. It was the beginning of something big, and even though the real fun (like framing and finishes) was still ahead, this was the moment it all started to feel real. If you're about to start building or just dreaming about it, we hope this behind-the-scenes look at our first steps helps you feel a little more prepared for the journey ahead.
👉 Stay tuned - or subscribe so you don't miss the next post: Framing & First Look Inside the Structure.


Leave a Reply