
These 30 no-carve pumpkin decorating ideas include painted, decoupaged, farmhouse, elegant, and kid-friendly pumpkins for fall and Halloween.
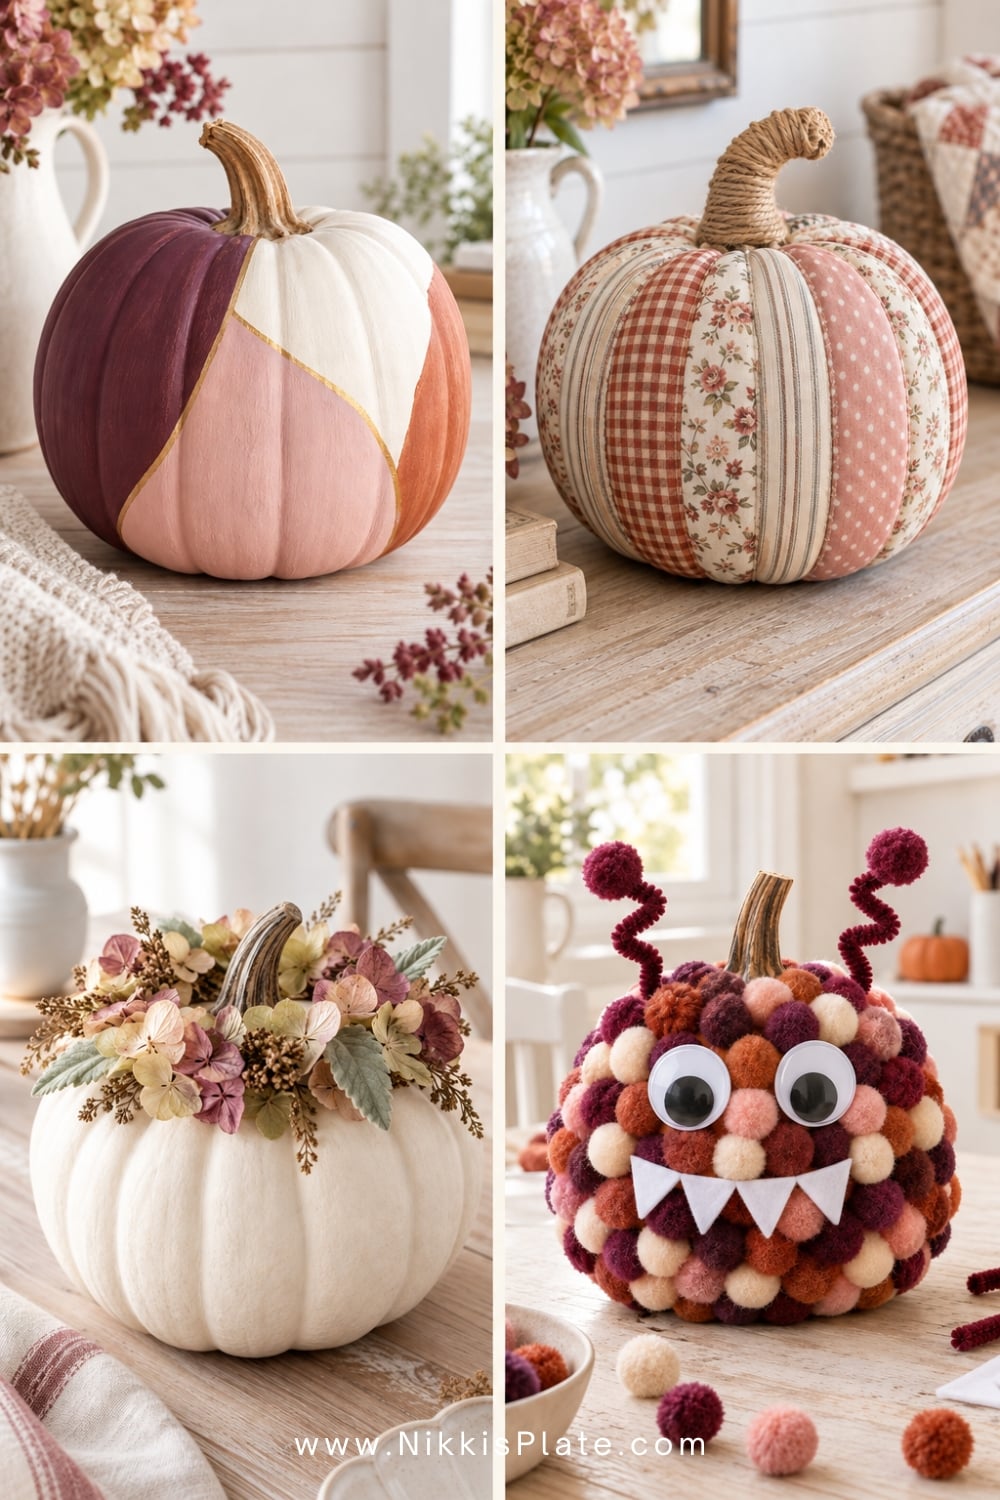
Looking for no-carve pumpkin decorating ideas that are cute, creative, and a little less messy than traditional jack-o'-lanterns? These 30 easy ideas transform real or faux pumpkins with paint, ribbon, fabric, flowers, felt, and other simple craft supplies-no carving knife required.
There are cozy farmhouse pumpkins, pretty painted designs, kid-friendly Halloween characters, and a few more detailed ideas that would be perfect for a pumpkin-decorating contest. Most can be customized to match the colours already in your home, and many work just as well for fall as they do for Halloween.
If you are planning a full afternoon of seasonal crafting, save my easy DIY fall decor ideas and easy Halloween crafts for kids for next!
Why Decorate Pumpkins Without Carving?
No-carve pumpkins are such an easy option when you want to decorate earlier in the season, avoid the mess of scooping pumpkin pulp, or let younger children join in. They also give you much more freedom with colour, texture, pattern, and style.
Use real pumpkins for a natural porch or table display, or choose faux craft pumpkins for projects you want to reuse next year. A smooth pumpkin is easiest to paint, while a deeply ribbed pumpkin looks especially pretty with ribbon, dried flowers, or simple colour blocking.
Basic Supplies You May Need
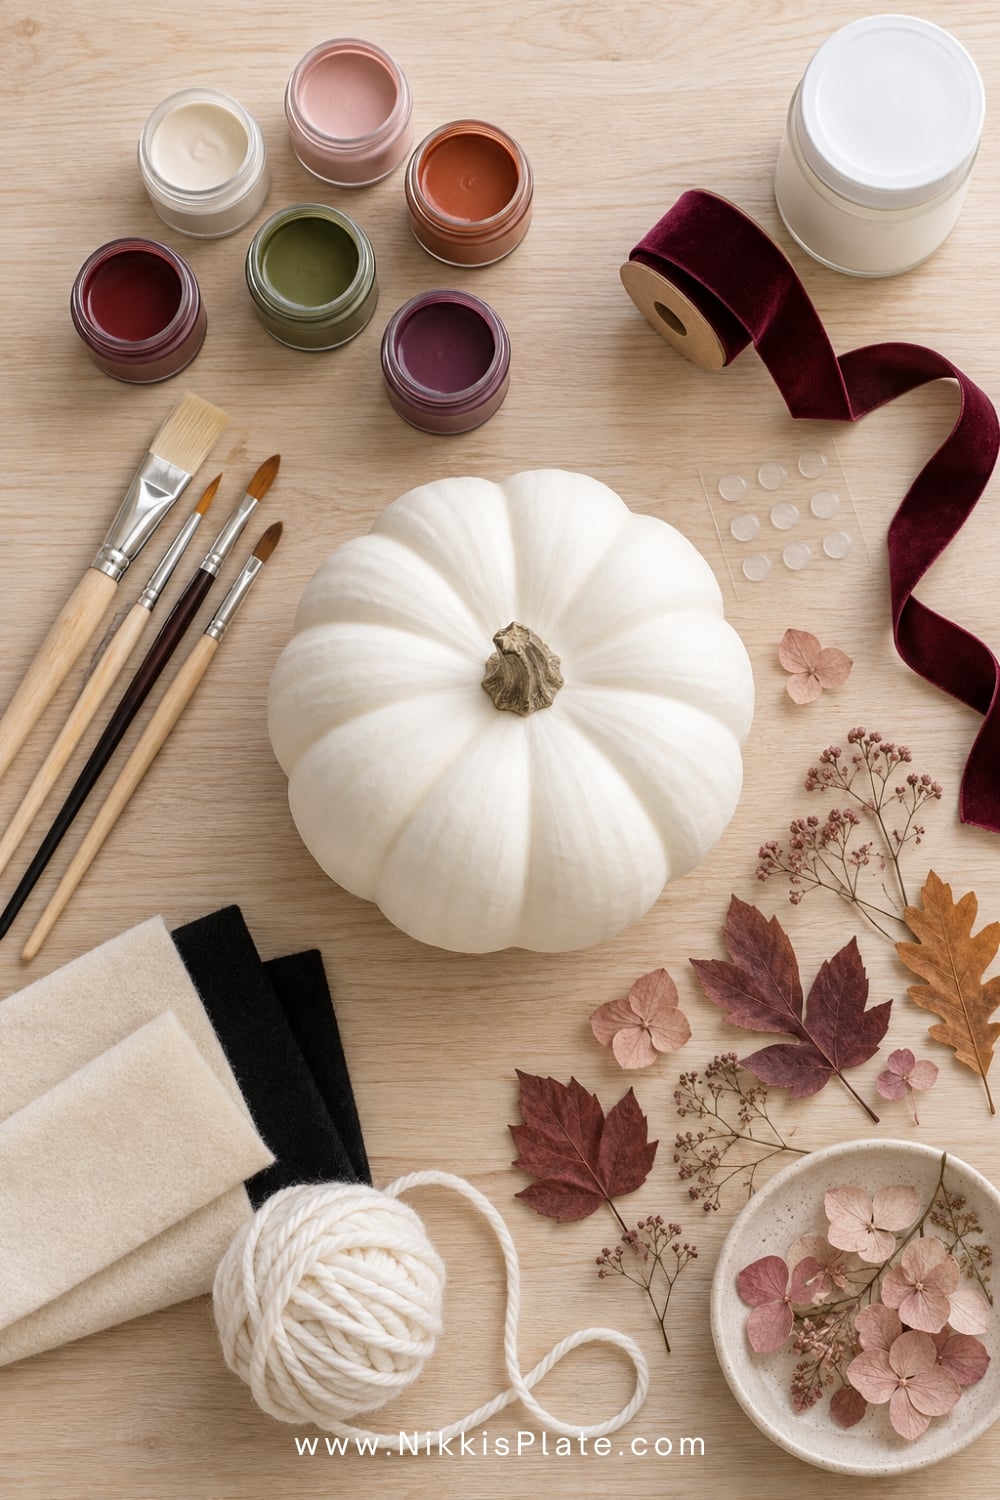
You do not need every item on this list. Choose your pumpkin idea first, then gather only the supplies required for that project.
- Real or faux pumpkins in assorted sizes
- Multi-surface acrylic craft paint
- Small flat brushes, detail brushes, and foam pouncers
- Paint pens or washable markers
- Decoupage medium and a soft brush
- Decorative paper, paper napkins, or pressed flowers
- Velvet, gingham, satin, or linen ribbon
- Felt, yarn, pom-poms, fabric scraps, and twine
- Removable glue dots, craft glue, or a low-temperature glue gun
- Faux pearls, metallic leaf, stickers, and vinyl letters
- Clear outdoor-rated sealer for faux pumpkins displayed outside
Before You Begin
Wipe each pumpkin with a soft, slightly damp cloth and let it dry completely. Do not paint over dirt, condensation, or waxy residue. If you are using a faux pumpkin, test paint or glue on the bottom first because finishes can vary.
For the cleanest result, apply two or three thin coats of paint instead of one heavy coat. Let each layer dry before adding patterns or embellishments. Real pumpkins should stay in a cool, dry spot away from direct heat, while decorated faux pumpkins can be stored and reused from year to year.
Easy Painted Pumpkin Ideas
1. Matte Monochrome Pumpkins
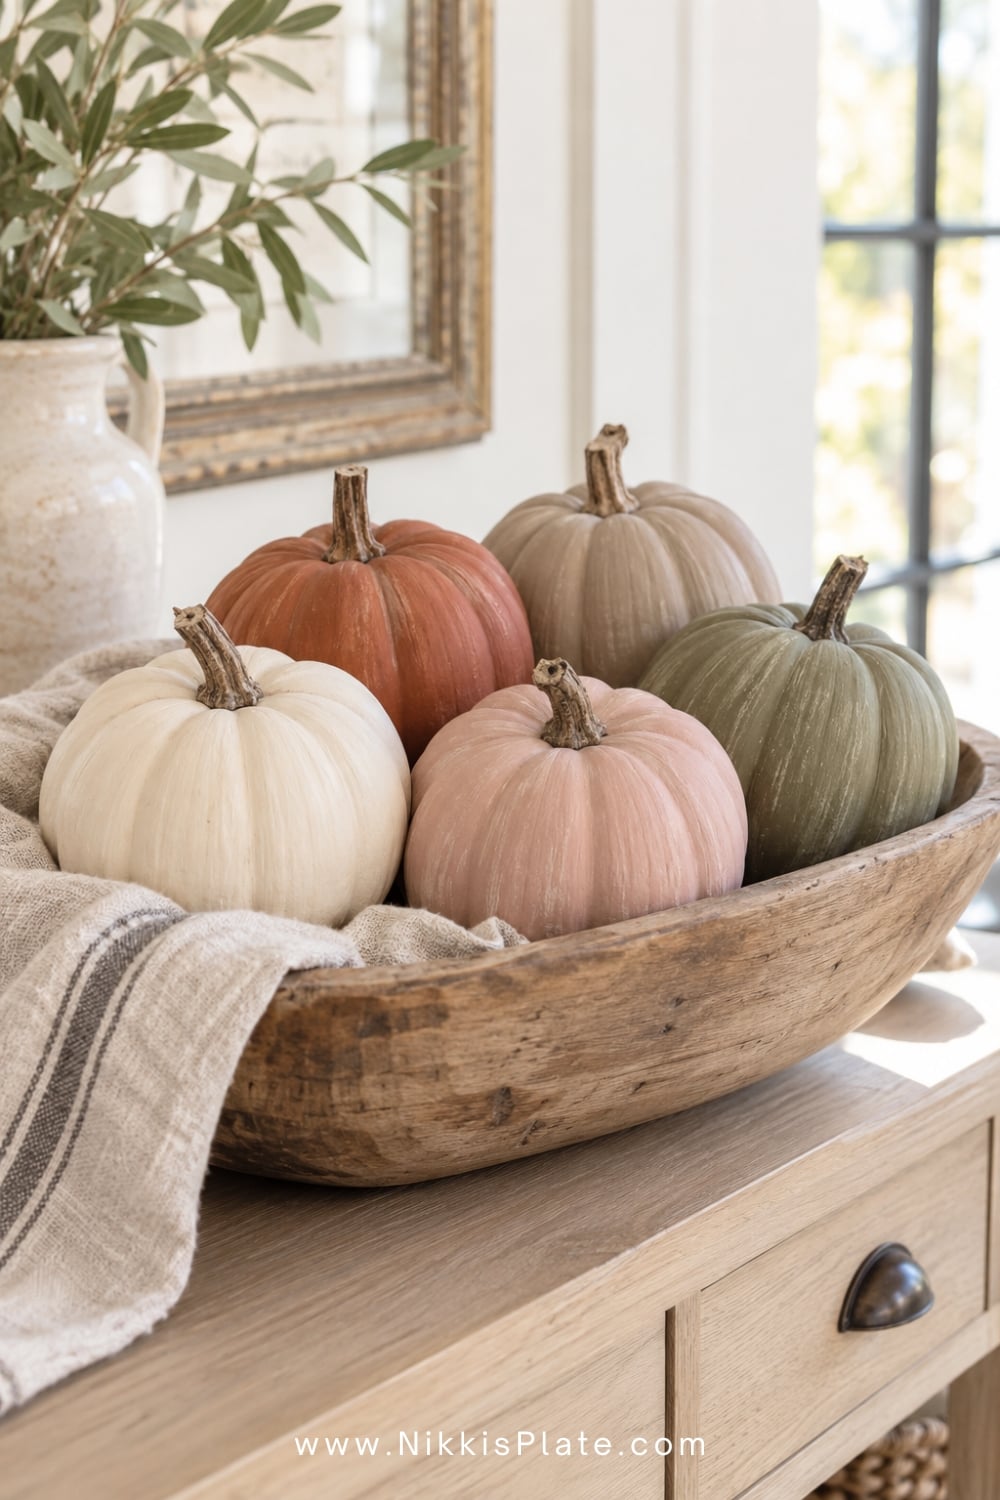
Paint a group of faux pumpkins in one soft colour family for an easy, high-end look. Cream, warm taupe, dusty blush, muted rust, olive, and deep plum all feel beautiful for fall. Choose matte paint rather than a glossy finish so the pumpkins look more like pottery.
Paint the stems in a slightly darker shade or replace plastic stems with short twigs. Style three or five pumpkins together in a wood bowl, on an entry table, or along the fireplace mantel.
2. Gingham Painted Pumpkins
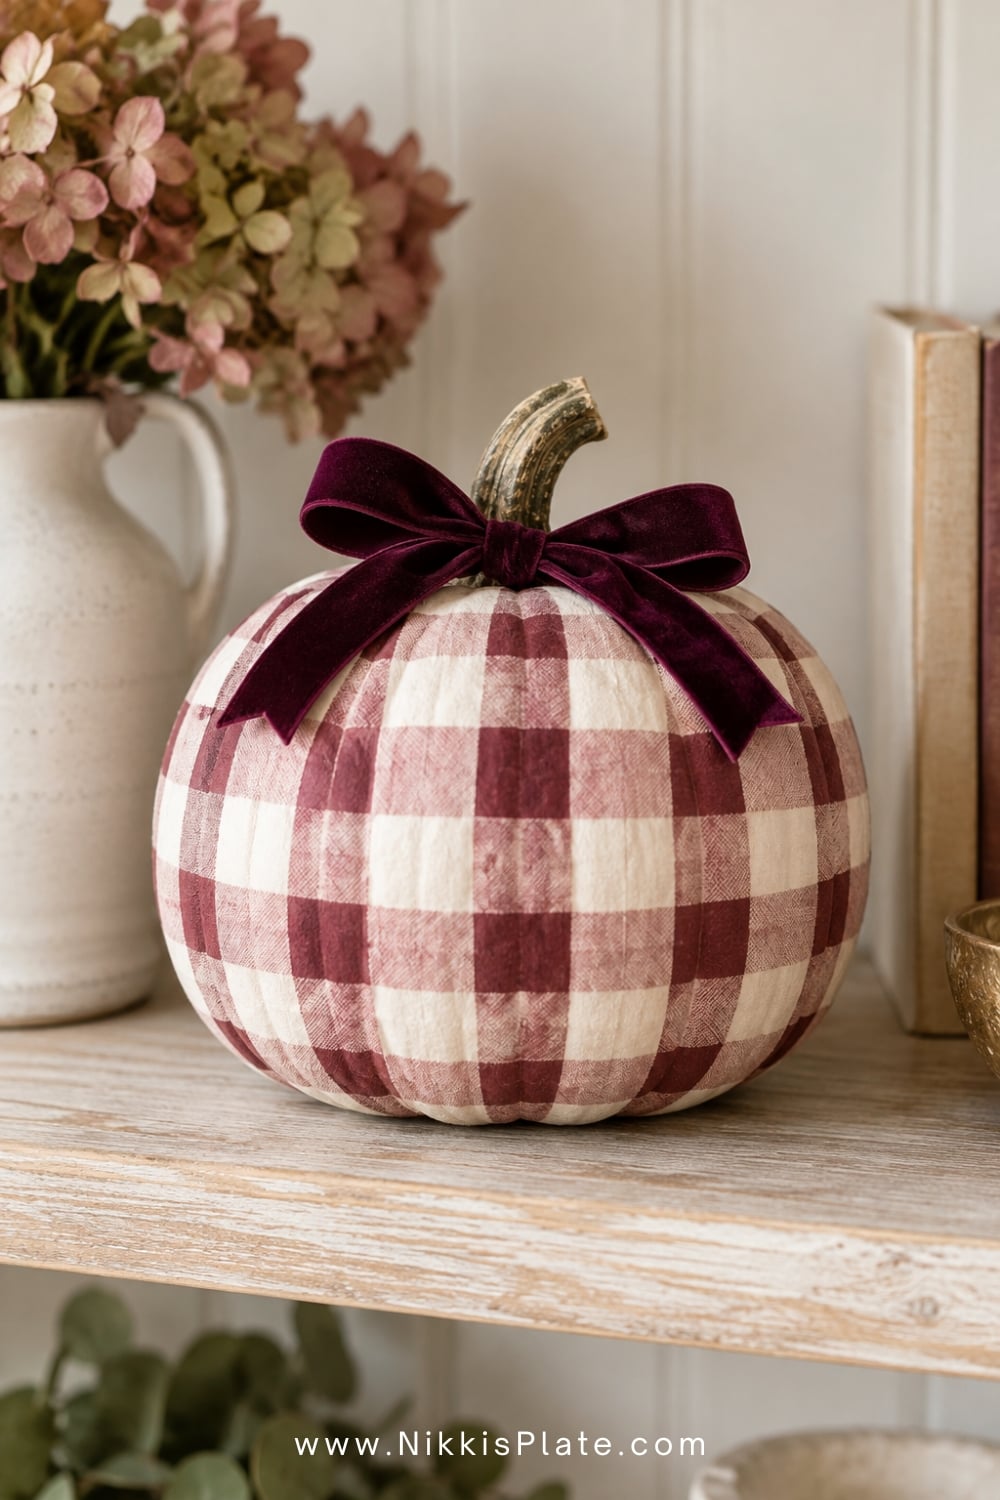
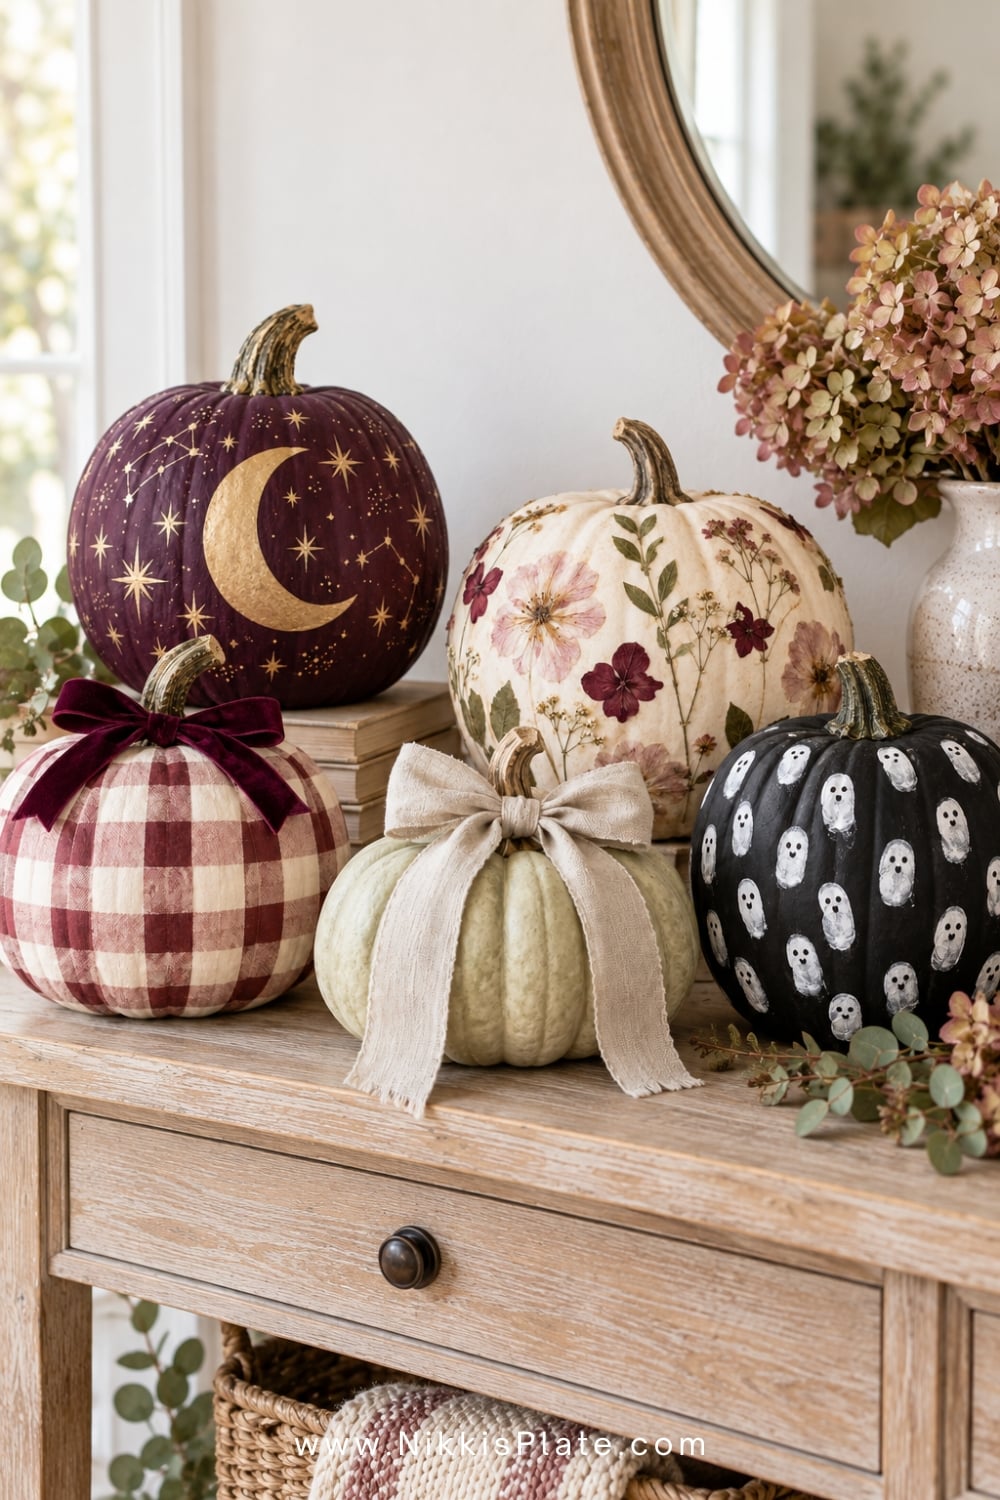
Turn a small white pumpkin into a sweet gingham accent using two shades of the same colour. Paint evenly spaced vertical and horizontal stripes, then deepen the squares where the lines overlap. Blush, burgundy, sage, or classic black-and-white gingham all photograph beautifully.
Use painter's tape if you want crisp lines, or paint the checks freehand for a softer, handmade finish. These pumpkins would be especially cute in a little girl's room, on a fall shelf, or mixed into a farmhouse tablescape.
3. Scalloped Border Pumpkins
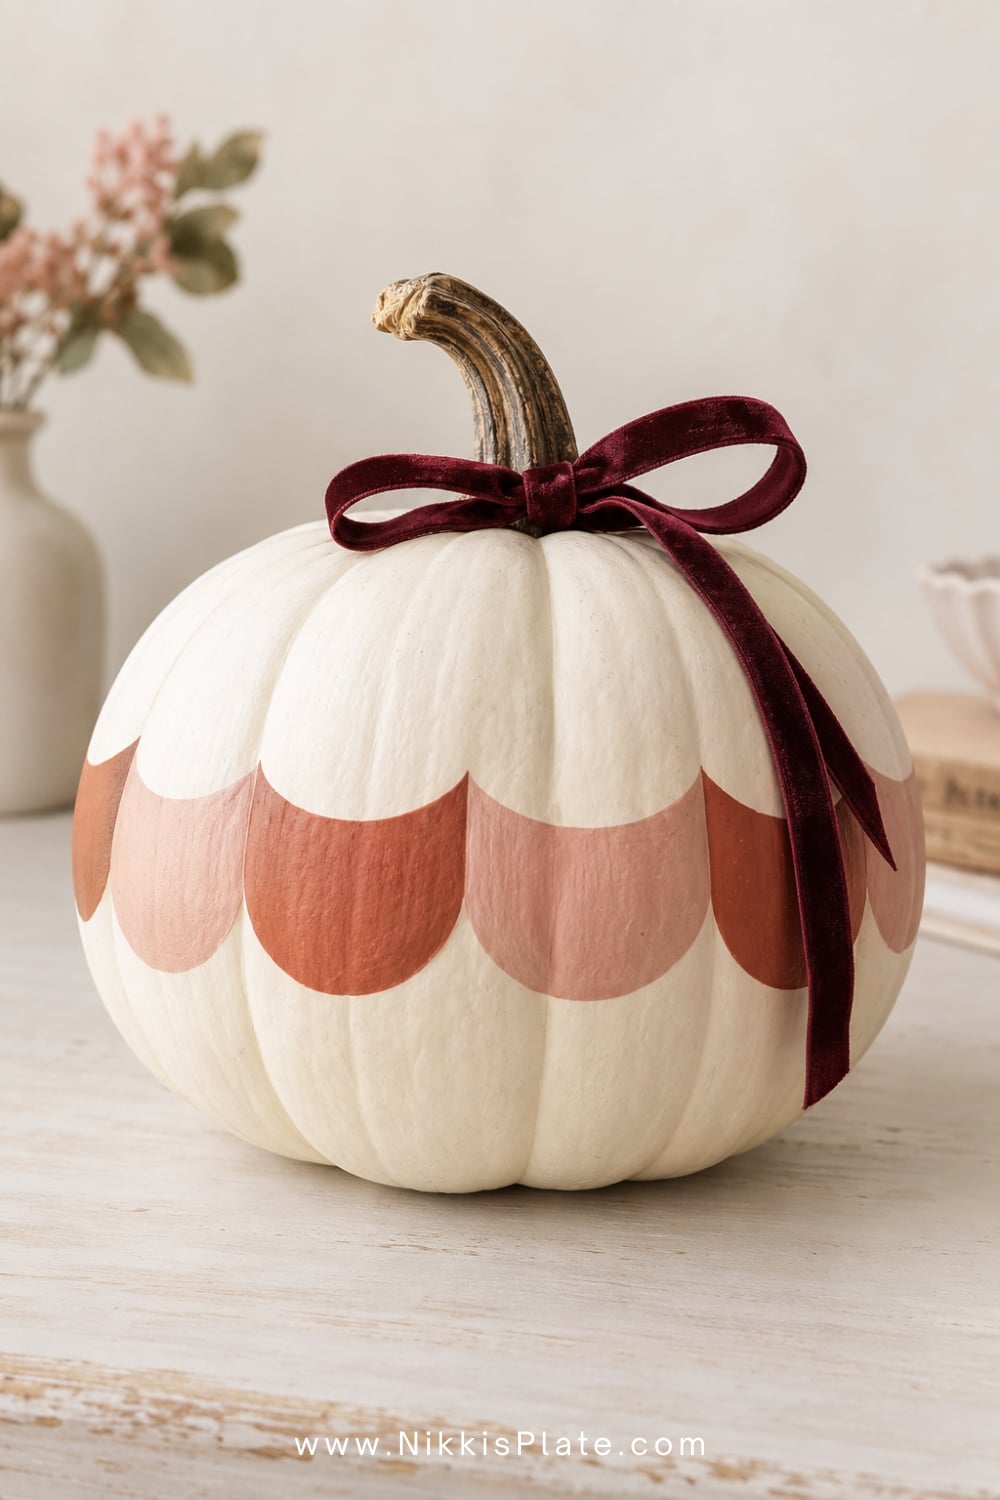
Paint a row of soft scallops around the widest part of a pumpkin for a playful design that still feels polished. Begin with a cream or pale blush base, then add scallops in rust, burgundy, sage, or navy using a small round brush.
Keep the rest of the pumpkin simple and tie a narrow velvet ribbon around the stem. The curved pattern works with the pumpkin's shape and is much easier to paint than it looks.
4. Vintage Folk Floral Pumpkins
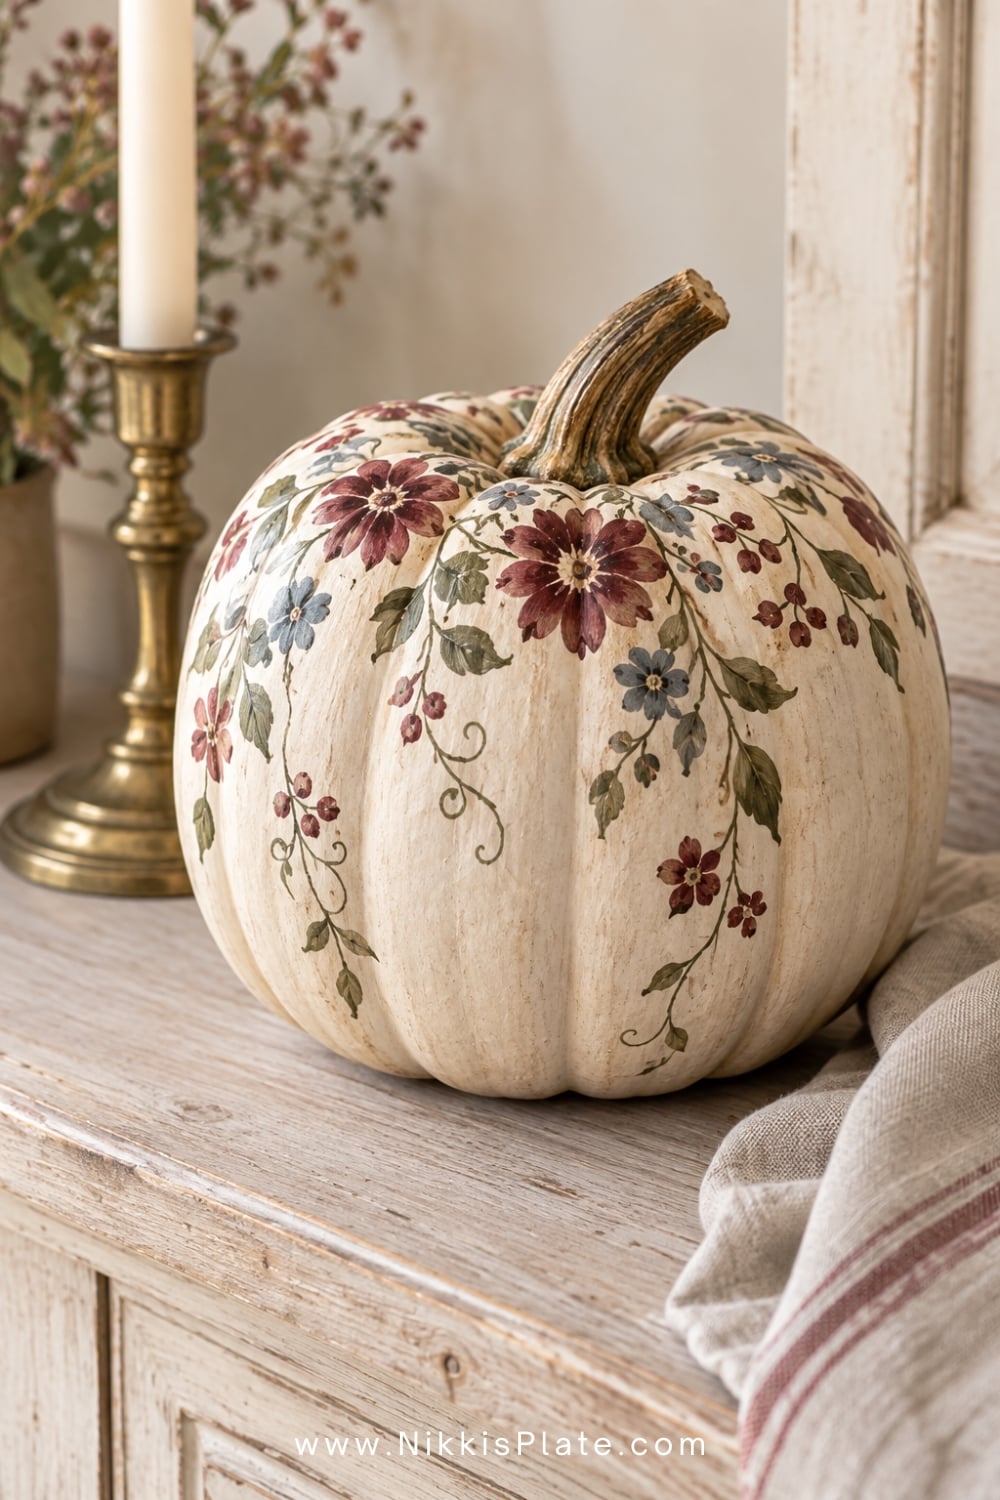
Paint tiny flowers, curling leaves, and simple vines across a cream pumpkin for a cozy, vintage-inspired look. You do not need advanced painting skills-small dots, teardrop-shaped leaves, and five-petal flowers create a lovely folk-art pattern.
Use muted colours such as burgundy, dusty blue, warm mustard, and olive. Concentrate the florals around the top and let a few vines trail down the pumpkin's natural ribs.
5. Blue and White Chinoiserie Pumpkins
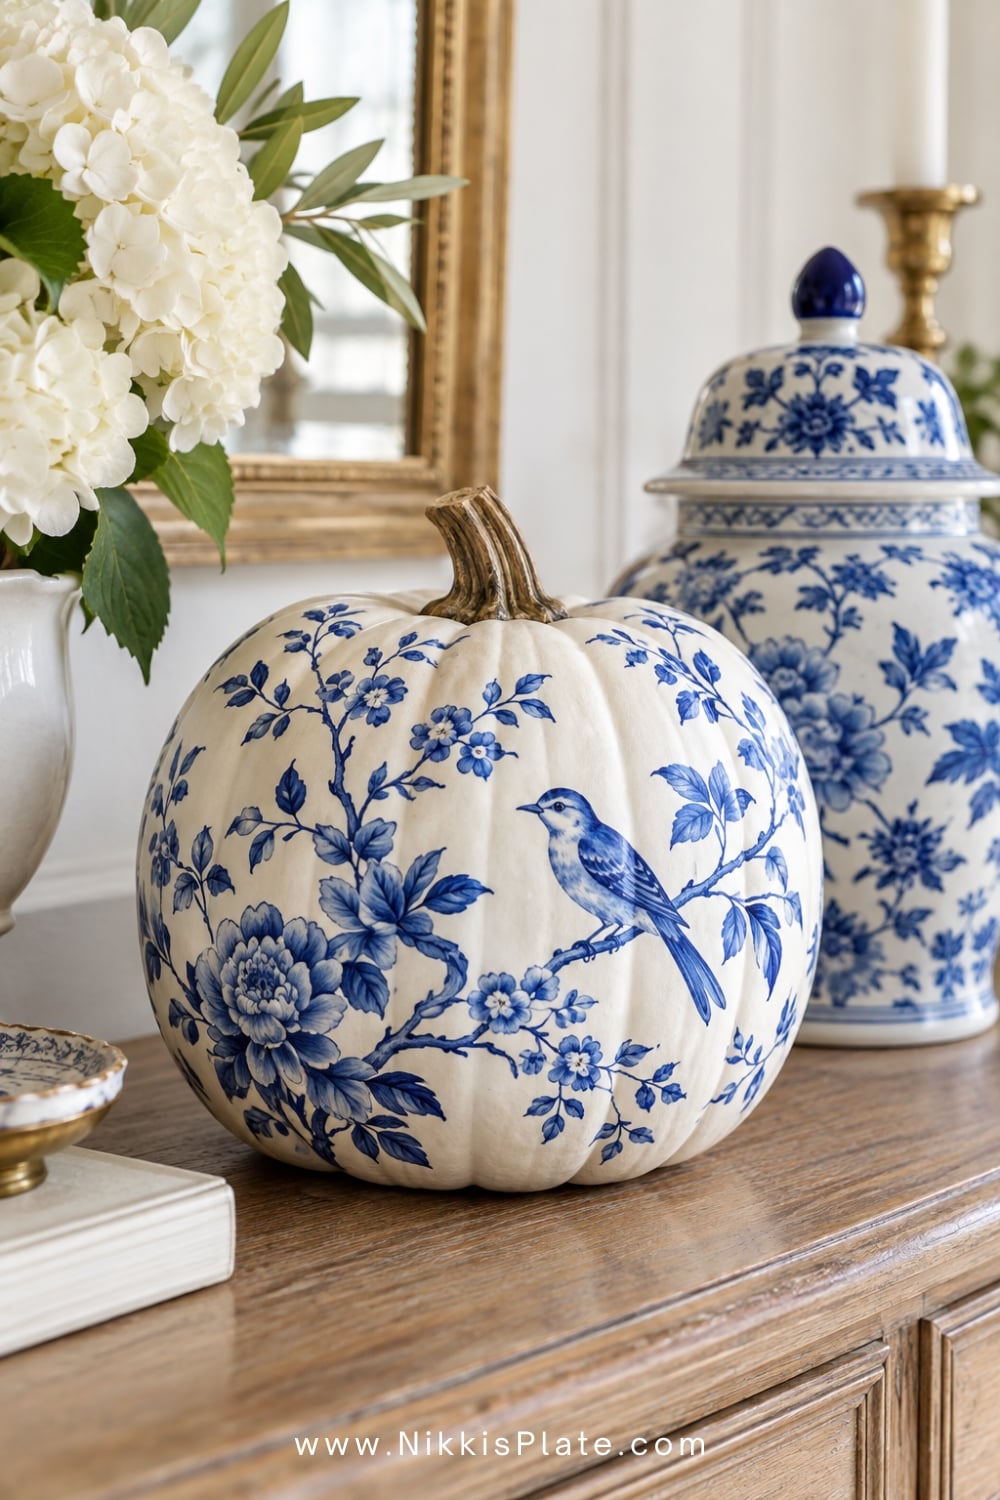
Give white faux pumpkins a blue-and-white porcelain look with a fine paintbrush or paint pen. Add loose branches, flowers, leaves, and small birds in cobalt or navy blue. The design does not need to be perfectly symmetrical; slightly varied brushwork makes it feel collected and hand-painted.
Display the finished pumpkins beside blue-and-white ginger jars or on a dining room sideboard. They are an elegant alternative to traditional orange fall decor.
6. Plum and Blush Colour-Block Pumpkins
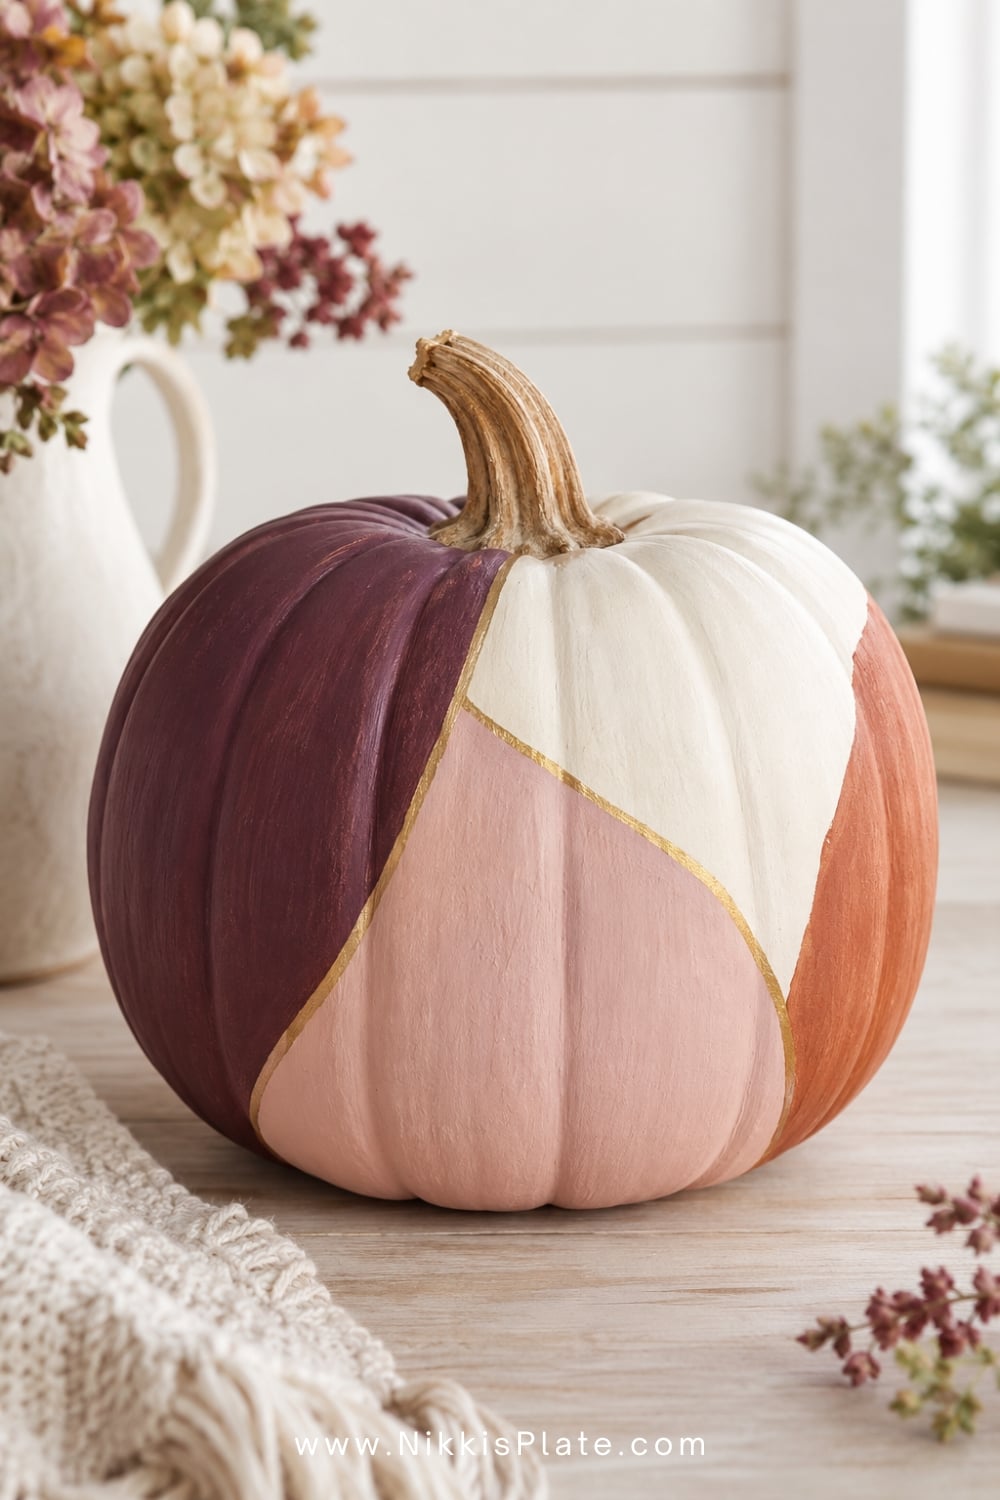
Use painter's tape to divide a pumpkin into two or three sections, then paint each area in a different coordinating shade. Deep plum, soft blush, warm cream, and muted persimmon create a current colour palette without losing the cozy autumn feeling.
Remove the tape once the final coat is nearly dry, then touch up the dividing lines with a detail brush. A metallic gold line between the colour blocks is optional but adds a pretty finished edge.
7. Textured Terracotta Pumpkins
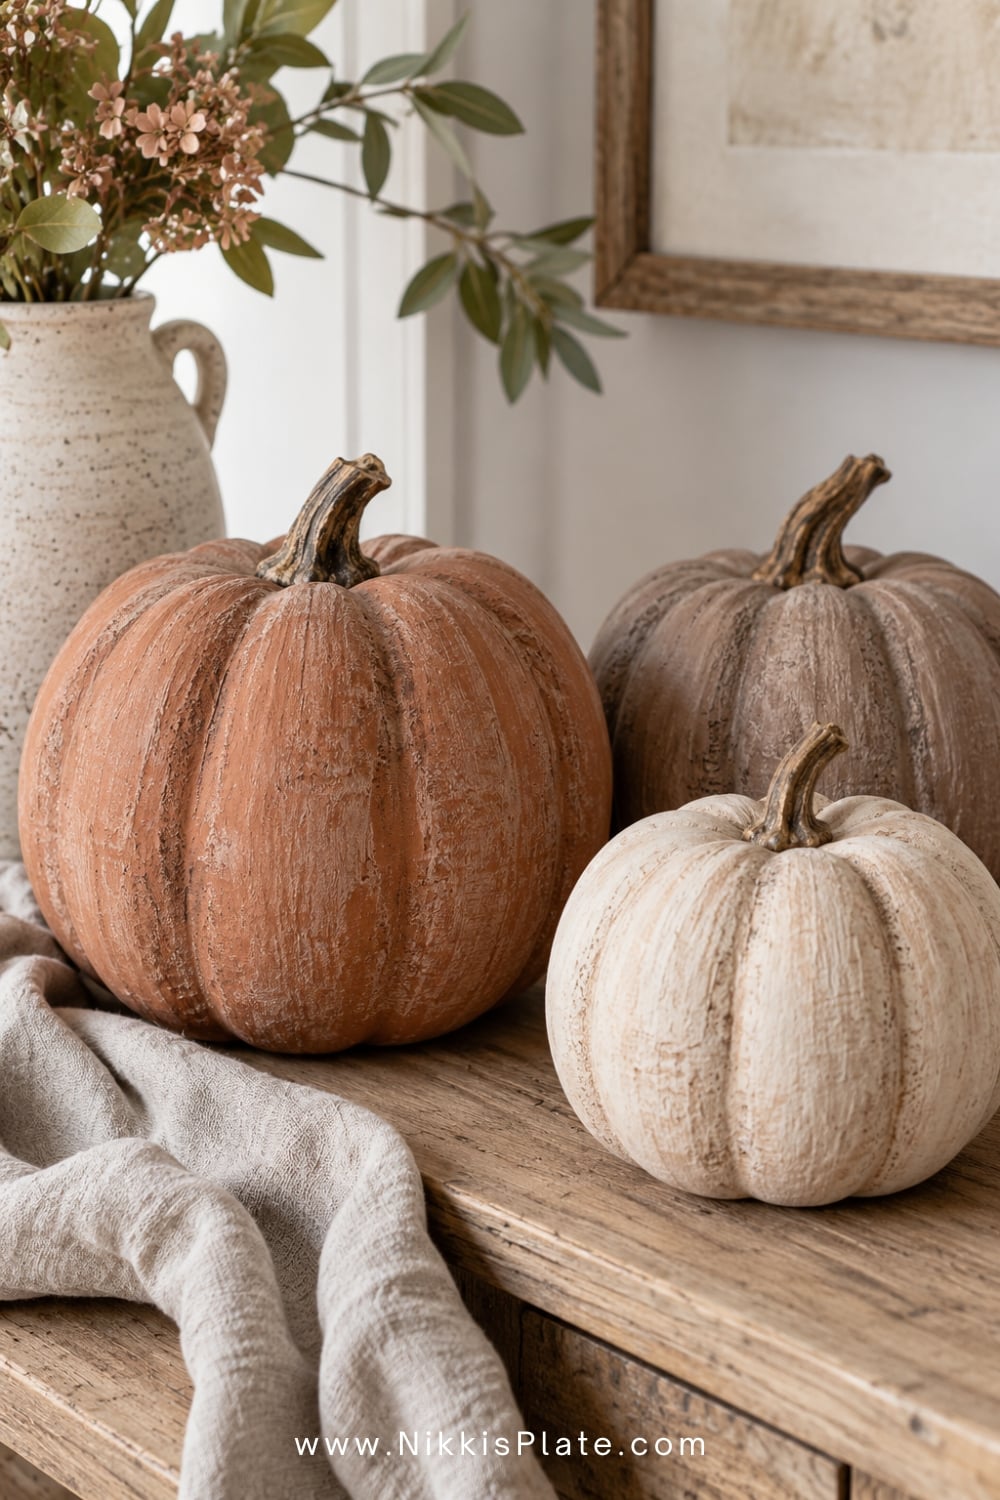
Transform inexpensive faux pumpkins with a chalky, clay-inspired finish. Mix a small amount of baking soda into matte acrylic paint, then apply it with visible crosshatch strokes. Warm terracotta, mushroom brown, chalky cream, and weathered rose all work well.
Once dry, lightly stipple a second shade into the grooves for extra depth. These pumpkins look beautiful with antique wood, linen, stoneware, and other natural materials.
8. Tiny Polka-Dot Pumpkins
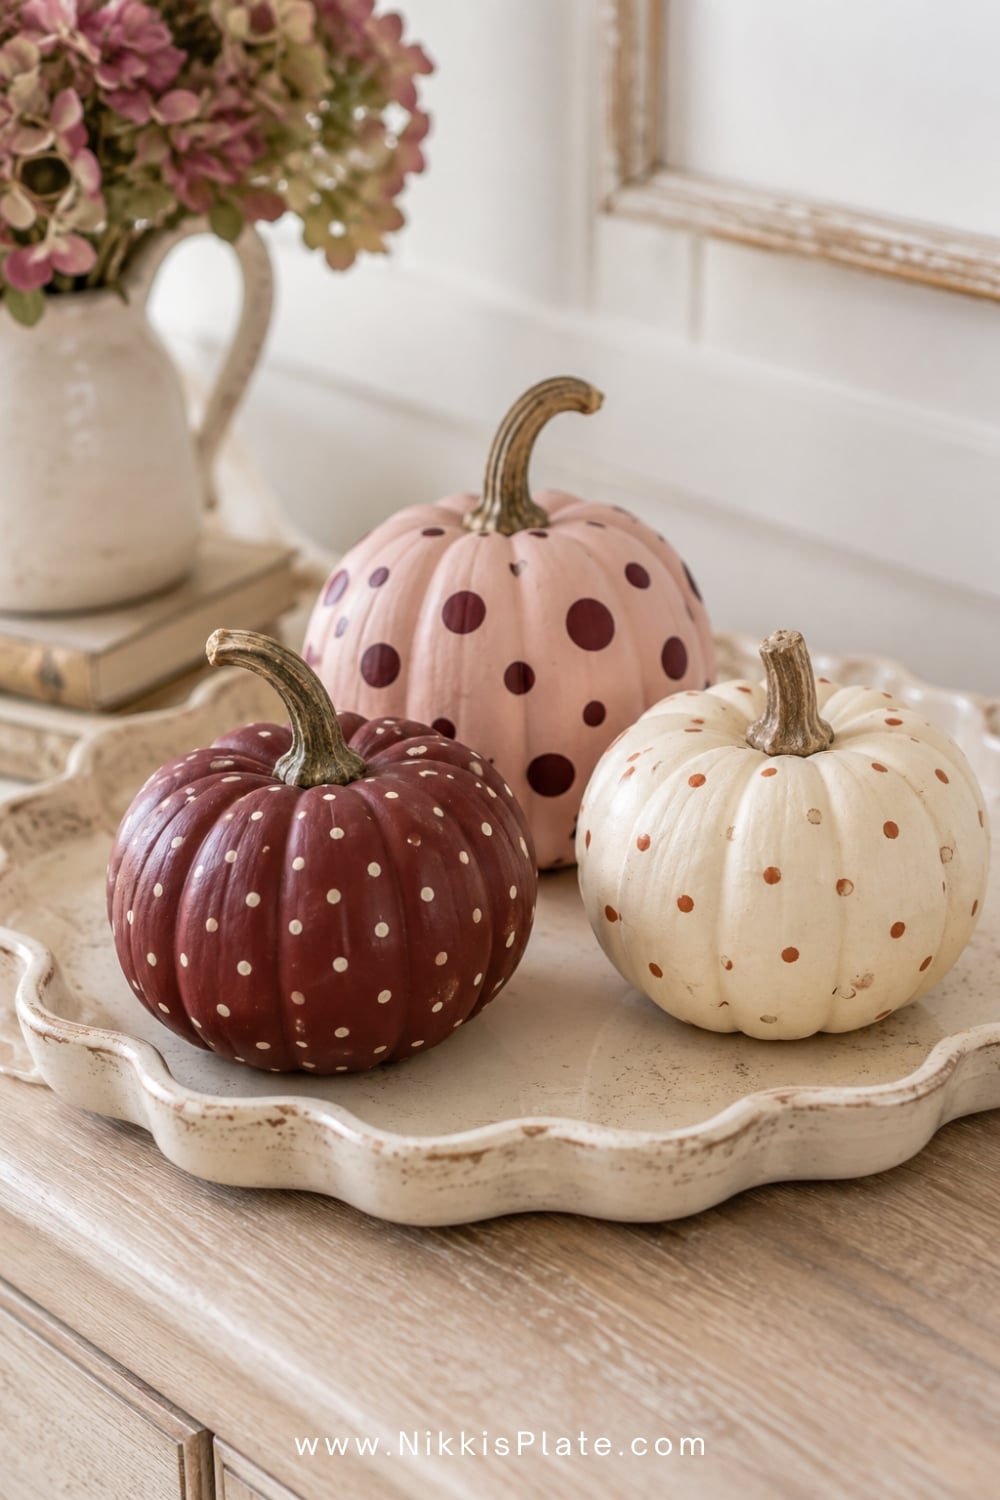
Use the end of a paintbrush, a cotton swab, or a small foam pouncer to add evenly spaced dots to a painted pumpkin. Try cream dots on a burgundy pumpkin, blush dots on a rust pumpkin, or black dots on a soft white pumpkin.
This is one of the fastest no-carve pumpkin decorating ideas, and it is easy enough for older children to help with. Use different dot sizes across a small group of pumpkins for a coordinated display.
Farmhouse and Cottagecore No-Carve Pumpkins
9. Pressed Flower Pumpkins
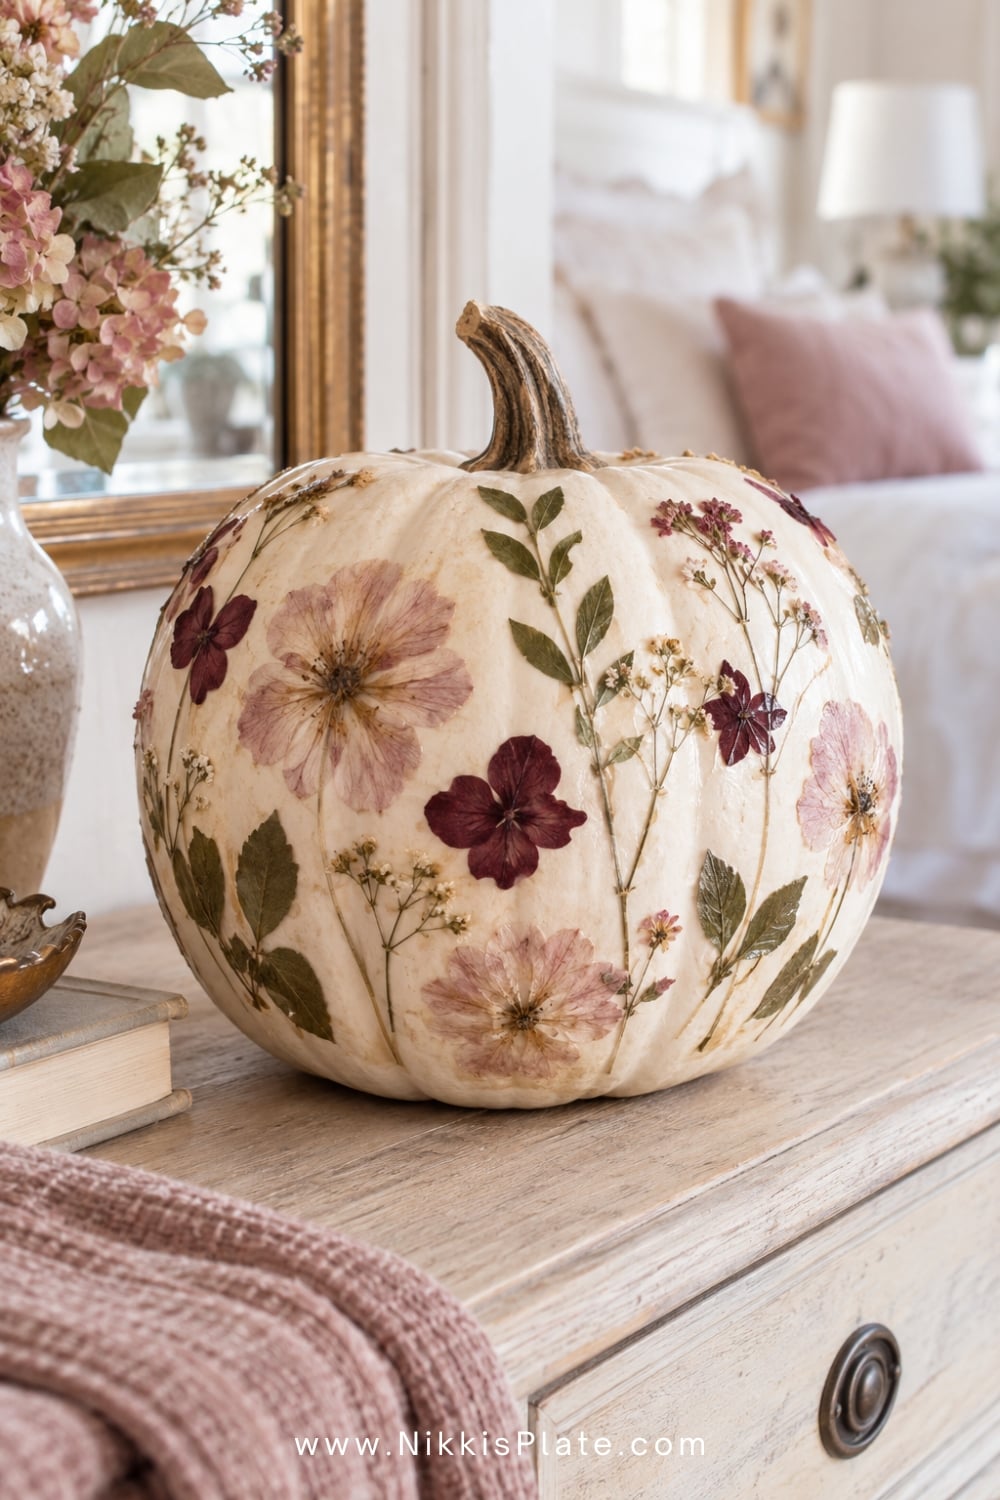
Arrange pressed flowers and delicate leaves over a white or pale blush pumpkin. Brush on a thin layer of decoupage medium, place each botanical carefully, and seal it with another light coat. Work slowly so the petals stay flat.
Use faux pumpkins if you want to keep the finished project for another year. For more handmade seasonal inspiration, browse these 35 easy DIY fall decor ideas.
10. Vintage Floral Decoupage Pumpkins
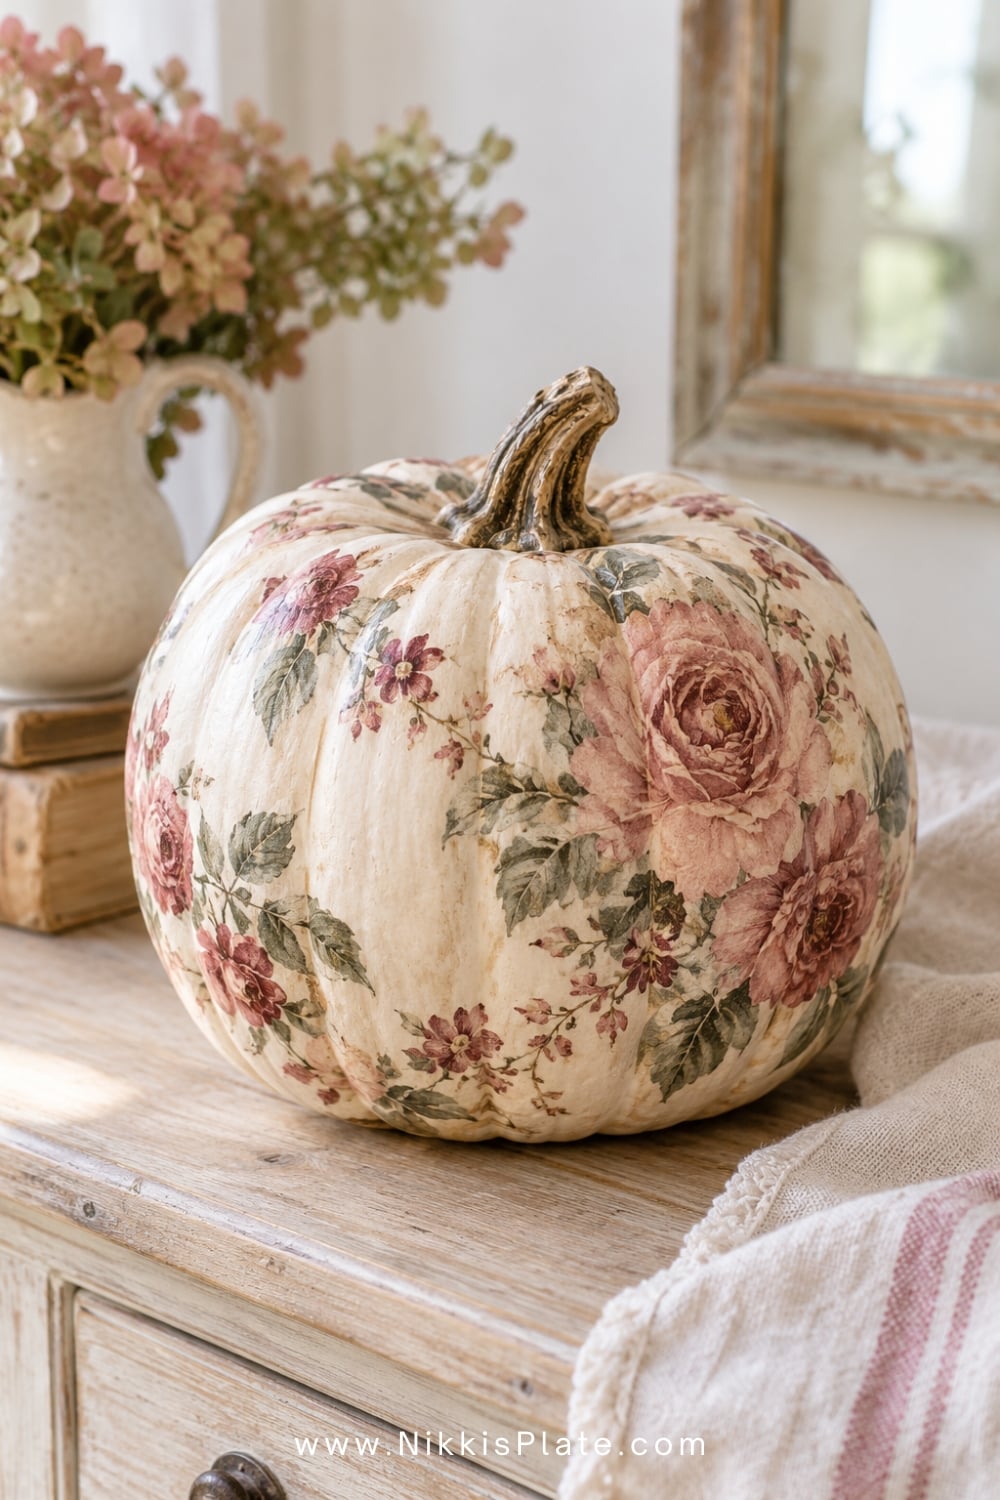
Separate the printed top layer from a decorative paper napkin, then tear the floral pattern into small pieces. Apply the pieces to a light-coloured pumpkin with decoupage medium, overlapping the soft torn edges so the design looks seamless.
Tiny roses, faded botanicals, and vintage wallpaper-style patterns suit the Nikki's Plate aesthetic beautifully. A matte decoupage medium will keep the finish soft and help the paper blend into the painted surface.
11. Patchwork Fabric Pumpkins
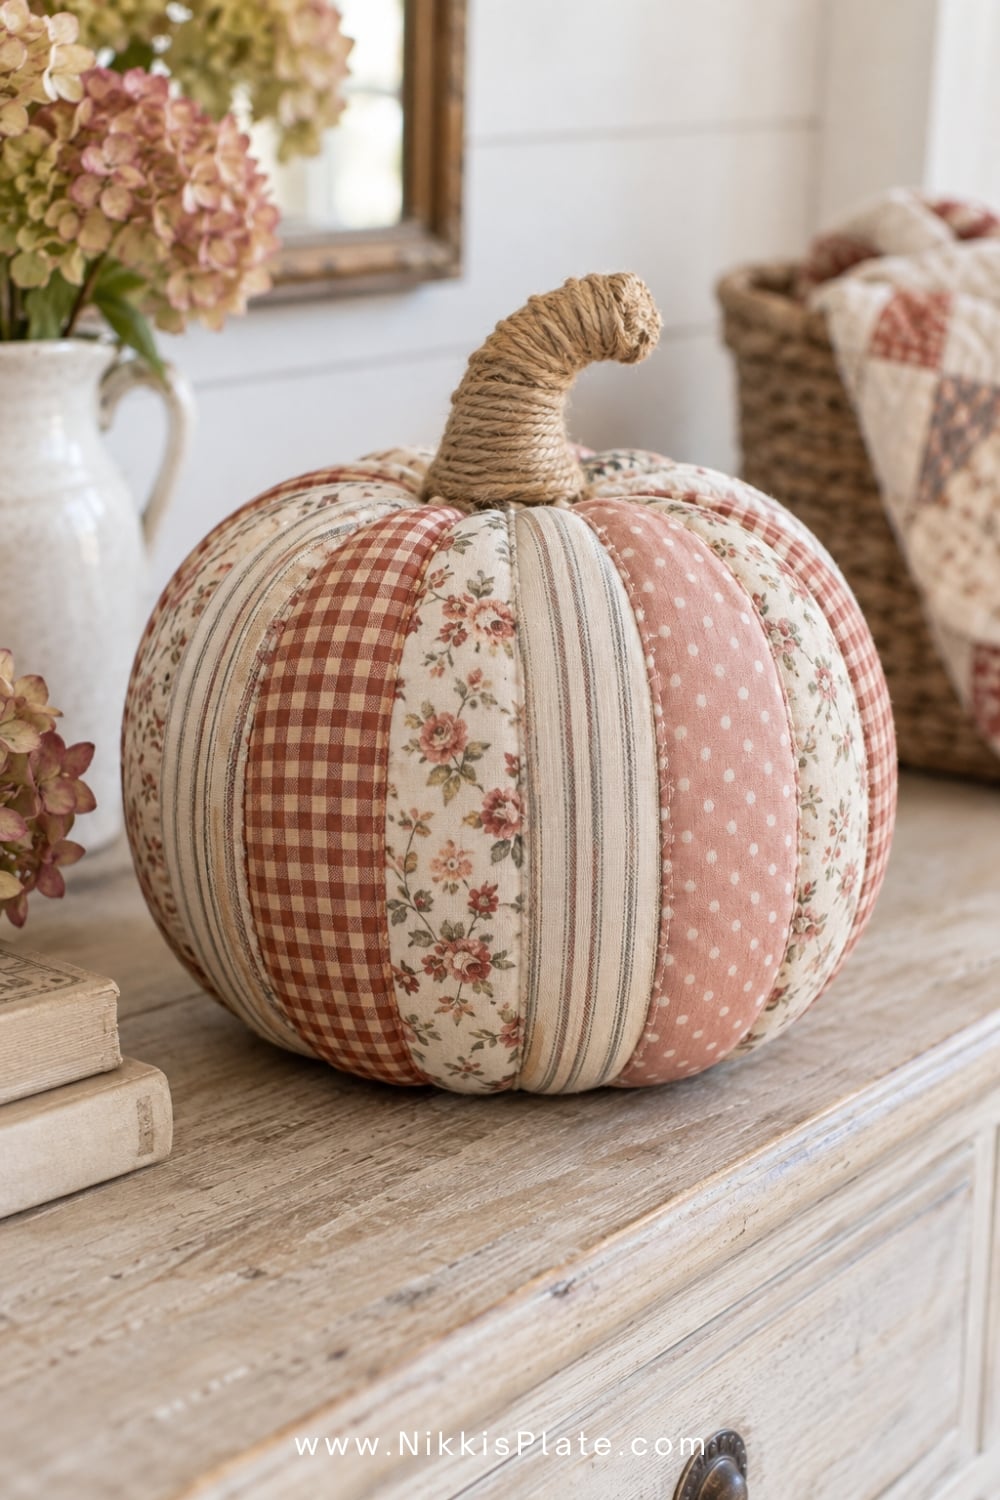
Cover a faux pumpkin with narrow pieces of cotton fabric, following the natural ribs from stem to base. Mix small-scale florals, gingham, ticking stripes, and tiny dots in a coordinated palette.
Brush decoupage medium under and over each strip, smoothing the fabric as you work. Finish the stem with jute twine or a velvet ribbon. The result feels like a cozy handmade quilt in pumpkin form.
12. Linen Bow Pumpkins
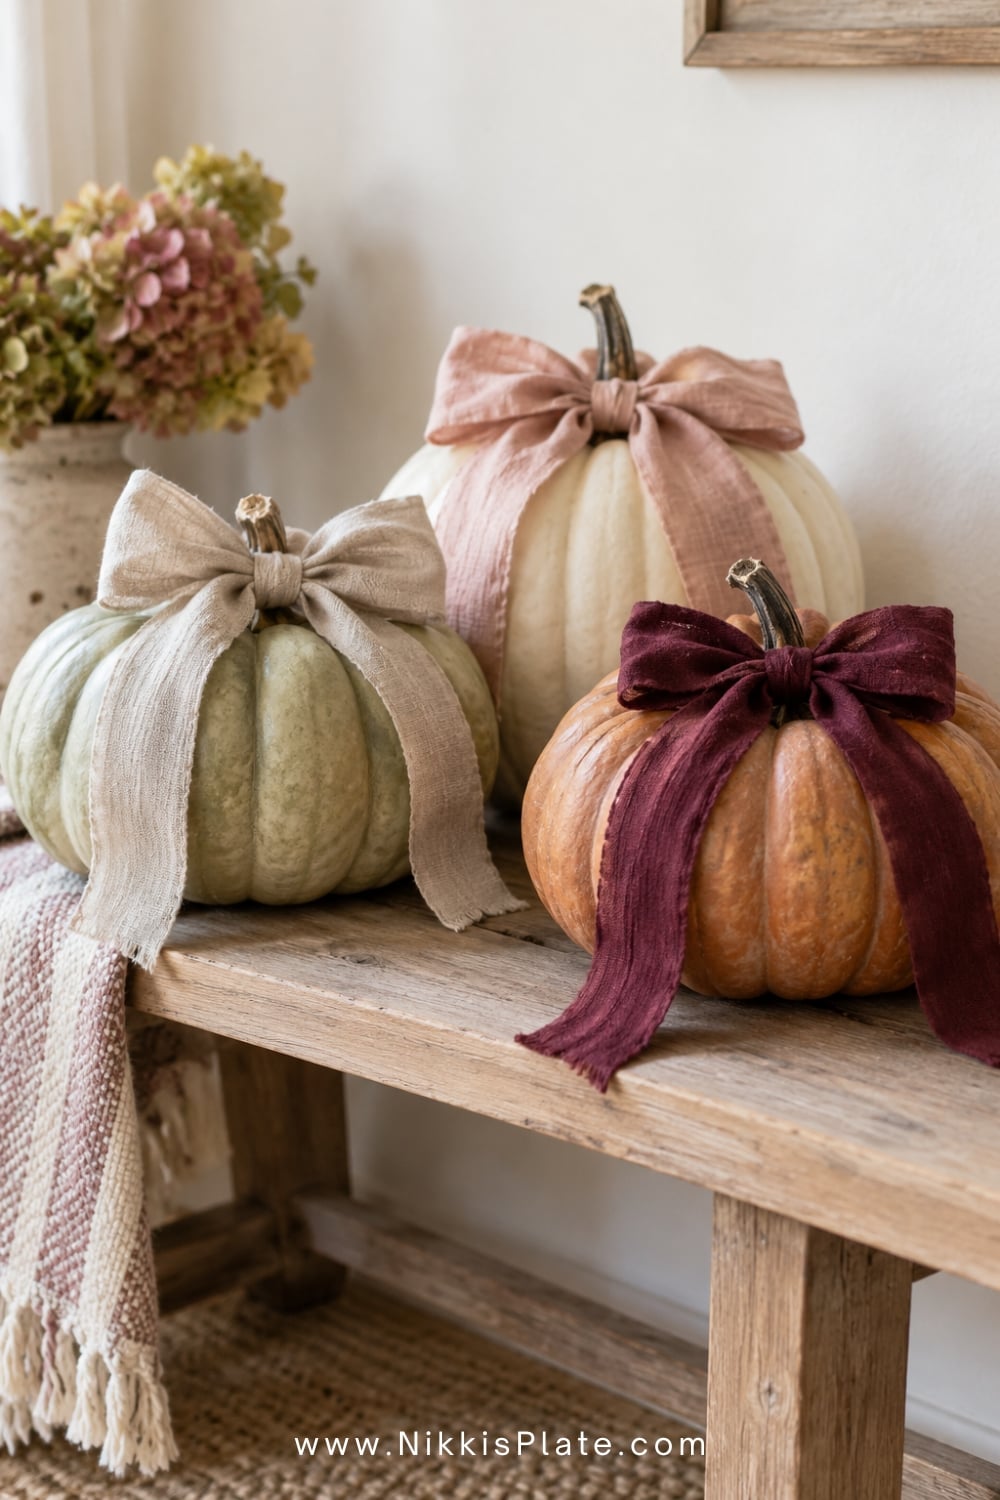
Sometimes the simplest idea is the prettiest. Tie a generous linen or velvet bow around the stem of a cream, pale green, or heirloom orange pumpkin. Let the ribbon tails fall naturally down one side.
Use wired ribbon if you want a full structured bow, or washed linen for a relaxed farmhouse look. A few bow pumpkins mixed with plain pumpkins create an easy porch or mantel display without making every piece identical.
13. Lace-Wrapped Heirloom Pumpkins
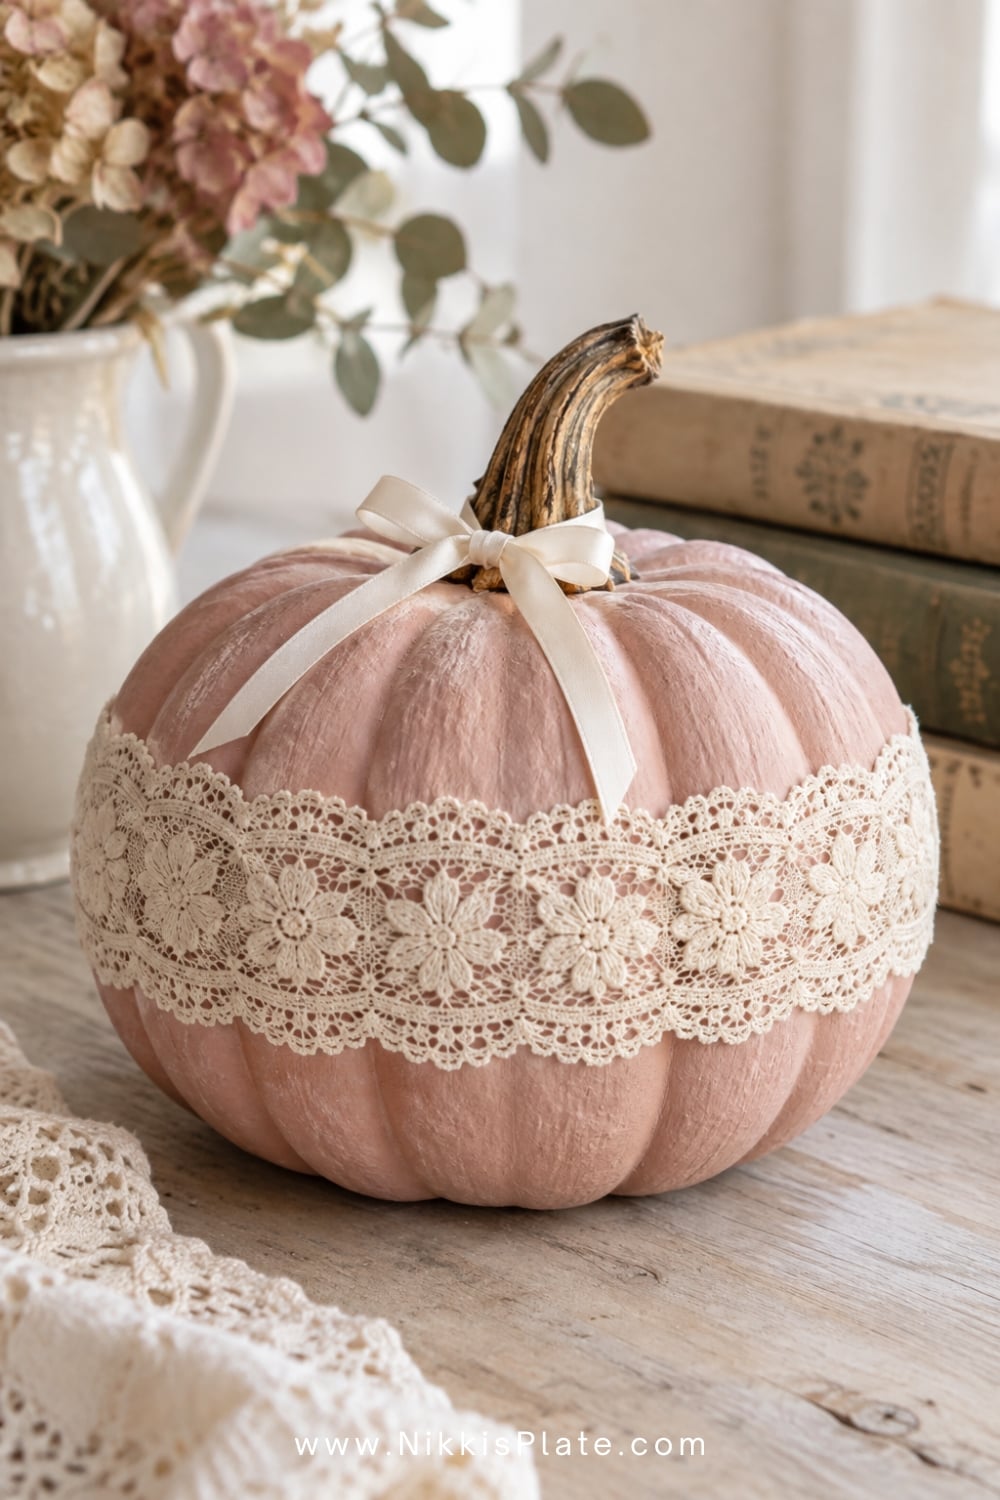
Wrap a band of cotton lace or embroidered trim around the middle of a small pumpkin and secure it at the back with removable glue dots. Add a narrow satin bow at the stem for a soft vintage finish.
Choose cream lace over a blush, sage, or white pumpkin so the texture remains visible. This project is quick, quiet, and almost completely mess-free.
14. Dried Hydrangea Crown Pumpkins
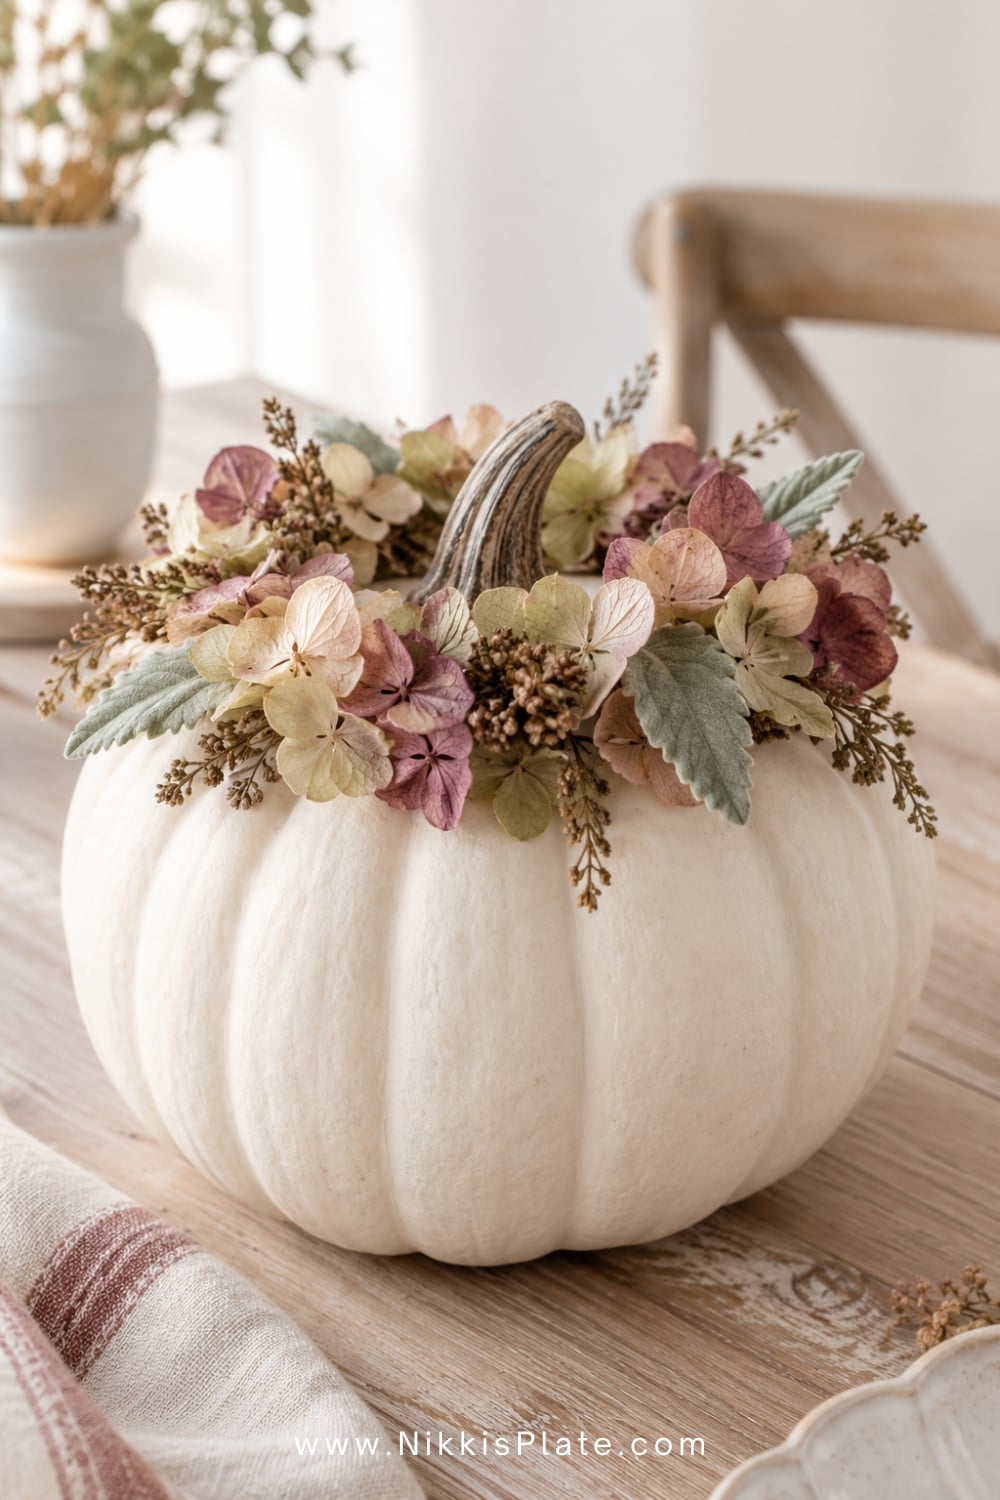
Create a floral crown around the stem using small pieces of dried hydrangea, preserved leaves, and tiny seed heads. Attach the flowers to a faux pumpkin with low-temperature hot glue, working around the stem in a loose ring.
Keep the arrangement low and airy so the pumpkin still shows. Dusty rose, faded mauve, cream, and soft green hydrangeas make a romantic fall centerpiece for a console or dining table.
15. Mossy Woodland Pumpkins
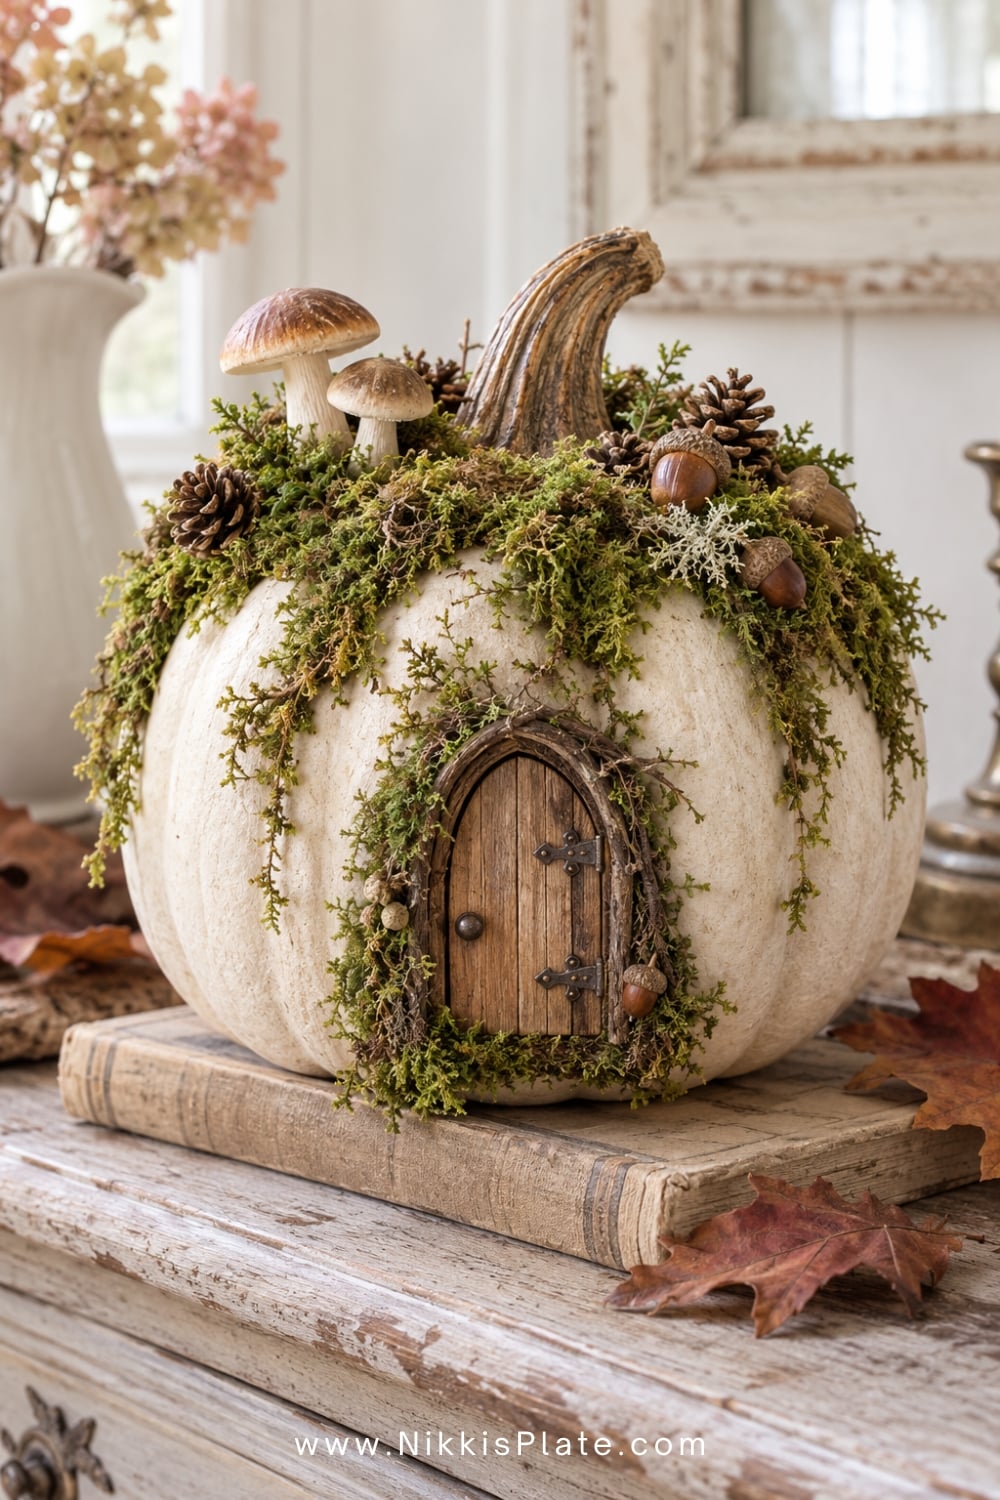
Cover the top third of a faux pumpkin with preserved moss, letting a few uneven pieces trail into the grooves. Add tiny pinecones, acorns, mushrooms, or a miniature wooden door to turn it into a woodland scene.
This idea looks especially charming beside old books, amber glass, and gathered branches. It is also a strong choice for a nature-themed pumpkin-decorating contest.
16. Twine-Wrapped Rustic Pumpkins
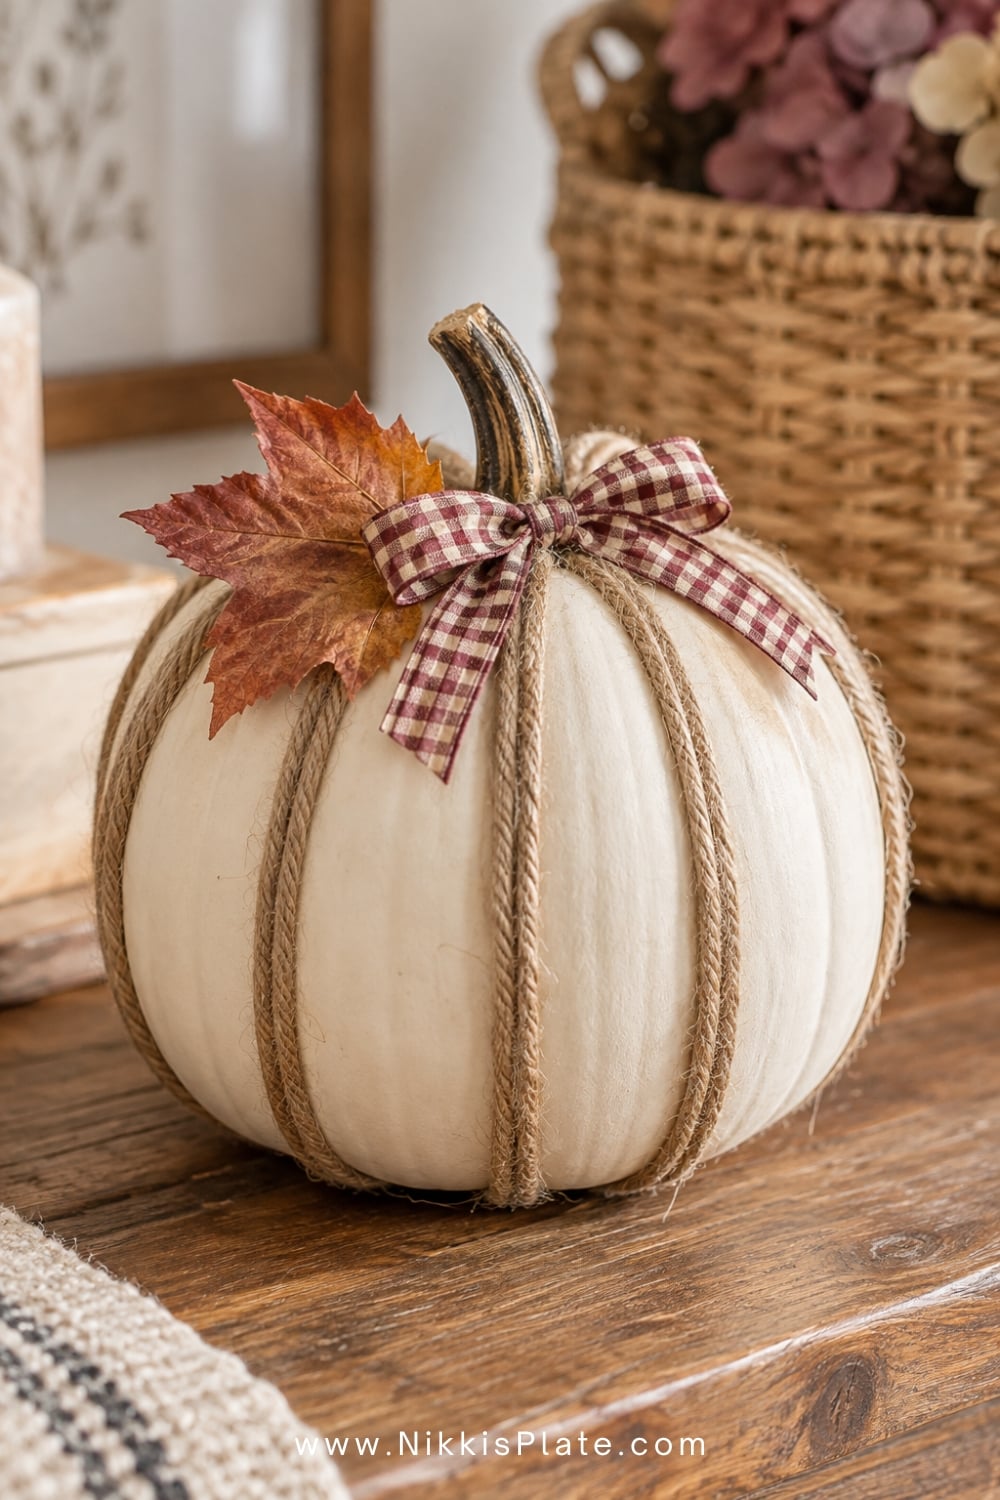
Wrap jute twine around the natural grooves of a small faux pumpkin, securing it underneath as you work. You can cover the full pumpkin or leave painted sections visible between the strands.
Add a dried leaf and a scrap of gingham ribbon near the stem. The texture works well in a rustic basket display and pairs naturally with the ideas in my farmhouse fall decor guide.
Cute No-Carve Pumpkin Ideas for Kids
17. Fingerprint Ghost Pumpkins
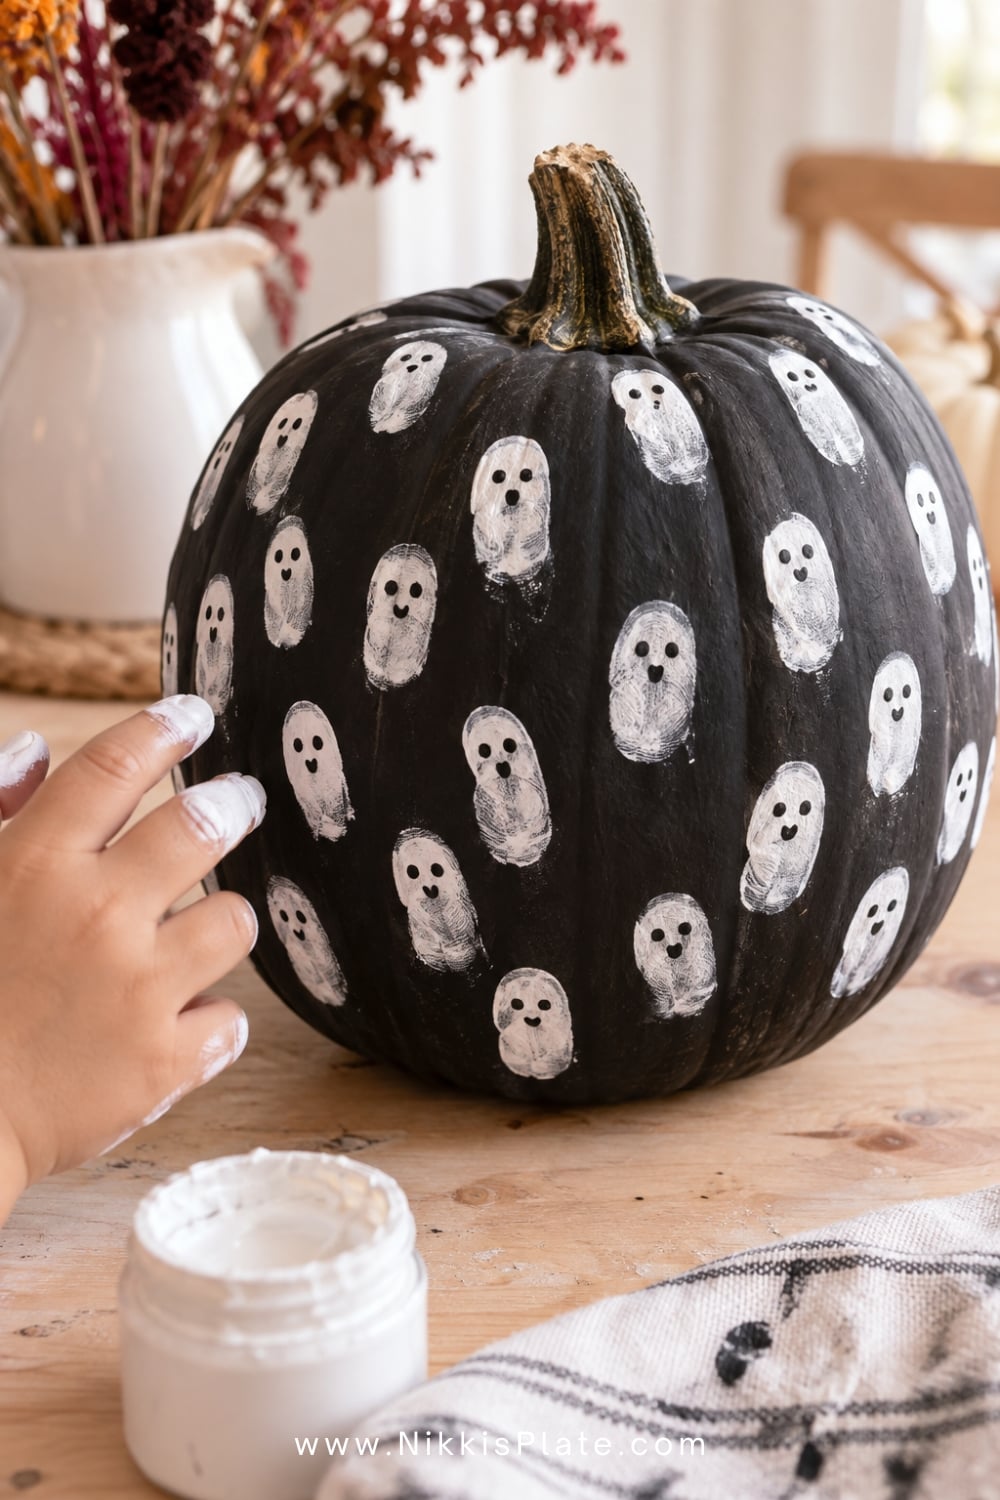
Paint a pumpkin black or deep plum, then let children add white fingerprint ghosts across the surface. Once the fingerprints are dry, use a fine black marker or paint pen to add two tiny eyes and a mouth to each ghost.
Use washable, child-safe paint for little hands and cover the table before beginning. The ghosts will all look slightly different, which is exactly what makes this pumpkin so cute.
18. Sticker Jack-O'-Lantern Pumpkins
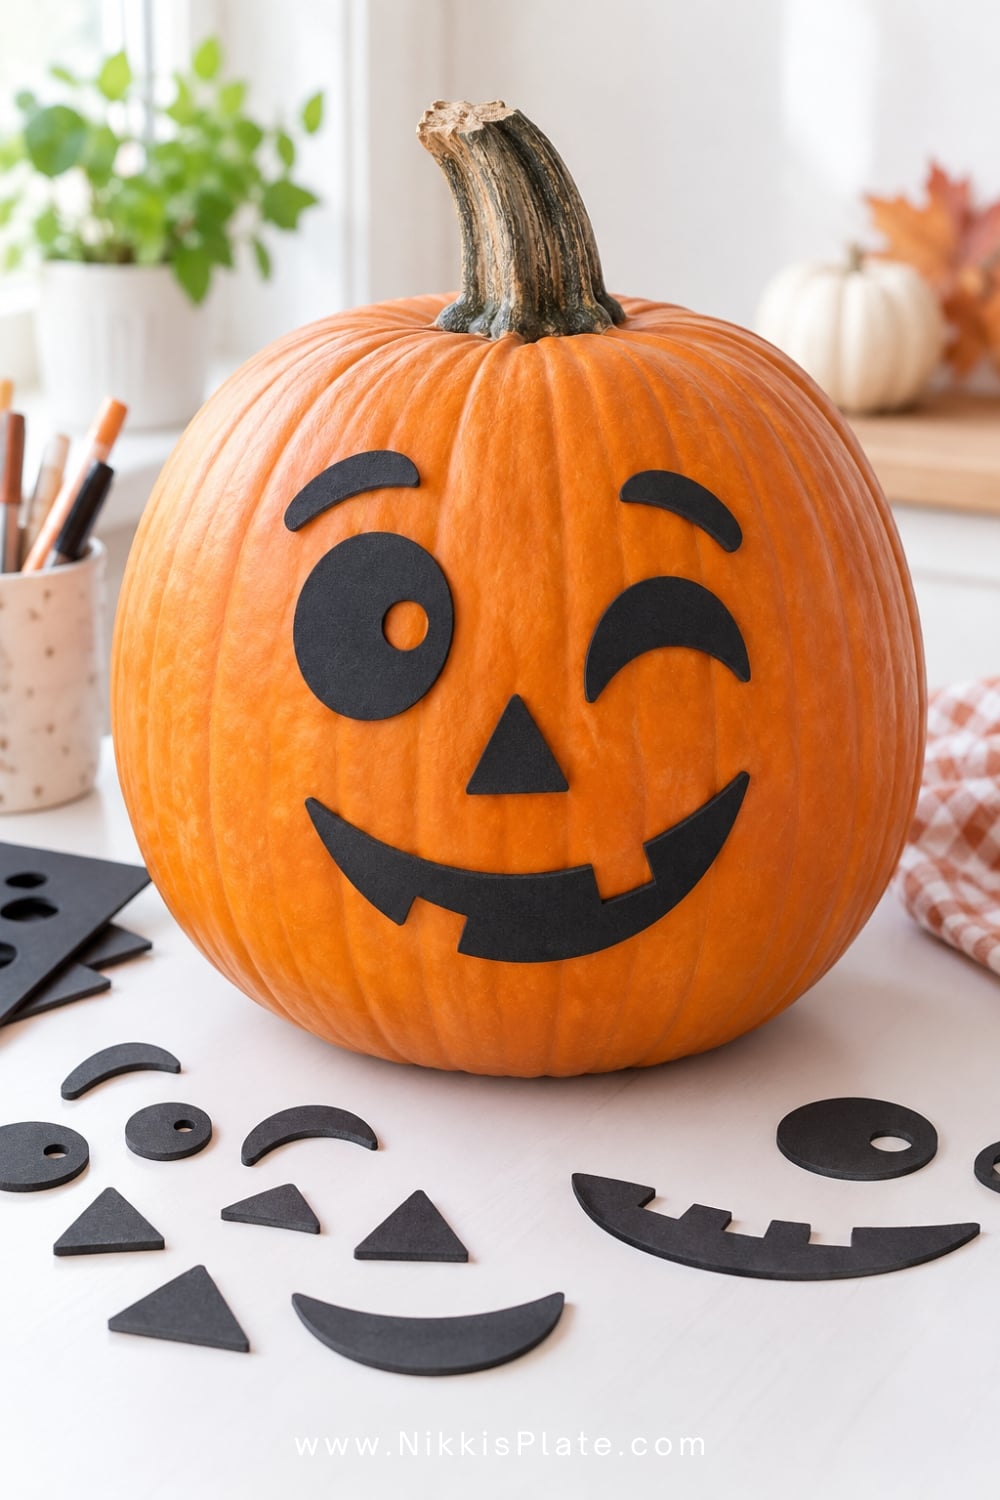
Cut eyes, noses, mouths, and silly eyebrows from black removable vinyl or adhesive craft foam. Let children mix and match the shapes to build their own jack-o'-lantern faces without using a knife.
This is an excellent toddler or preschool activity because the pieces can be prepared in advance. Make several sets of features so children can change the expressions whenever they want.
19. Pom-Pom Monster Pumpkins
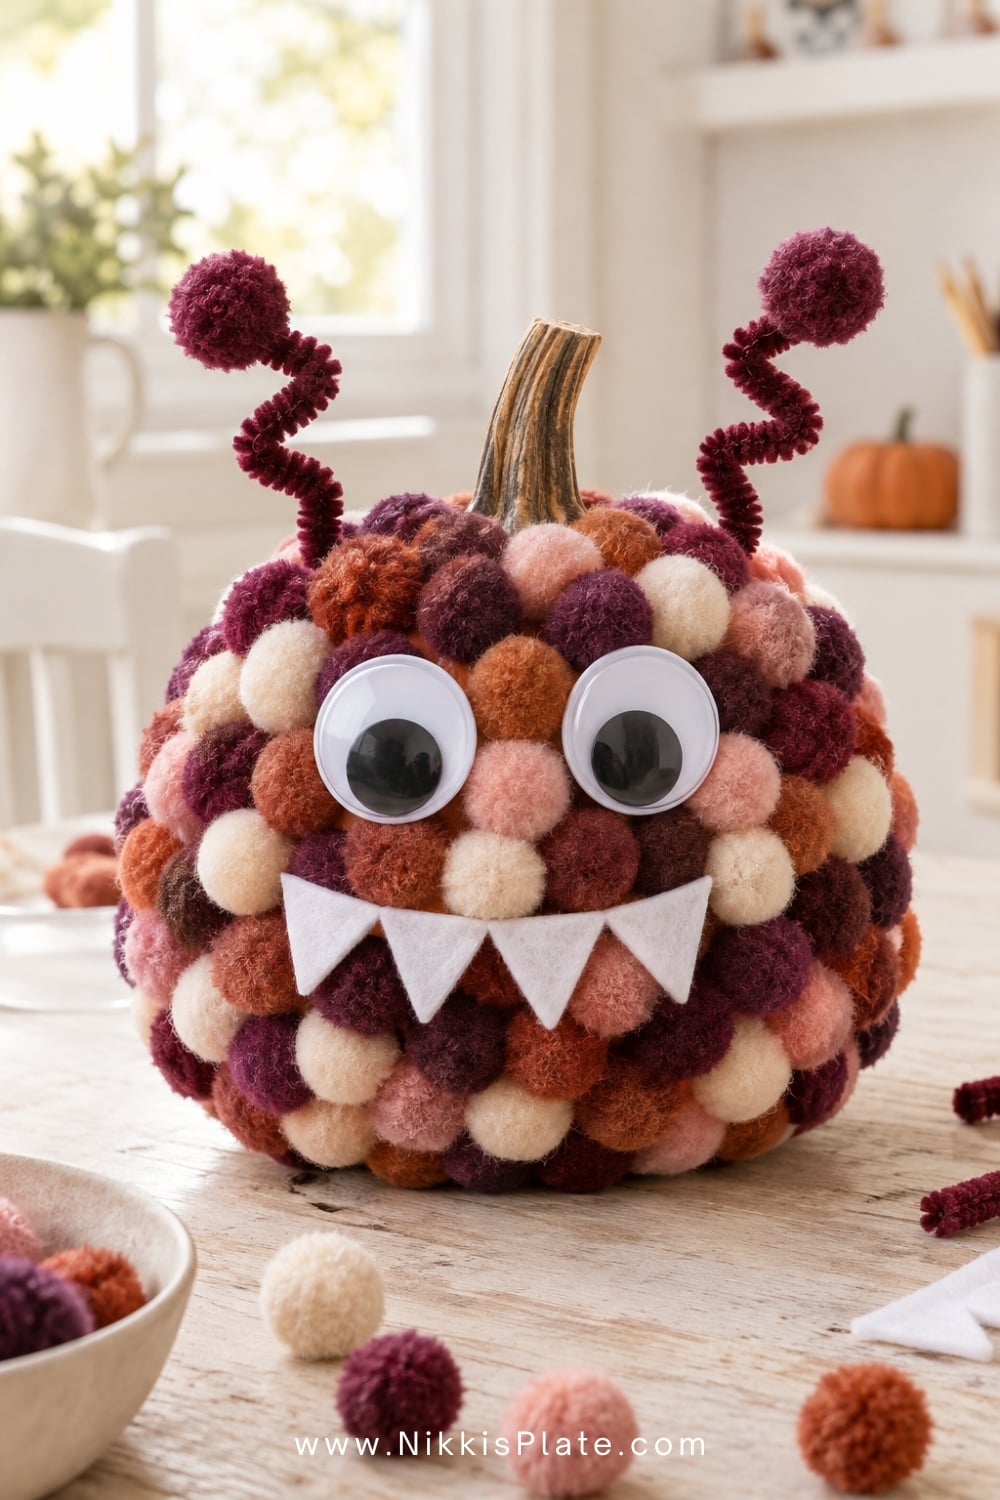
Cover a small faux pumpkin with colourful pom-poms, or glue them in stripes around the pumpkin's ribs. Add oversized googly eyes, felt teeth, and pipe-cleaner antennae to create a cheerful Halloween monster.
Choose two or three colours instead of using the entire rainbow if you want the finished pumpkin to look more coordinated. Adults should handle the glue gun and supervise small craft pieces.
20. Yarn Spiderweb Pumpkins
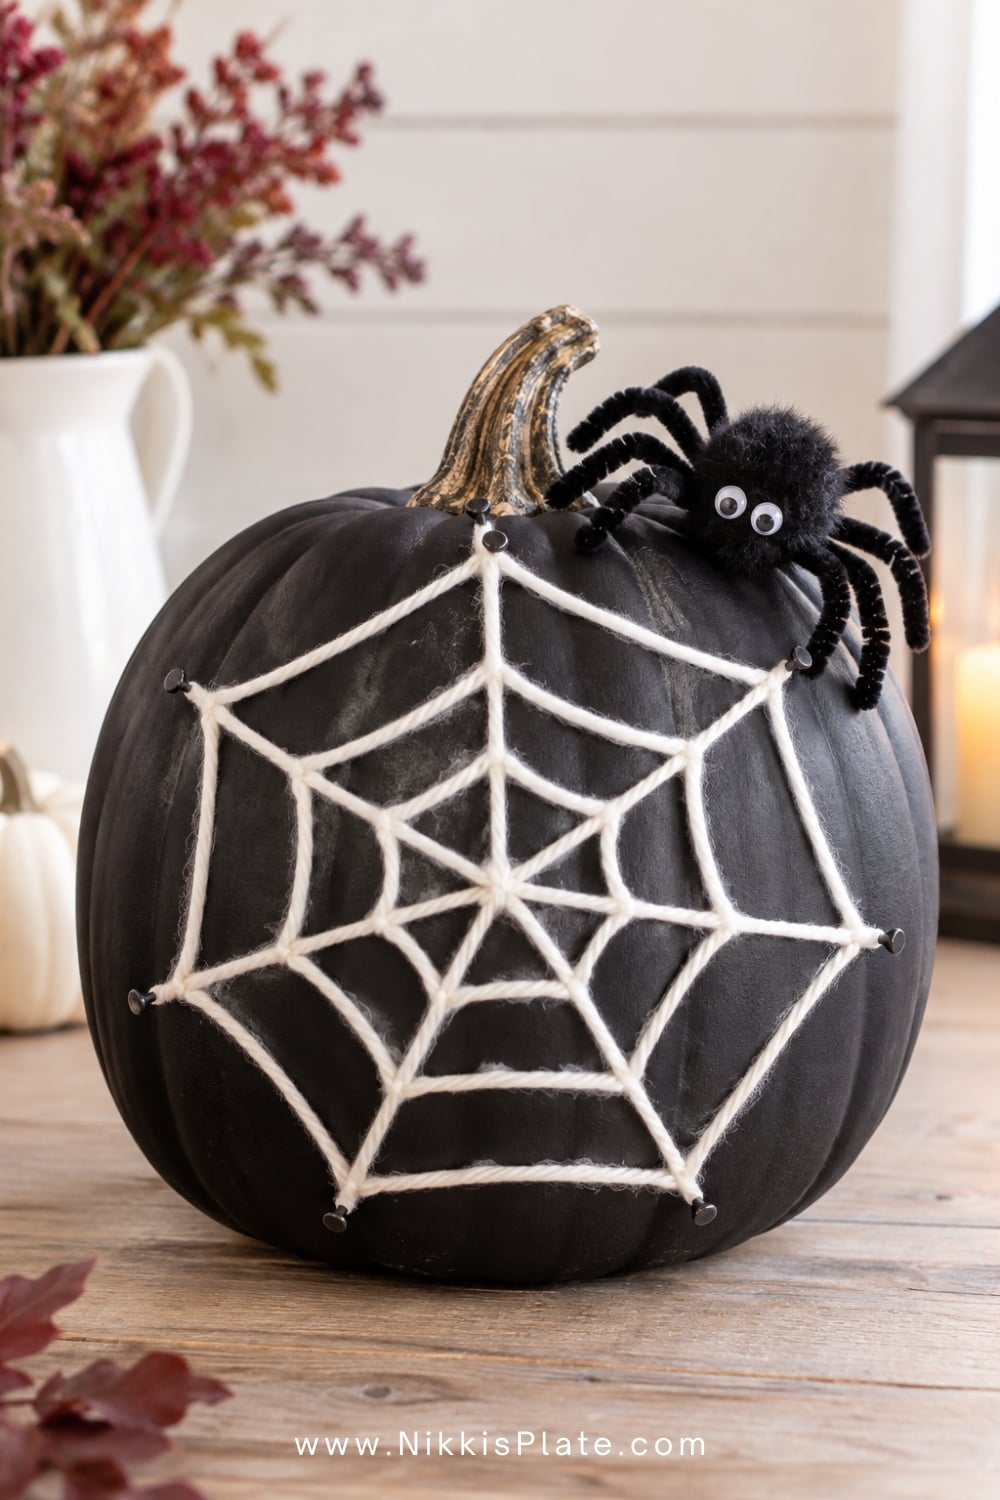
Push small removable adhesive hooks or glue dots around a black faux pumpkin, then wind white yarn from point to point to form a loose spiderweb. Add a soft pom-pom spider or a large felt spider near the stem.
For a younger child, pre-cut several lengths of yarn and help hold the pumpkin steady. The slightly uneven web makes the design feel playful and handmade.
21. Felt Black Cat Pumpkins
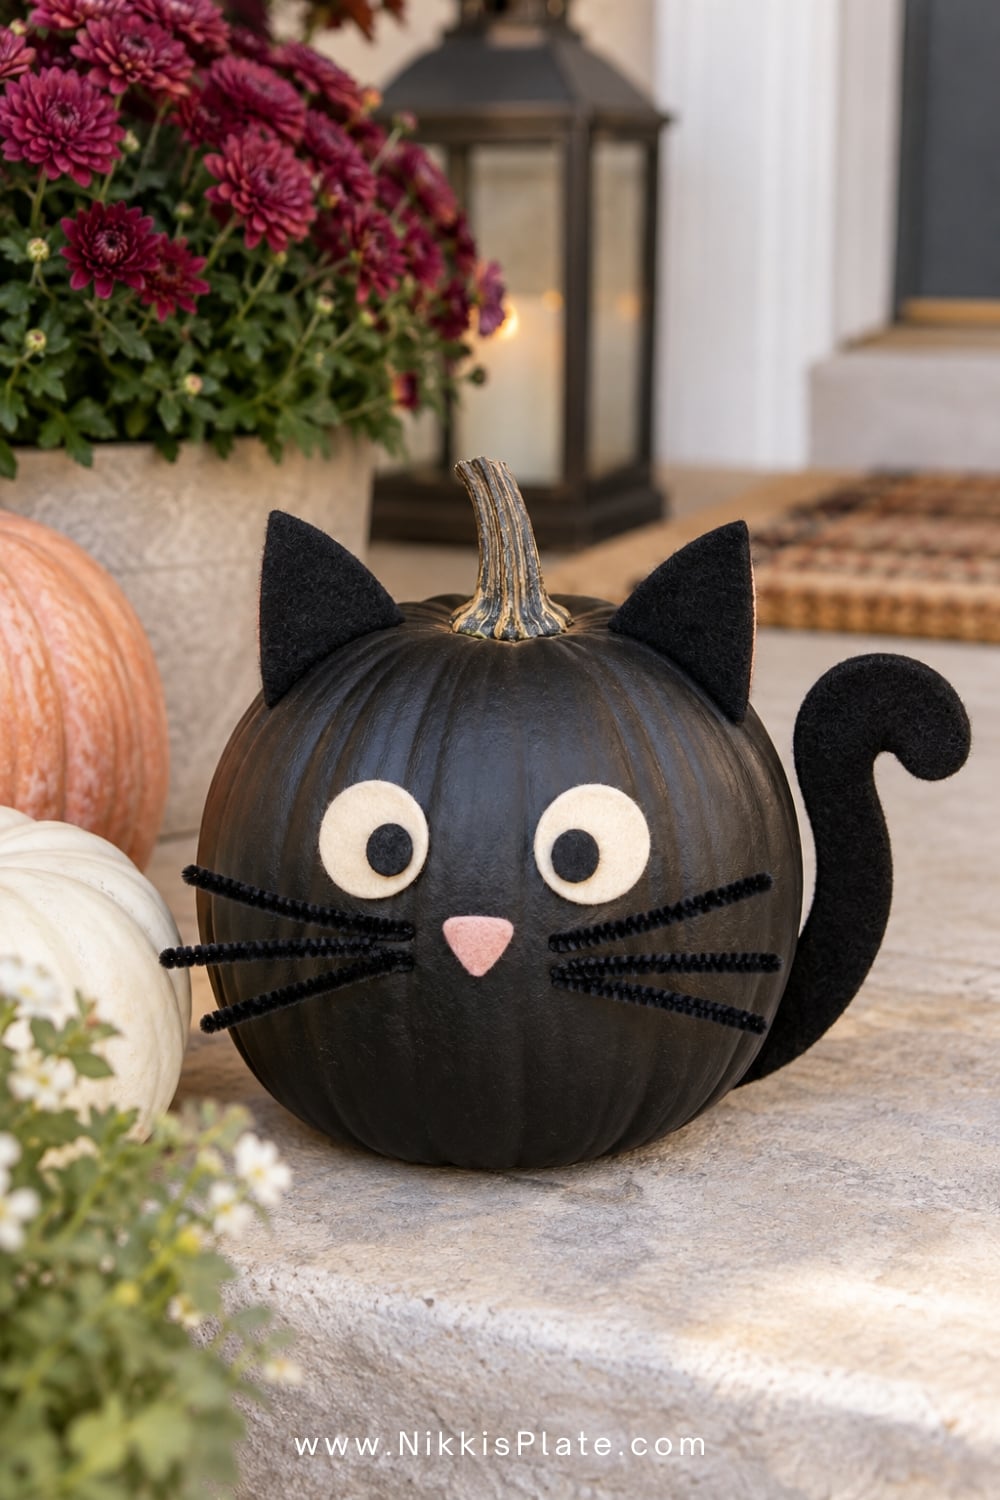
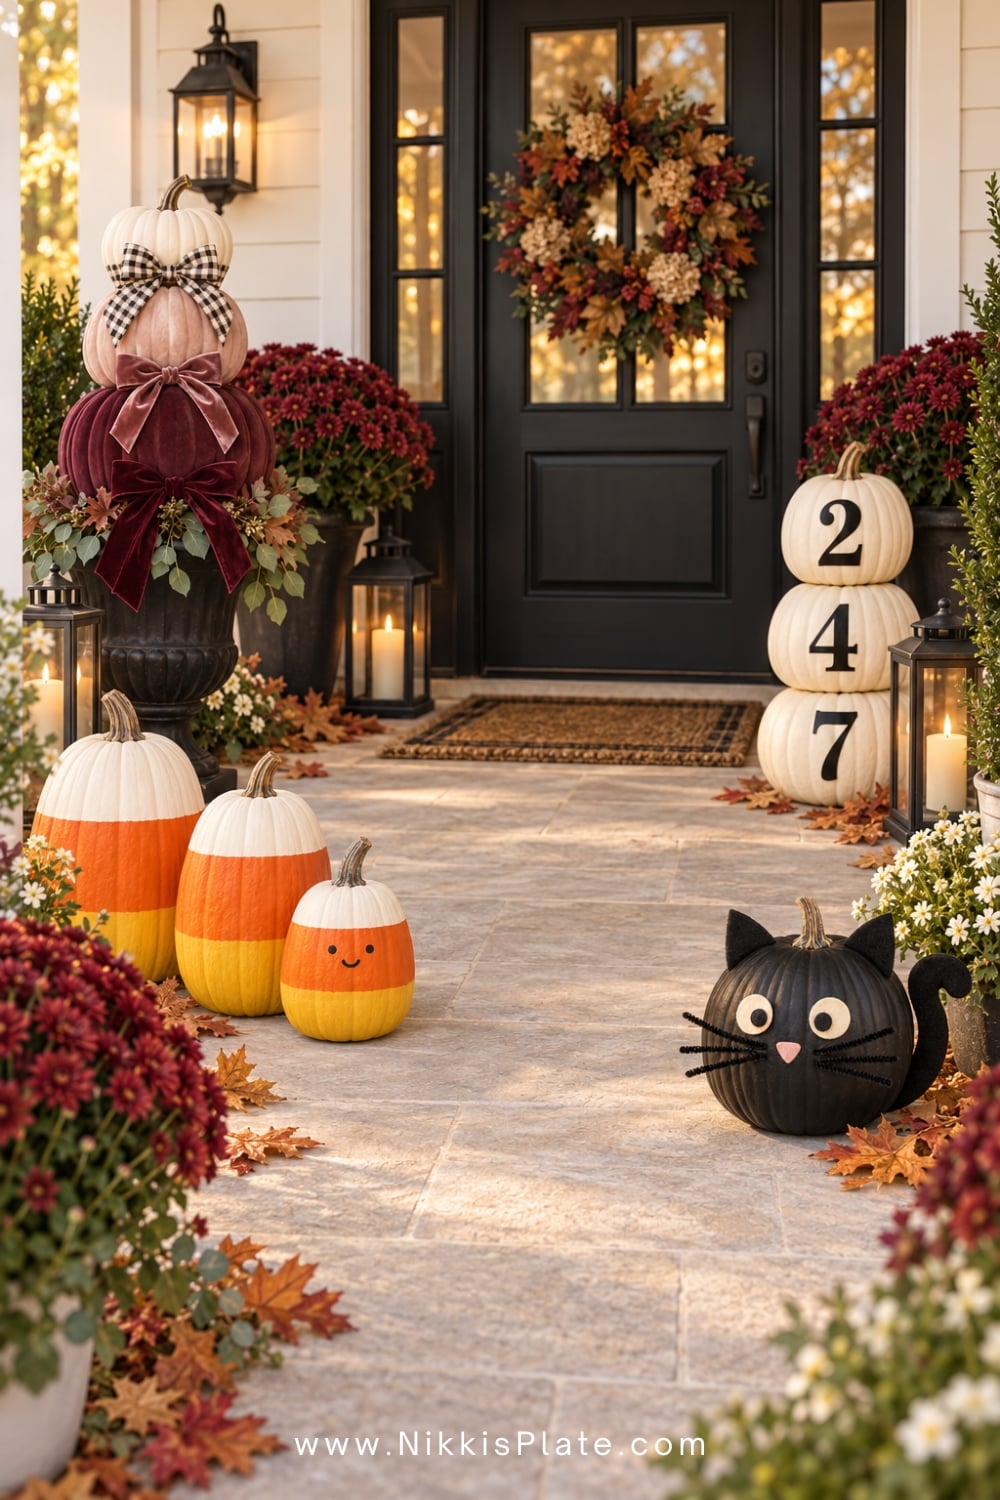
Start with a small black pumpkin or paint a faux pumpkin with matte black craft paint. Cut two ears, a tail, eyes, and a tiny nose from felt, then attach them with glue dots or craft glue. Add thin chenille-stem whiskers if desired.
Pair the cat with one of my free cat pumpkin carving patterns if your family wants both carved and no-carve designs in the same porch display.
22. Woodland Animal Pumpkins
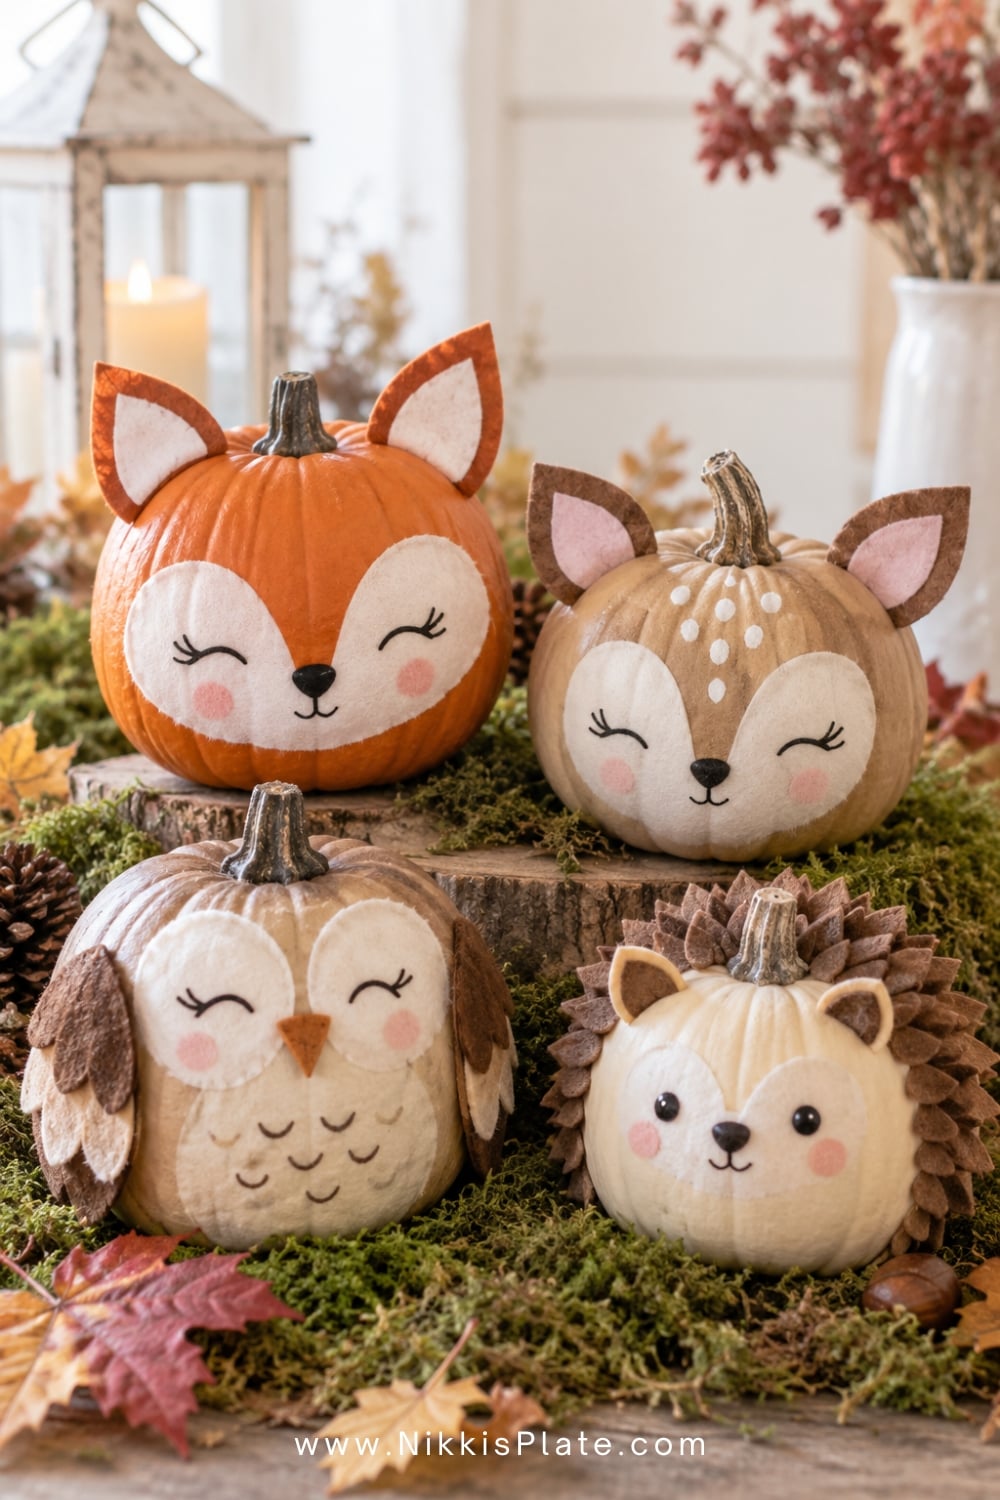
Turn mini pumpkins into a fox, fawn, owl, or hedgehog using paint and simple felt pieces. Keep the faces sweet and minimal: closed eyes, rosy cheeks, a tiny nose, and two small ears are often enough.
Group several animals on a bed of moss and autumn leaves to create a little woodland family. This idea is cute for children but still pretty enough to display in a nursery or playroom.
23. Mushroom House Pumpkin
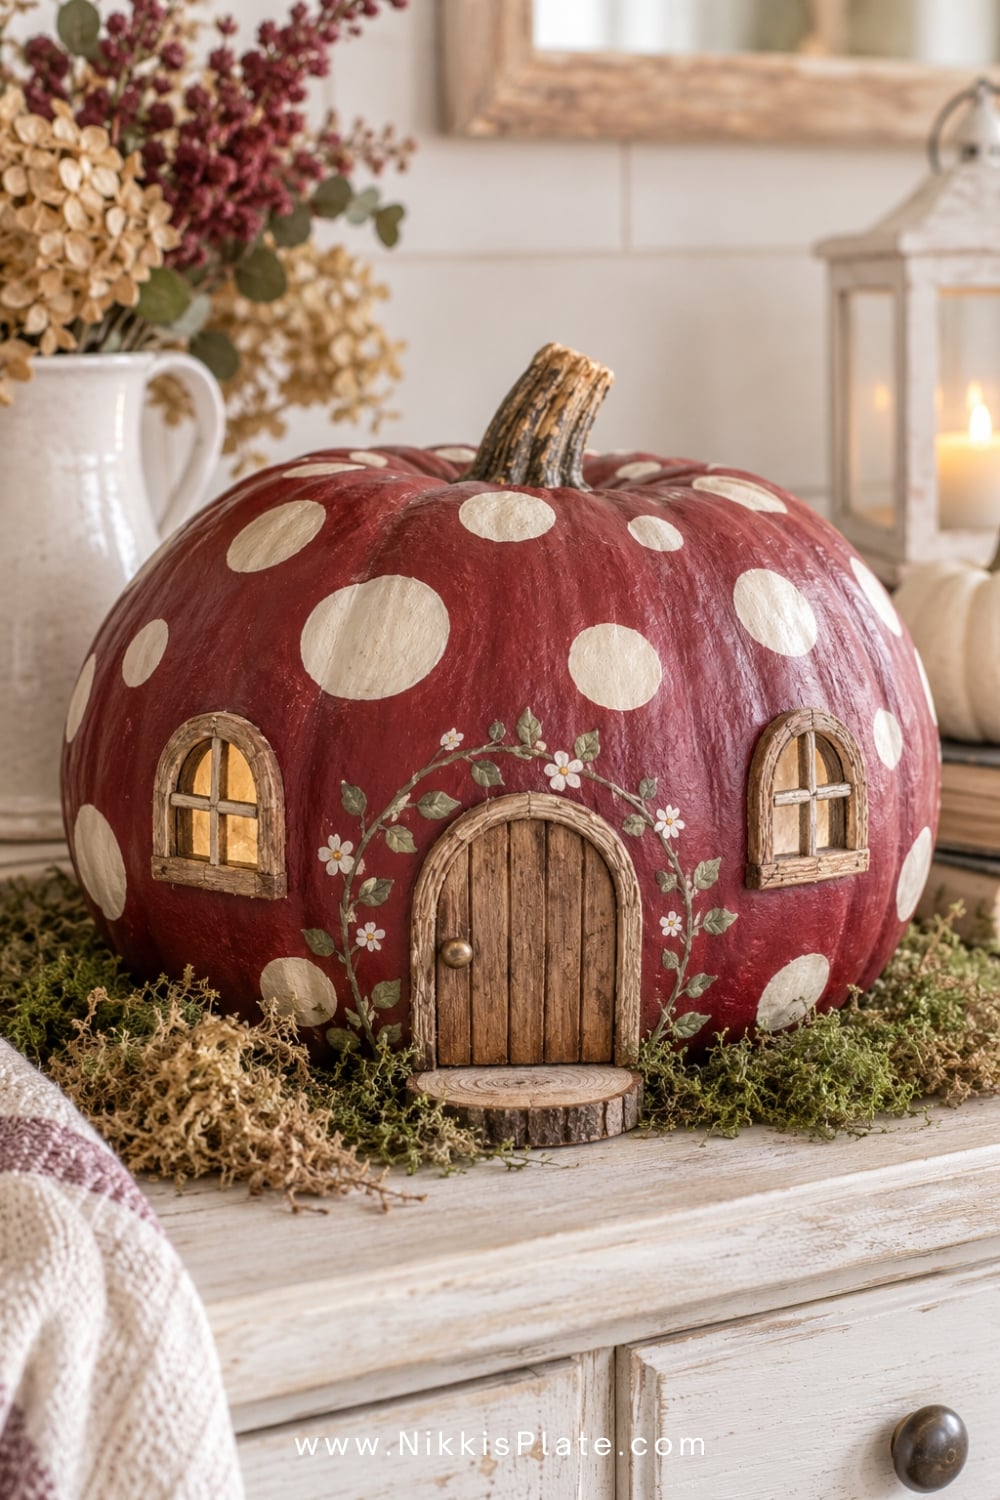
Paint a squat pumpkin like a storybook mushroom with a red, rust, blush, or plum top and cream spots. Add a small arched door, tiny windows, trailing vines, and a little path along the base.
Use a white pumpkin for the easiest starting point, or paint the whole pumpkin cream before adding details. This whimsical design is one of the best no-carve pumpkin contest ideas because it looks detailed without requiring complicated materials.
24. Candy Corn Pumpkins
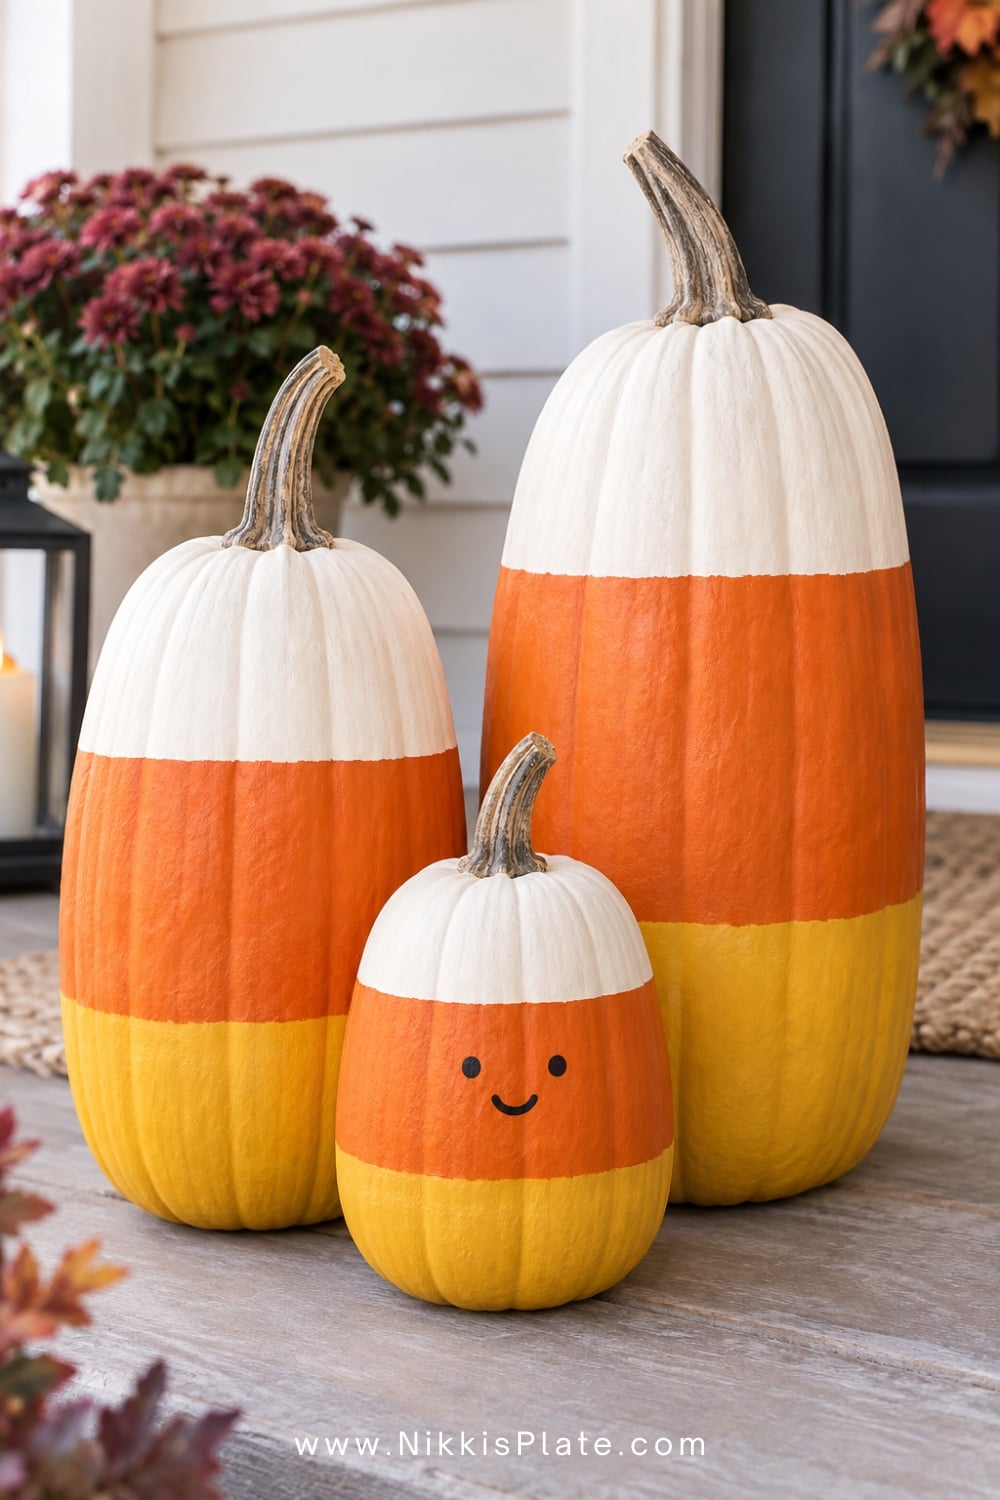
Divide a tall pumpkin into three horizontal sections and paint them white, orange, and yellow to resemble candy corn. Use painter's tape for crisp stripes or let children paint the sections freehand.
Finish with a happy face if you want a cuter Halloween look. A group of three pumpkins in different sizes makes a bright front-step display.
25. Doodle Pumpkins
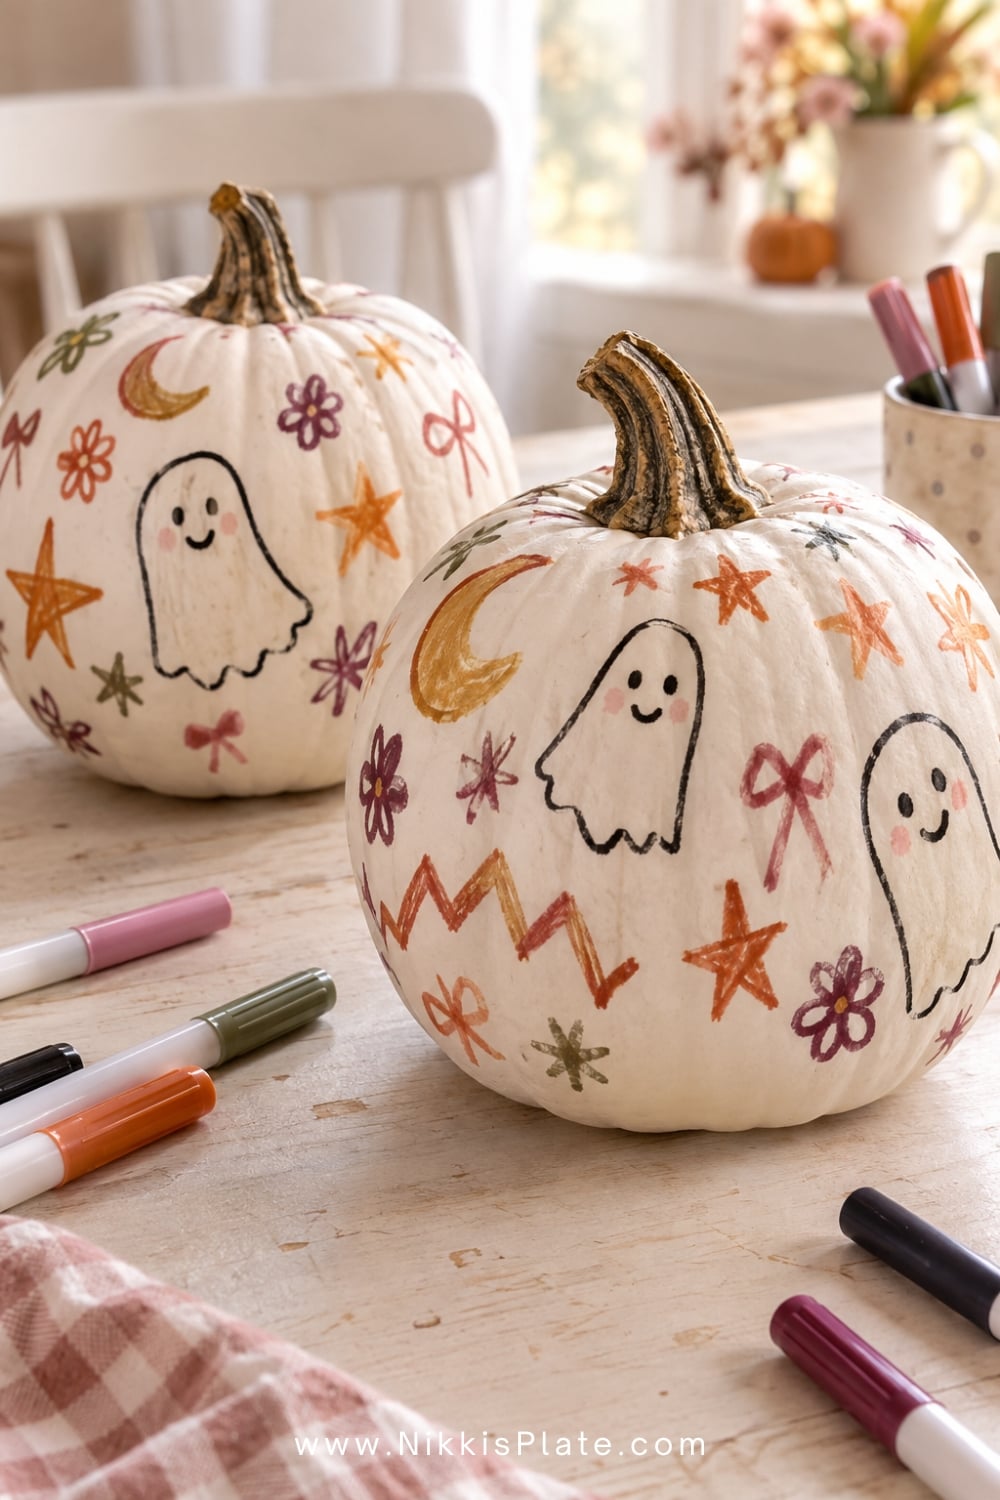
Give each child a white faux pumpkin and a set of washable markers or paint pens suited to their age. Encourage stars, flowers, bows, friendly ghosts, names, zigzags, and tiny Halloween characters.
This open-ended project is perfect for a playdate or classroom because every pumpkin will be different. If children want more ready-to-use designs, print a few of my free pumpkin carving stencils for kids and use them as tracing templates instead of carving guides.
Elegant and Unique Pumpkin Decorating Ideas
26. Pearl and Velvet Ribbon Pumpkins
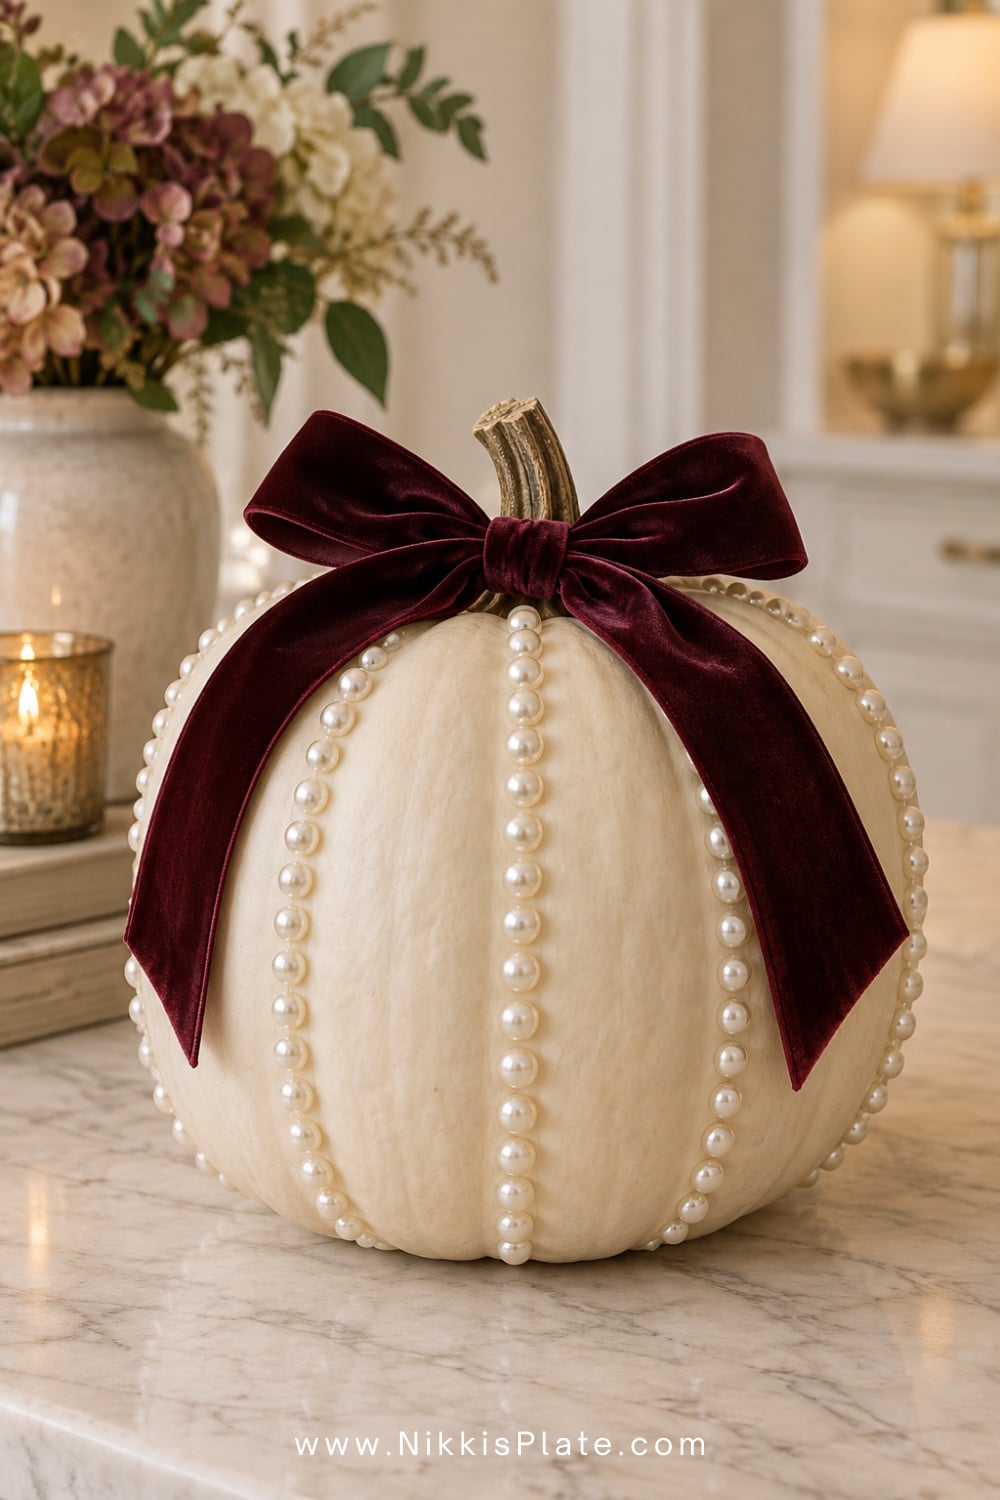
Press flat-back faux pearls into tidy rows along the pumpkin's grooves, then finish the stem with a deep burgundy, plum, or blush velvet bow. Use a cream faux pumpkin so the texture and embellishments feel elegant rather than busy.
Display one large pumpkin as a focal point or decorate three small pumpkins with different pearl patterns. These look especially pretty on a vanity, mantel, or formal dining table.
27. Gold-Leaf Botanical Pumpkins
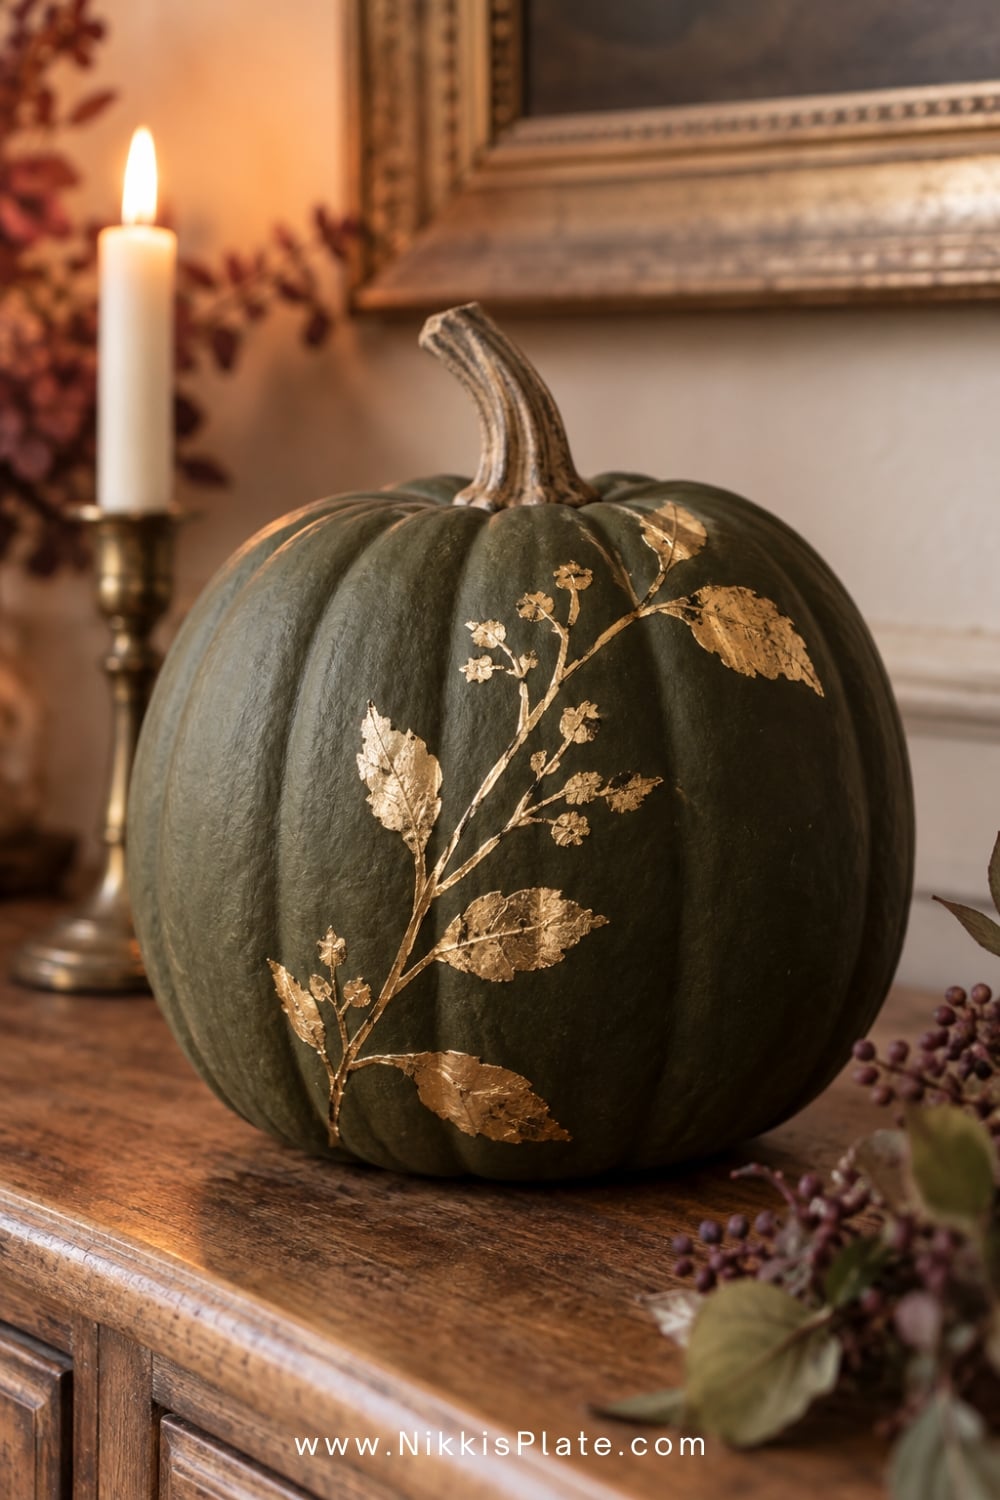
Paint a pumpkin matte cream, charcoal, or deep olive, then apply delicate gold-leaf branches around one side. Use leaf adhesive and a soft brush, following the product directions carefully.
Keep plenty of negative space so the metallic detail stands out. If loose metal leaf feels intimidating, use a metallic paint pen to draw the same botanical design.
28. Celestial Moon and Star Pumpkins
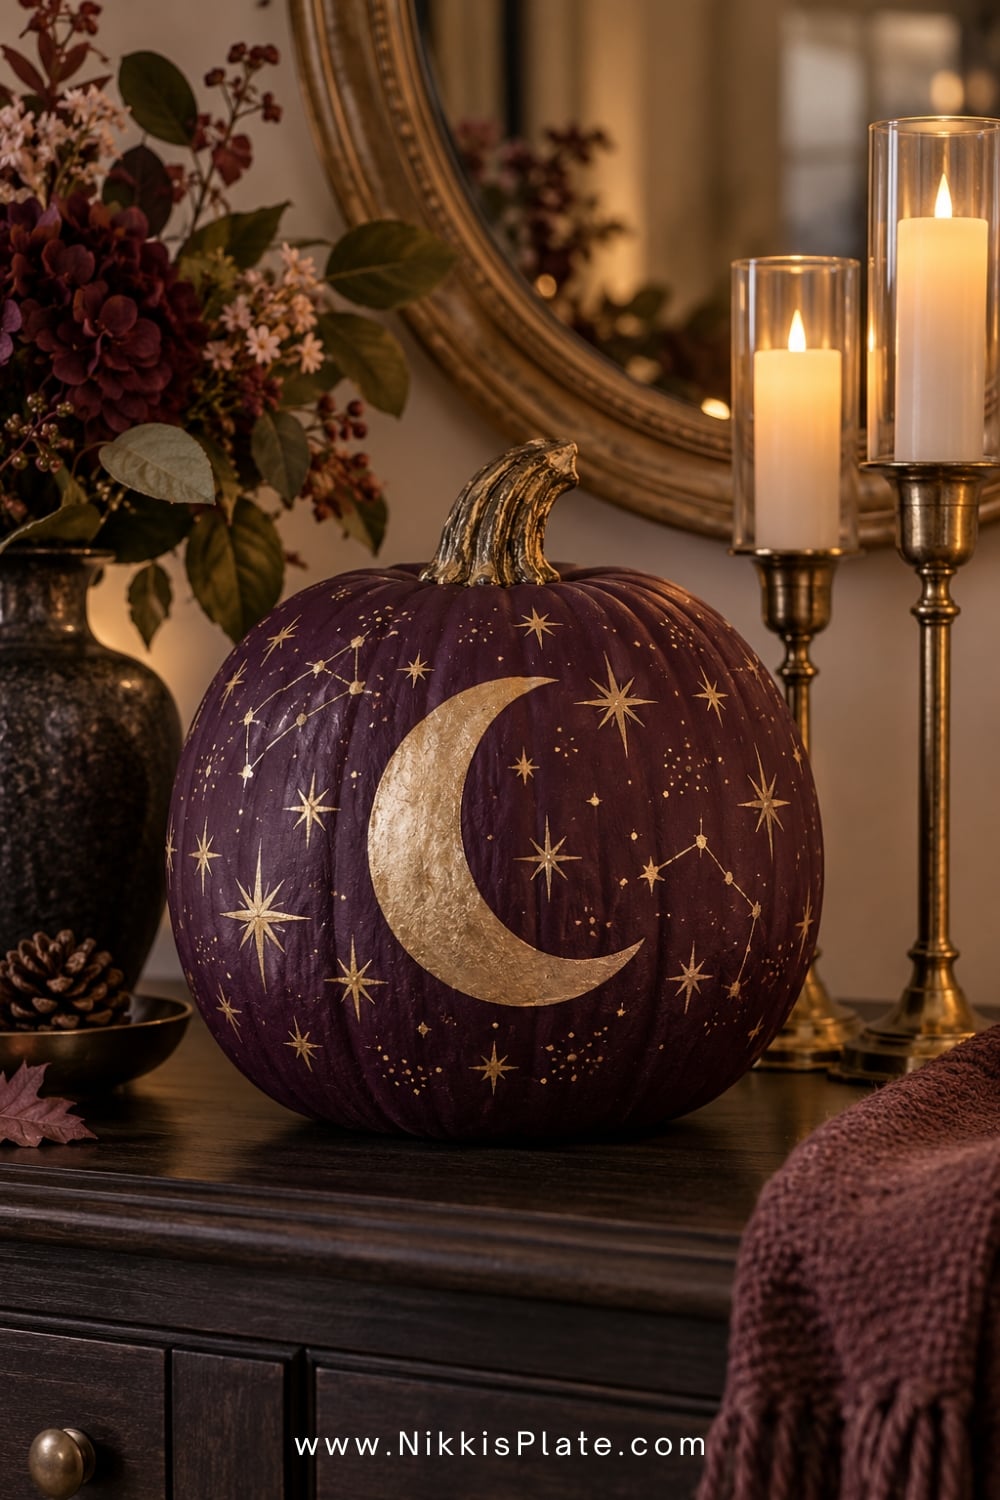
Decorate a navy, black, or plum pumpkin with gold moons, stars, and tiny constellations. Use metallic paint, star stickers, or removable vinyl shapes. A few dotted starbursts help fill the empty areas without making the design too crowded.
Arrange the pumpkin beside brass candlesticks and battery-operated candles for a softly moody Halloween display. Keep open flames away from ribbon, paper, and dried botanicals.
29. House Number Porch Pumpkins
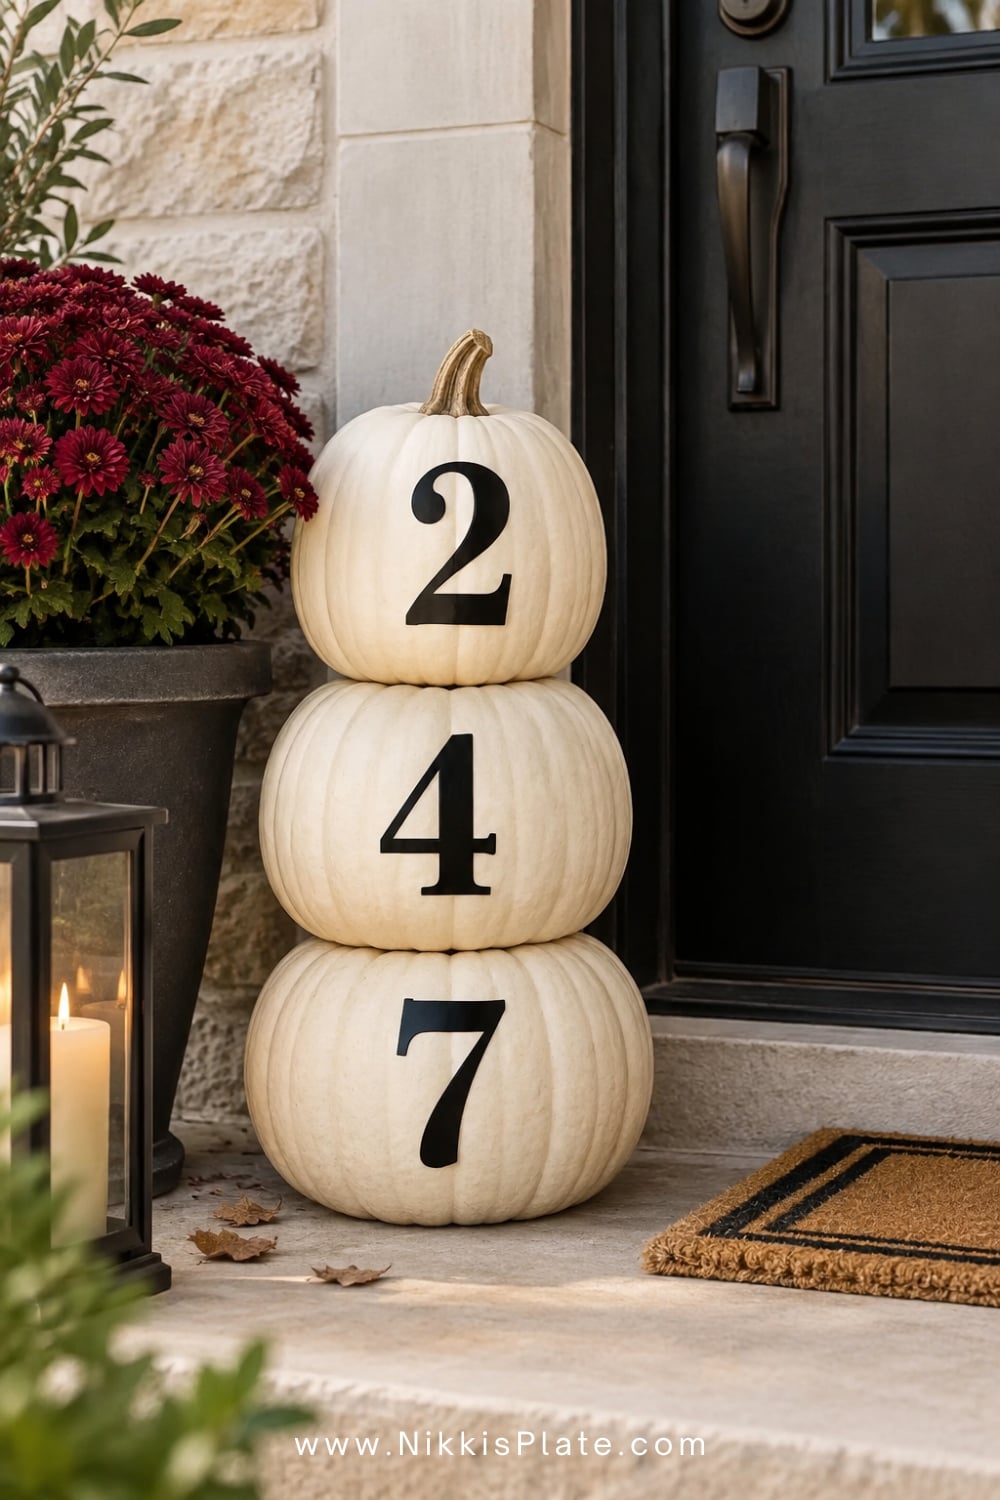
Add one digit of your house number to each pumpkin using removable vinyl, stencils, or painted numerals. Choose pumpkins of similar size and stack or line them up vertically near the front door.
Black numbers on cream pumpkins feel clean and classic, while gold numbers on deep green or burgundy pumpkins make a richer statement. For more entryway inspiration, see these outdoor fall decor ideas.
30. Stacked Pumpkin Topiary With Bows
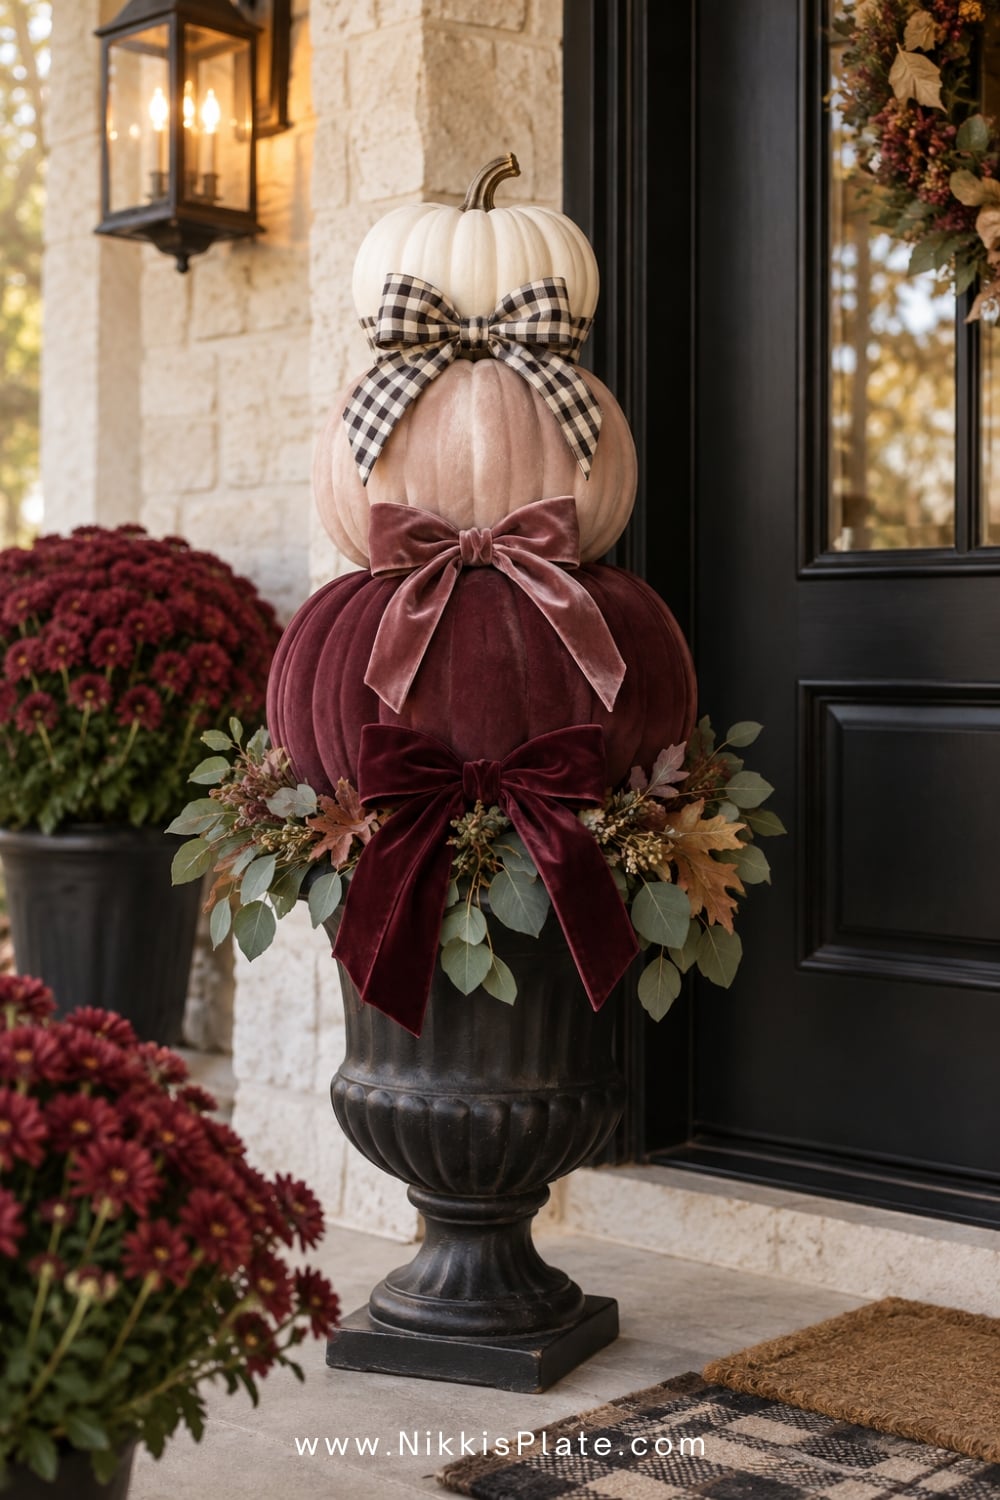
Stack three faux pumpkins in graduated sizes inside a heavy urn or planter. Paint them in coordinating shades, then tuck velvet or gingham bows between the layers. Add faux eucalyptus, dried leaves, or wispy branches around the base.
Use a dowel through faux foam pumpkins or follow the manufacturer's recommended adhesive method so the stack is stable. Place the topiary on a covered porch, beside the fireplace, or at the end of a console table where it cannot be bumped.
How to Choose the Best Idea
If you want the fastest project, begin with a linen bow pumpkin, sticker jack-o'-lantern, polka-dot pumpkin, or simple monochrome set. For a cozy farmhouse look, try patchwork fabric, dried hydrangeas, twine, or pressed flowers.
The fingerprint ghosts, woodland animals, and doodle pumpkins are especially fun for children. For a school or community pumpkin-decorating contest, choose an idea with a strong theme and an easy-to-recognize silhouette, such as the mushroom house, mossy woodland pumpkin, celestial pumpkin, or stacked topiary.
When you are decorating a room rather than making a single craft, repeat two or three colours across the pumpkins and the surrounding decor. My fall mantel decor ideas and fall table decor ideas have more ways to style the finished pumpkins.
Frequently Asked Questions
Acrylic craft paint is an easy choice for both real and faux pumpkins. Multi-surface paint usually adheres best to smooth faux finishes. Clean and dry the pumpkin first, apply thin coats, and let each layer dry completely. If a faux pumpkin will be displayed outdoors, use an outdoor-rated paint or compatible clear sealer.
Wipe away dirt with a slightly damp cloth, let the pumpkin dry fully, and avoid handling it with oily hands. Apply thin layers of acrylic craft paint rather than one heavy coat. Keeping the finished pumpkin dry and under cover will help protect the design.
An intact pumpkin generally lasts longer than one that has been cut open, but its condition still depends on freshness, temperature, moisture, and handling. Choose a firm pumpkin without soft spots, avoid puncturing the skin, and keep it somewhere cool and dry.
Yes. Stickers, washable paint, washable markers, felt shapes, fingerprints, and ribbon are all fun choices. Adults should handle hot glue, permanent paint, sharp tools, and small embellishments that may be a choking hazard.
Yes, but a covered porch is best. Moisture can damage paper, fabric, dried flowers, and some paints. For an uncovered area, use a faux pumpkin with outdoor-rated paint and sealer, and bring ribbon or fabric-covered designs inside during wet weather.
Choose a design with a clear theme, strong contrast, and interesting details that can be seen from several feet away. A mushroom house, woodland animal family, mossy forest pumpkin, celestial pumpkin, patchwork pumpkin, or stacked pumpkin topiary would all stand out in a decorating contest.
Final Thoughts
These no-carve pumpkin decorating ideas make it easy to create something festive without cutting into a single pumpkin. A little paint, ribbon, fabric, or felt can turn an ordinary pumpkin into a piece that feels completely personal to your home or family.
Choose one simple design for an afternoon craft, or make a small coordinated collection for your porch, mantel, or fall table. If you still want a few glowing jack-o'-lanterns in the mix, you can also download my 30 free printable pumpkin carving stencils.
Until next time,


As Seen on TikTok
Come behind the scenes of our farmhouse build, decor projects, and cozy everyday life. Tap a video to watch, then follow @nikkisplate on TikTok for more.
Watch this video on TikTok
Watch this video on TikTok
Watch this video on TikTok


Leave a Reply