
Turn little hands, feet and fingerprints into Christmas trees, reindeer, wreaths and sweet handmade gifts. These 15 free craft ideas include simple instructions, practical tips and a peek at my Christmas keepsake countdown book, 25 Days of Little Hands.
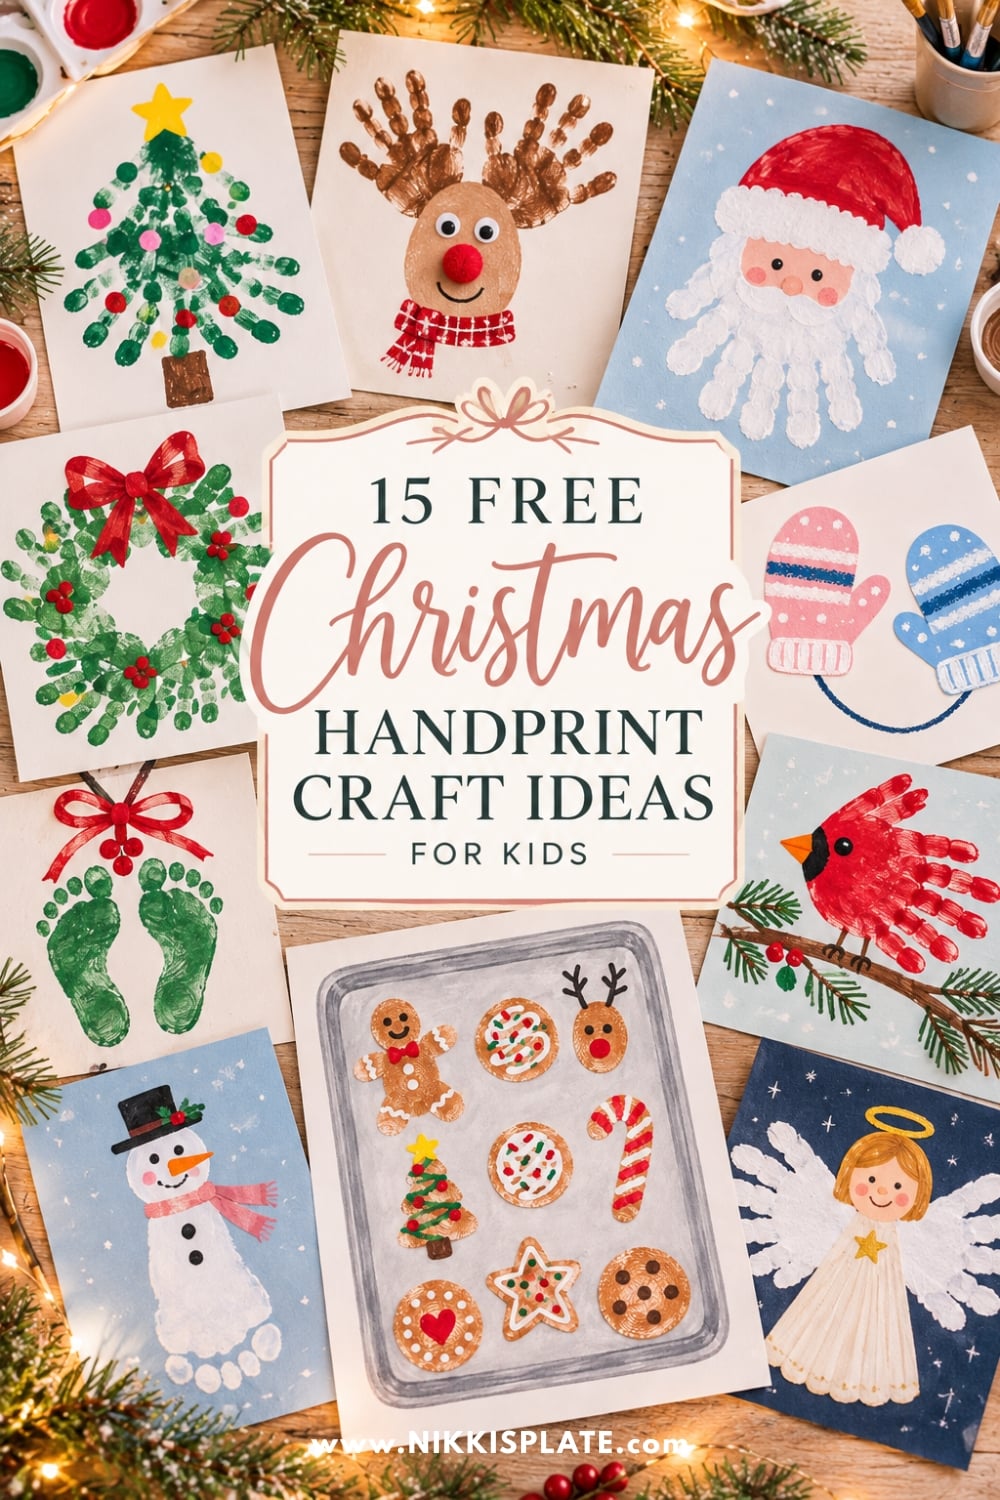
Hi beauties! These Christmas handprint crafts for kids turn little hands into Christmas trees, reindeer, wreaths and the sweetest keepsakes. I love the idea of making something festive that also captures a small piece of who your child is right now, right down to those tiny fingertips.
You can make these projects with paper, a few paint colours and simple drawn details. Choose one for a quiet afternoon, make a card for grandparents, or spread your favourites throughout December. There is plenty of room for crooked fingers, mixed colours and your child's own finishing touches.
Below, you'll find 15 free craft ideas with materials, step-by-step directions and tips for making each one. Most use handprints, with a few footprint and fingerprint activities mixed in. Every project can be made from the instructions here using blank paper or cardstock.
Make a Little Christmas Tradition
One little print can become a favourite Christmas memory. If you'd like to build a daily tradition around the idea, my book, 25 Days of Little Hands, brings together a Christmas keepsake countdown built around handprints, footprints and fingerprints.
Supplies for Christmas Handprint Art
Start with the supplies you already have, then add only what your chosen project needs. The free part is the ideas and instructions; paper, paint and any optional decorations are separate supplies.
- White cardstock or sturdy drawing paper, plus a few sheets of coloured paper.
- Washable, water-based finger paint in the colours needed for your chosen design.
- A shallow paint tray and a soft brush for spreading a thin layer of paint.
- Washable markers, pencil crayons or crayons for the details.
- A glue stick and scissors for the paper versions.
- A washable table covering, an old shirt or smock, and a damp cloth.
For painting directly onto little hands, choose age-appropriate, washable finger paint labelled for that use: washable, water-based children's finger paint. Follow the product's age guidance and directions; washable craft paint is not automatically suitable for hand printing.
Sturdy white cardstock is useful when you want to keep or gift the finished artwork. A larger sheet gives handprint wreaths and flowers more space, while a folded sheet makes an easy card.
Health Canada recommends water-based paint specifically labelled for finger painting and close supervision during children's craft time. You can read its arts and crafts safety guidance when choosing your materials. Adults should handle detailed cutting, and painted feet should be washed and dried before children stand up.
How to Get a Clear Handprint
Spread a thin, even coat of finger paint across the palm and fingers. A soft brush can help you reach the creases without leaving a thick puddle. Try one print on scrap paper before starting the keepsake.
Place the hand down once, gently press each finger, then lift straight up. For footprints, have your child sit securely while an adult brings the paper to the foot. Allow the print to dry before drawing faces, adding another colour or gluing on paper details.
If your child dislikes paint, trace the hand or foot instead and let them colour the shape. You can also choose my free printable Christmas crafts for kids for a separate colouring, cutting and gluing activity.
15 Christmas Handprint Crafts for Kids
The active times below are planning estimates, with paint drying time added separately. Follow your child's interest and the age guidance on your supplies, and let an adult help with setup, printing and cutting as needed.
1. Handprint Christmas Tree
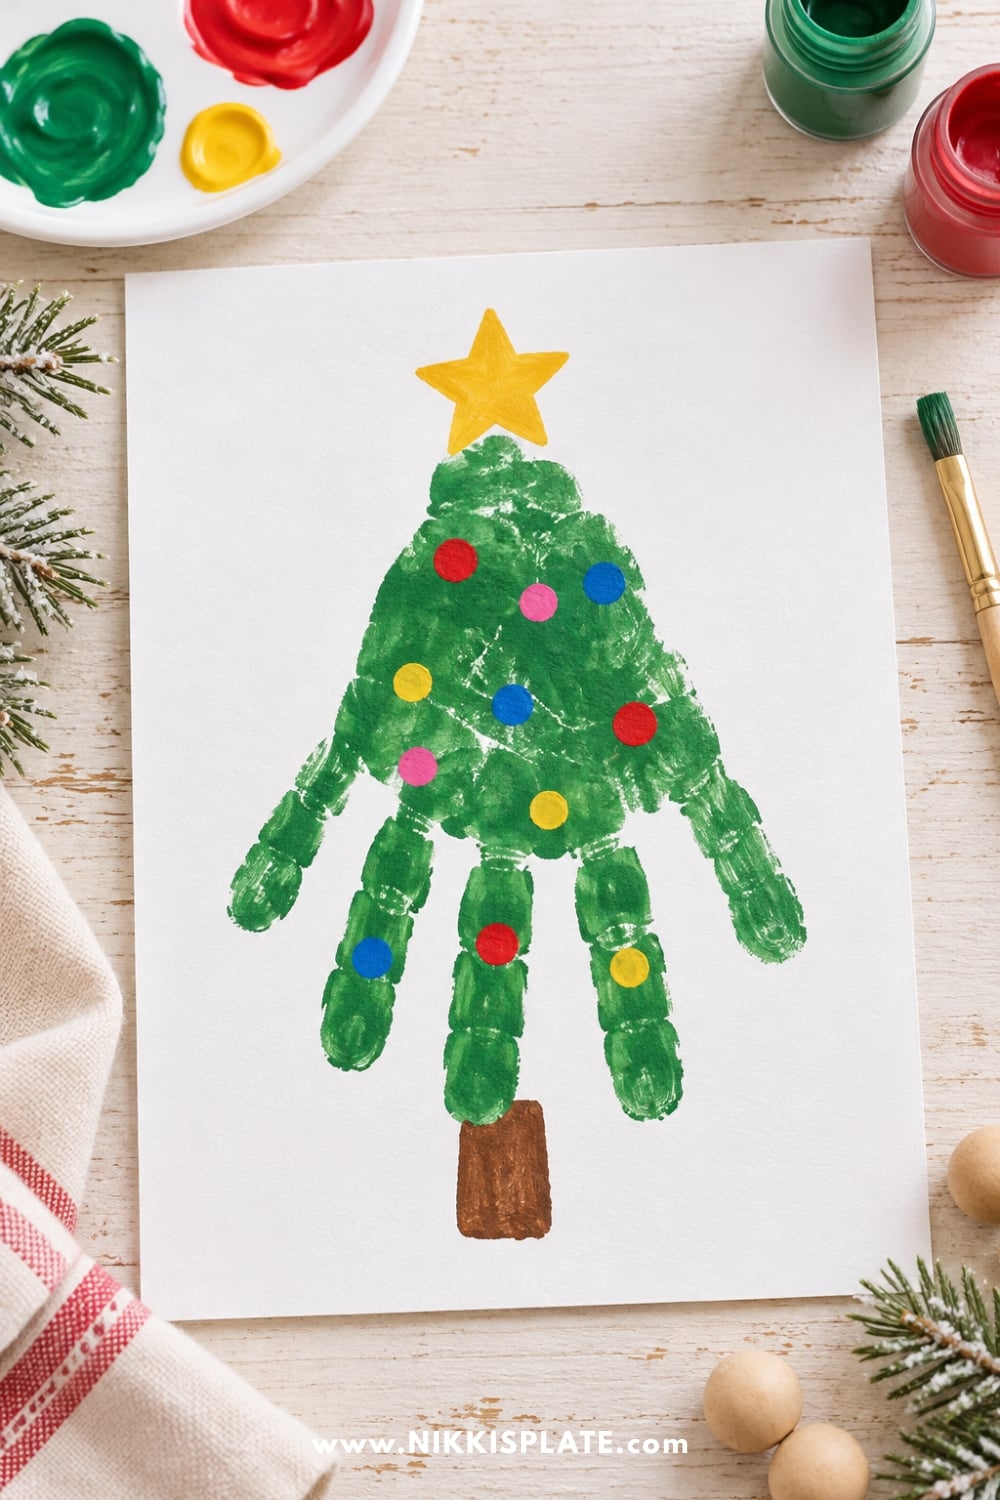
A green handprint makes a sweet little Christmas tree, especially when your child adds the ornaments. This is a simple first project because one print creates most of the picture.
Materials: White cardstock, green finger paint, coloured finger paint or markers, and a brown marker. Active time: About 10 minutes plus drying. Difficulty: Easy with adult printing help.
- Turn the paper so the painted hand will land with the fingers pointing towards the bottom of the page. Keep the fingers fairly close together and press once.
- After the green print dries, draw a short brown trunk below the middle fingertips and a star above the wrist edge.
- Add small fingerprint ornaments or marker dots across the tree, leaving some green showing.
2. Handprint Reindeer Antlers
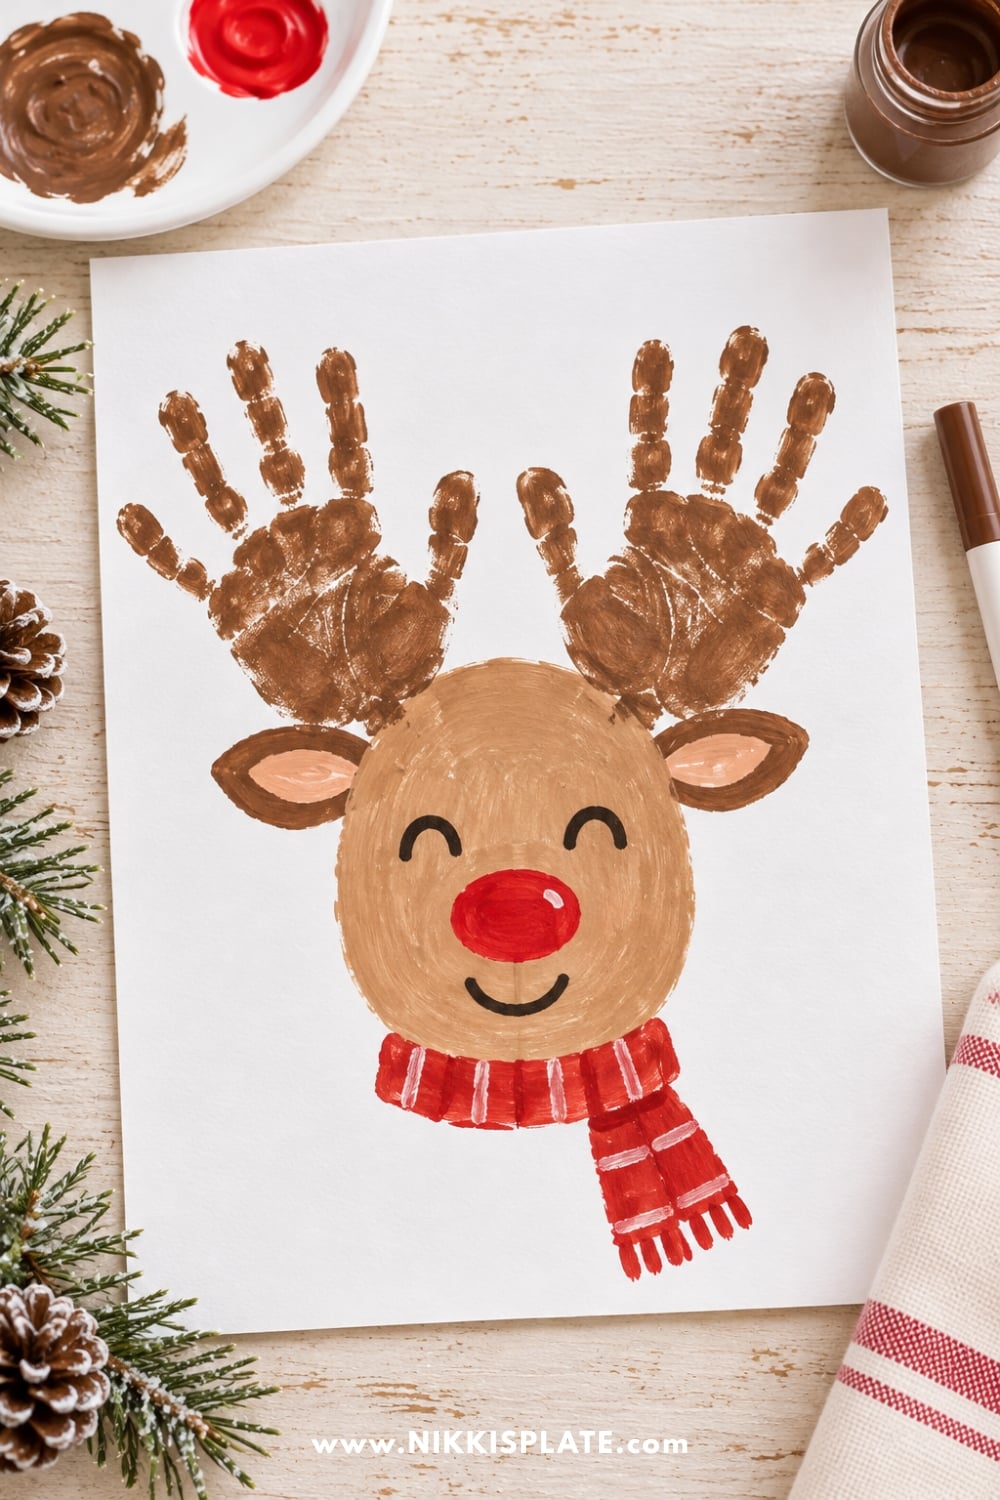
Two handprints become the antlers on this cheerful reindeer. The face can be a simple drawn oval, so you don't need a template or any small craft pieces.
Materials: White cardstock, brown finger paint, and brown, black and red markers. Active time: About 15 minutes plus drying. Difficulty: Easy with adult help lining up the prints.
- Print both hands near the top of the paper with fingers pointing up and slightly outwards. Leave a small gap between the palms.
- Once dry, draw a large oval head below and between the prints, overlapping the lower palm edges so the antlers appear attached.
- Add ears, two eyes and a red or brown nose. Your child can draw a scarf beneath the face.
Little tip: Draw the head outline lightly in pencil first to check that the antlers sit on either side of the top of the head.
3. Santa Handprint Beard
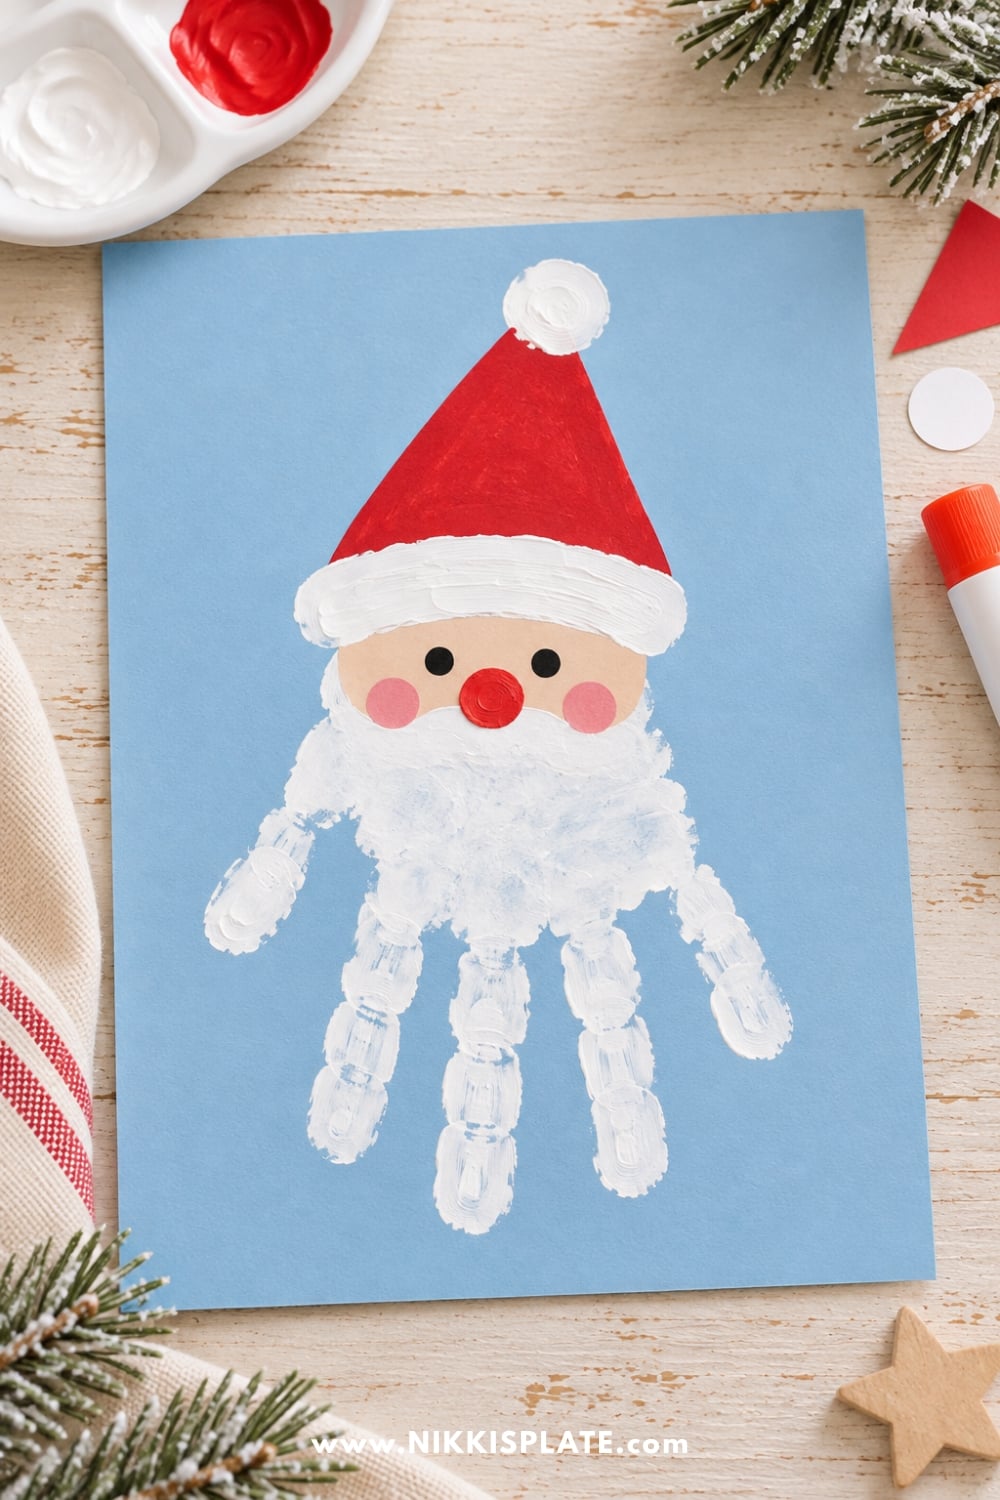
A white handprint stands out beautifully against navy or pale blue paper. Turn the fingers downwards and they become Santa's wonderfully uneven beard.
Materials: Coloured cardstock, white finger paint, red and skin-tone paper or crayons, glue and markers. Active time: About 15 minutes plus drying. Difficulty: Easy; an adult can prepare paper shapes.
- Print a white hand with the fingers pointing down, leaving space above the wrist edge for Santa's face and hat.
- Let the print dry. Draw or glue a small oval face just above the palm, allowing the white palm to sit beneath it as the beard.
- Add a red triangle hat, white trim, eyes, a nose and rosy cheeks.
Little tip: Keep the hat and face simple so the little fingers remain the main feature. Use the child's chosen skin tone for Santa's face.
4. Handprint Christmas Wreath
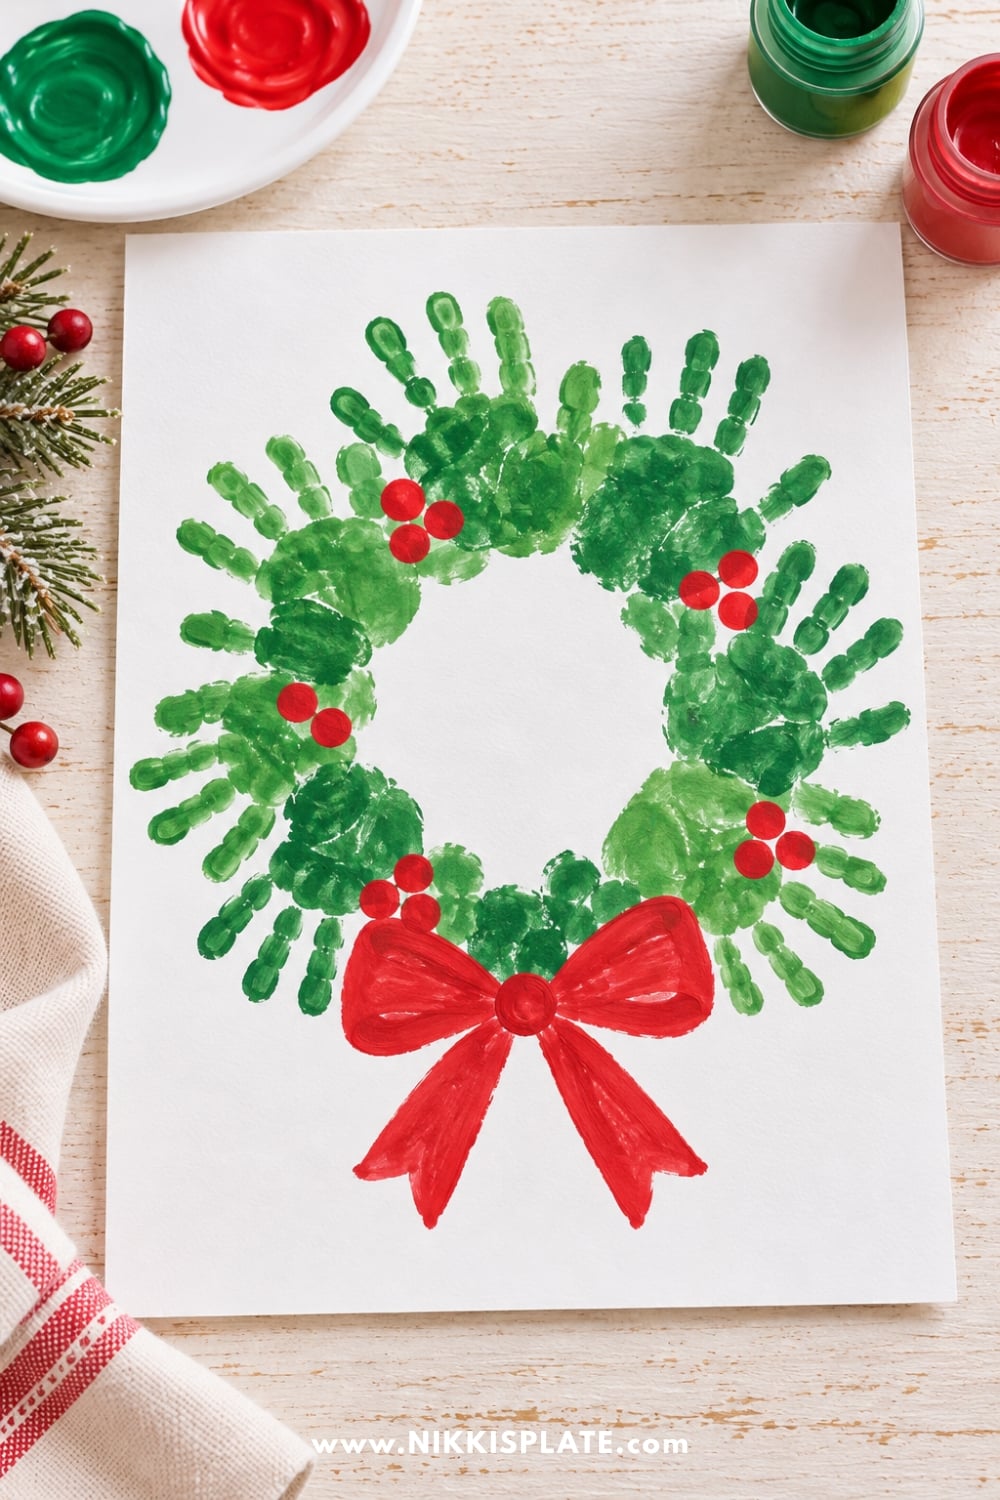
This wreath gives children a chance to repeat the same printing motion and watch a larger picture appear. Use a large sheet so the handprints can form a ring without crowding each other.
Materials: Large white drawing paper, green finger paint, a pencil, and red paint or markers. Active time: About 20 minutes plus drying. Difficulty: A little more help with placement.
- Lightly draw a large circle as a guide. Make one green handprint with the palm on the circle and the fingers pointing around its curve.
- Rotate the paper and repeat, overlapping the prints slightly until they form a ring with an open centre. Recoat the hand as needed.
- Once dry, add a few red fingerprint berries and draw a bow at the bottom.
Little tip: Make the ring bigger than you think you need. For a paint-free version, trace and cut several green paper hands, then glue them around the circle with adult cutting help.
5. Handprint Angel Wings
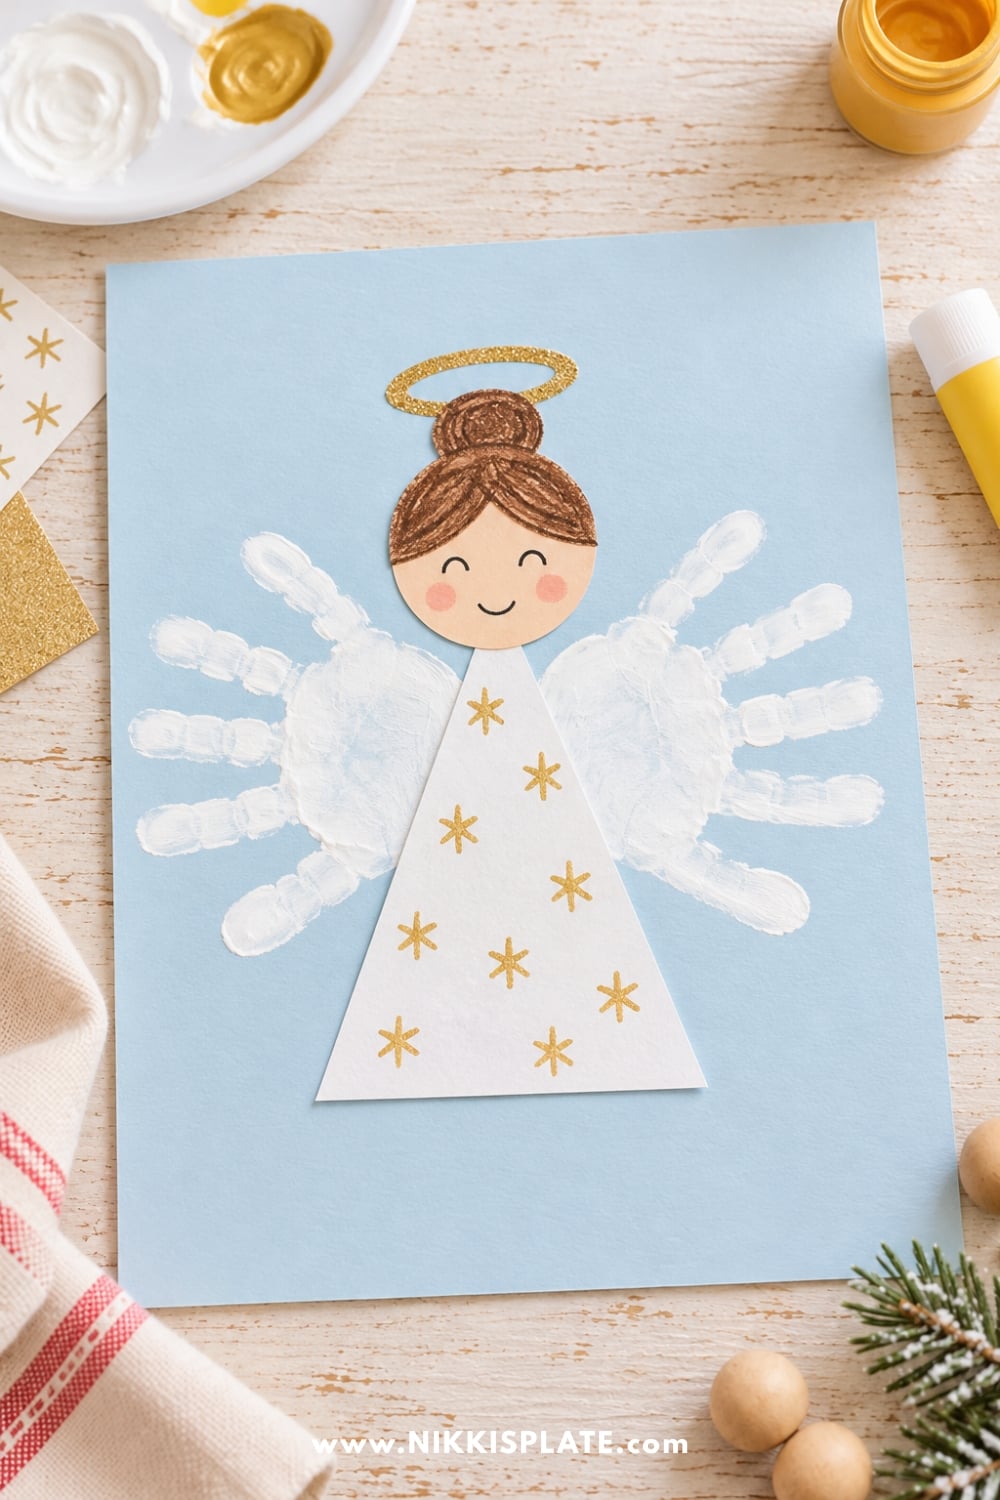
Two little hands make a pair of angel wings, with a paper gown between them. I love soft yellow wings on pale blue paper, but children can choose their own colours.
Materials: Pale blue cardstock, yellow or white finger paint, paper for the gown and face, glue and markers. Active time: About 15 minutes plus drying. Difficulty: Easy with adult preparation.
1. Print one hand on each side of the page, with the fingers pointing outwards and the wrist edges meeting near the middle.
2. Once dry, glue a triangular paper gown over the meeting point, leaving both sets of fingers visible as wings.
3. Add a paper circle face above the gown and draw hair, a smile and a halo.
Little tip: Cut the gown before printing and lay it on the blank page to judge how far apart the wings should sit.
Turn little prints into a Christmas countdown
If you love the idea of making these keepsakes throughout December, take a look at 25 Days of Little Hands. My Christmas countdown book brings the little-hands idea together around 25 creations, using handprints, footprints and fingerprints.
Choose a small creative moment each day from December 1 through Christmas Day, or enjoy the activities at a pace that fits your family. Add your child's name and the year to the finished art, and you'll have a lovely reminder of this Christmas together.
See 25 Days of Little Hands on Amazon
6. Handprint Holly
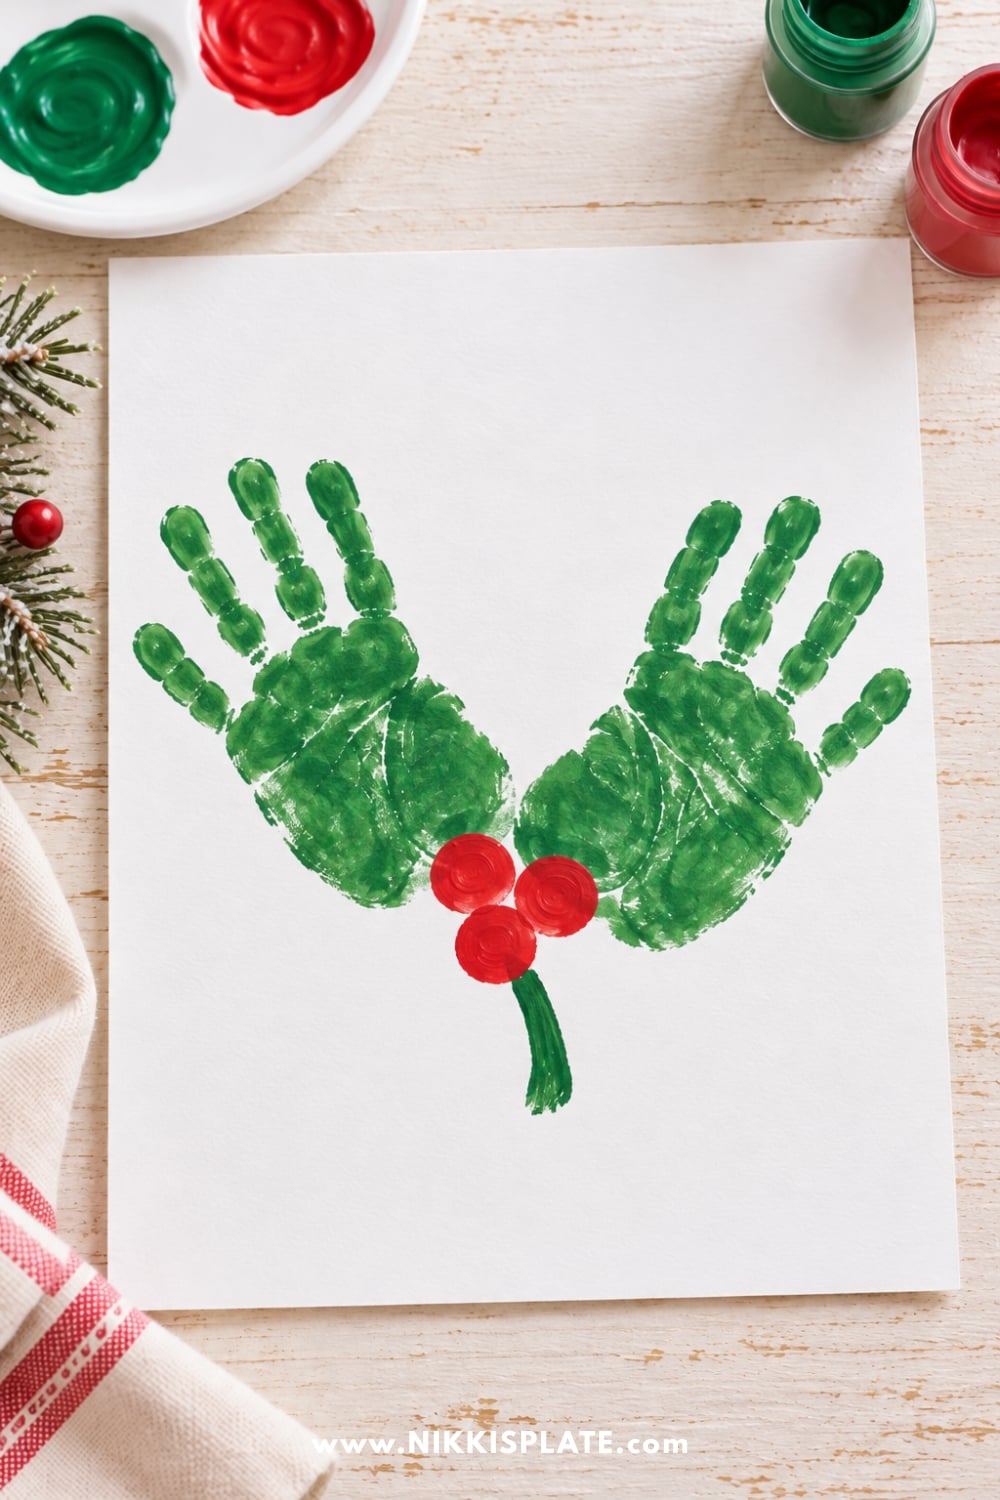
Two green handprints and a few red fingerprints make a playful version of a holly sprig. The individual fingers give the leaves their own child-made shape.
Materials: White cardstock, green and red finger paint, and a green marker. Active time: About 10 minutes plus drying. Difficulty: Easy with adult positioning help.
- Print one green hand with the fingers angled towards the upper left corner.
- Print the other hand towards the upper right, letting the wrist edges meet in a shallow V near the bottom.
- When the green paint is dry, add three red fingerprint berries at the meeting point. Draw a short stem or ribbon beneath them.
Little tip: Fold the paper into a card before printing if you'd like to send the finished holly to someone special.
7. Handprint Poinsettia
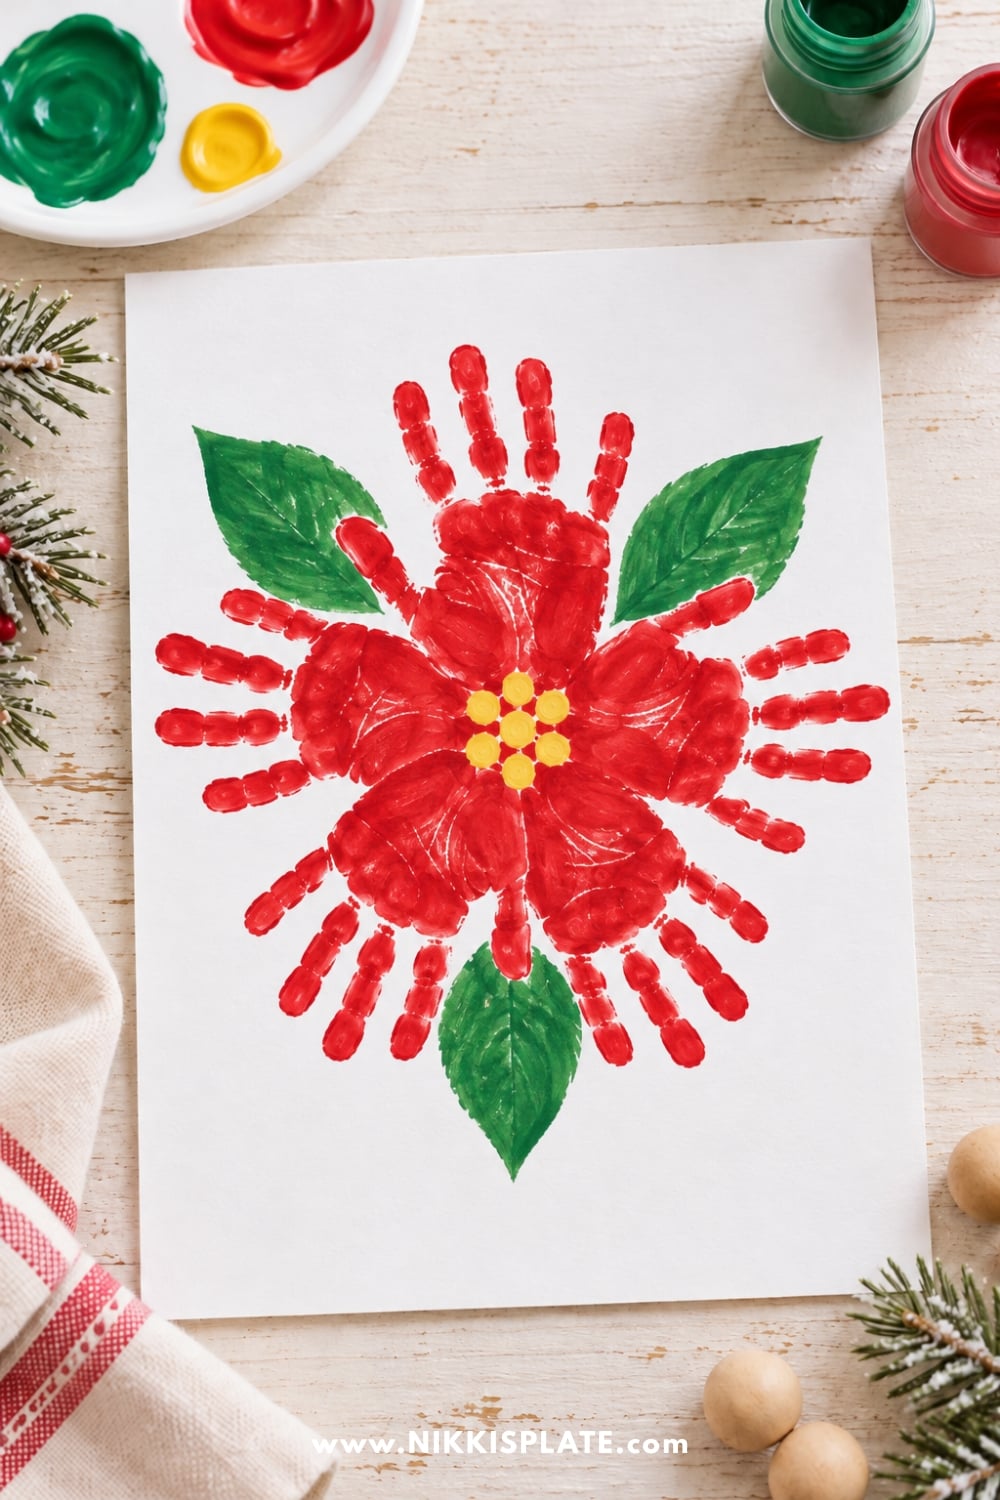
A group of red handprints becomes a big Christmas flower. This one needs a larger sheet of paper and a little more help turning the page between prints.
Materials: Large white drawing paper, red and yellow finger paint, green paper or markers, and glue if using paper leaves. Active time: About 20 minutes plus drying. Difficulty: Adult help with the layout.
- Mark a small dot in the centre of the paper. Print a red hand with the wrist edge beside the dot and fingers pointing outwards.
- Turn the paper and repeat around the centre, making four or five overlapping handprints like a ring of petals.
- Let the red paint dry, then add yellow fingertip dots in the centre and draw or glue green leaves around the outside.
Little tip: Let your child make the prints before deciding where to place the leaves. An uneven flower still looks lovely.
8. Handprint Christmas Cardinal
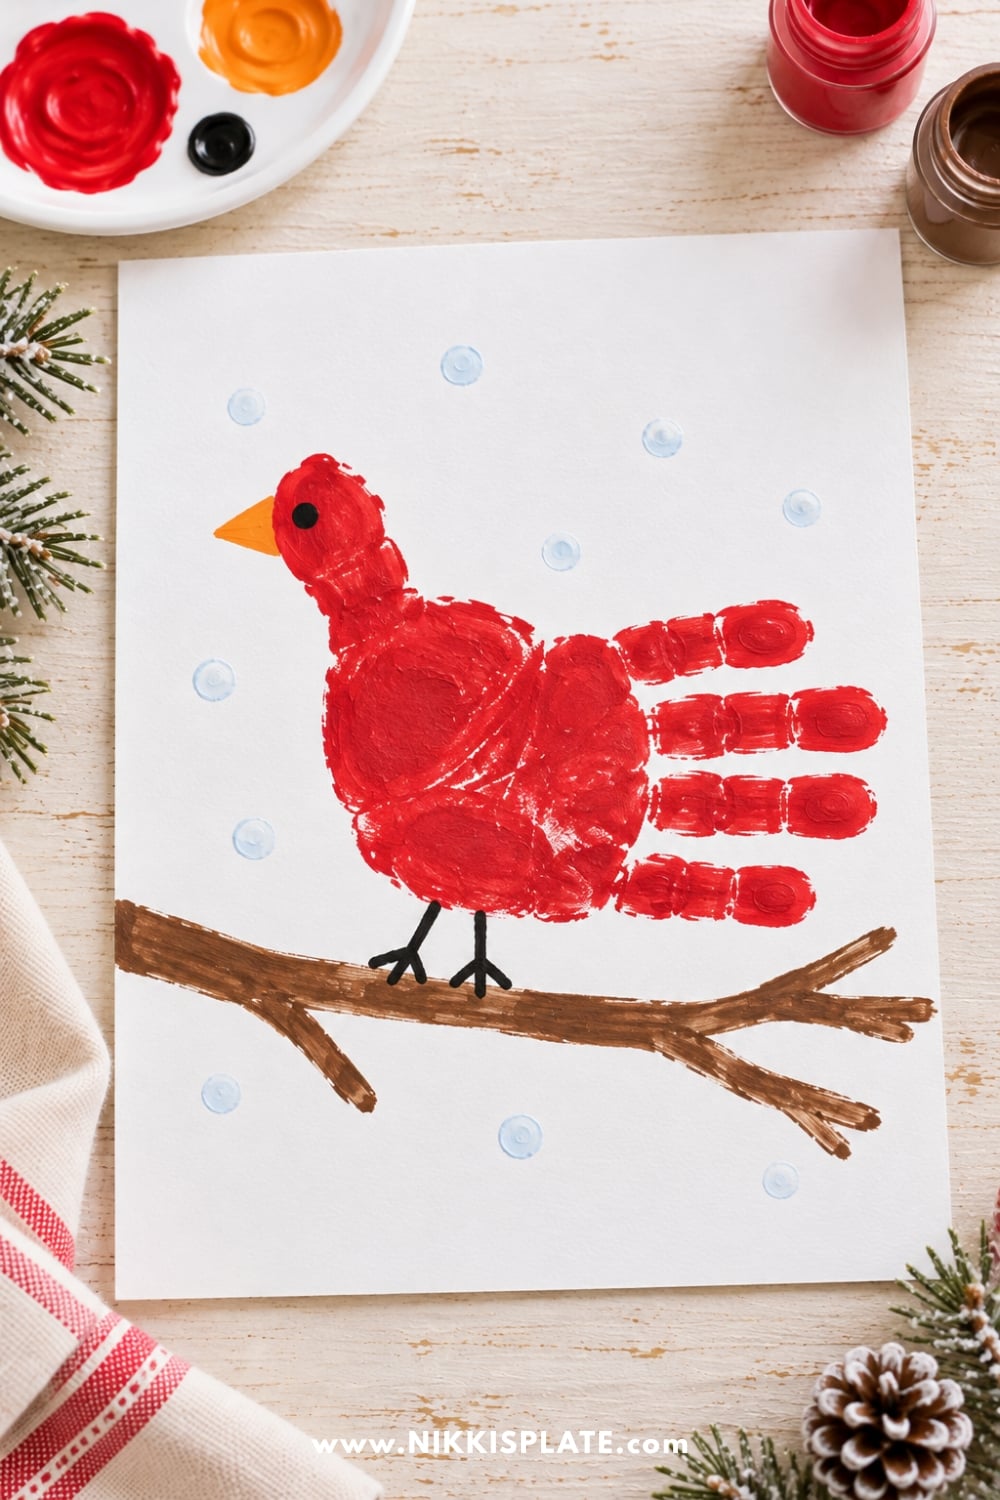
A sideways red handprint makes a winter bird with a long, feathery tail. A few marker details help turn the familiar hand shape into a cardinal sitting on a branch.
Materials: White cardstock, red finger paint, and black, orange and brown markers. Active time: About 15 minutes plus drying. Difficulty: Some adult help with the bird details.
- Position the hand sideways, with four fingers close together pointing right and the thumb angled up towards the upper left. Make one red print.
- After it dries, add a small eye and orange triangle beak at the tip of the thumb. The palm becomes the body and the four fingers become the tail.
- Draw two feet beneath the palm and a branch below them. Add a few snow dots around the bird if you like.
Little tip: Turn the paper to help position the print. The bird can face the other direction if that is more comfortable for your child.
9. Little Hand Christmas Mittens
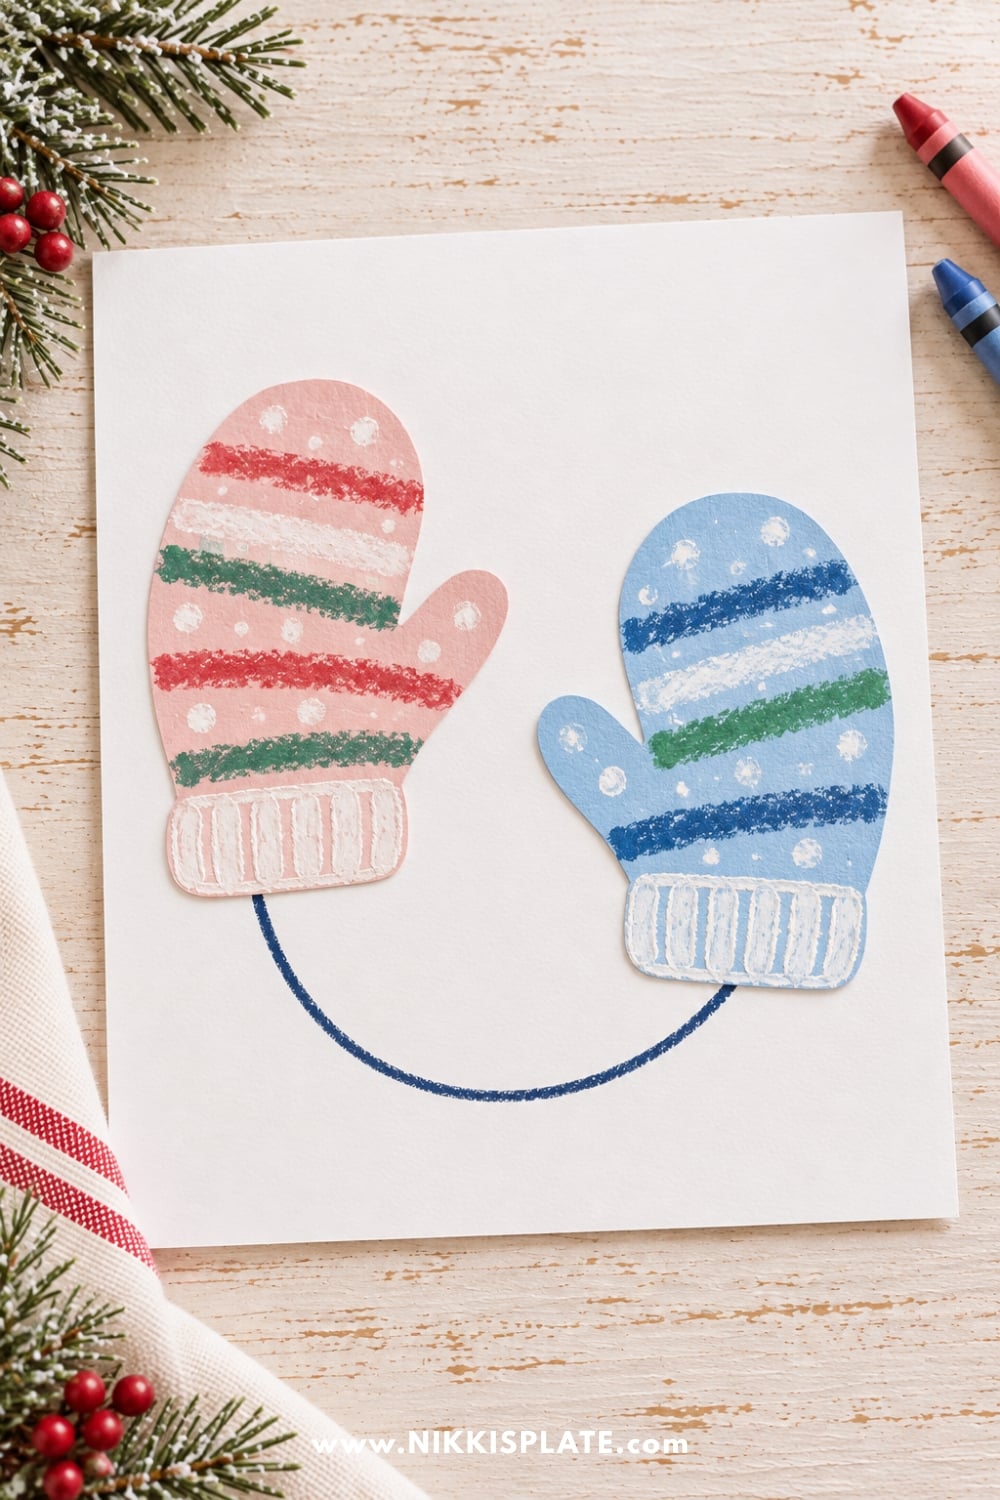
This paint-free idea captures the size of both hands in a pair of paper mittens. It is a useful choice for children who prefer colouring and gluing to getting paint on their skin.
Materials: Coloured paper, pencil, scissors, glue, a larger backing sheet and crayons or markers. Active time: About 15 minutes. Difficulty: Easy with adult cutting help.
- Trace each hand with the four fingers touching and the thumb extended. Draw a smooth curved line around the four fingertips to create the rounded top of each mitten, keeping the thumb outline.
- Have an adult cut out the mitten shapes, then let your child decorate them with stripes, snow dots or drawn cuffs.
- Glue both mittens onto a backing sheet. Draw a curved line between them as the mitten string and add the child's name and year.
Little tip: Decorate the full sheet before cutting if your child finds small paper shapes hard to hold.
10. Handprint Christmas Present Bow
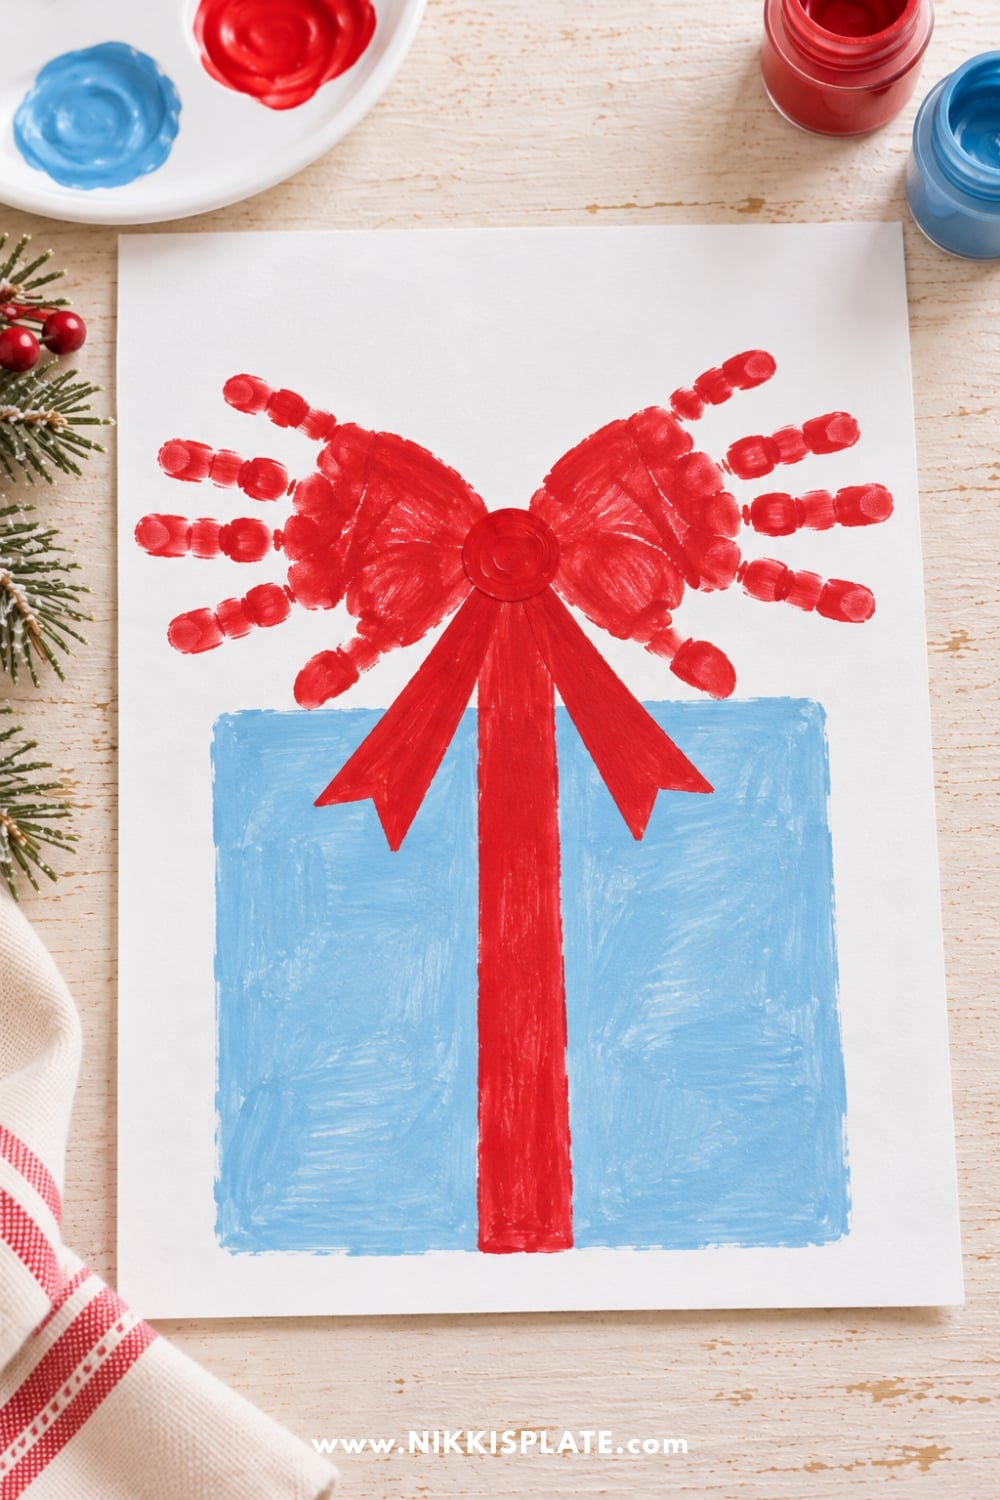
A pair of little hands becomes the bow on a Christmas present. This makes a sweet card for grandparents because the handprints sit right at the centre of the design.
Materials: White cardstock, red finger paint, and coloured markers or crayons. Active time: About 15 minutes plus drying. Difficulty: Adult help with positioning.
- Draw and colour a large gift box in the lower half of the paper. Add a vertical ribbon down the middle.
- Above the box, print one hand with the fingers pointing left and a second with the fingers pointing right. Let the wrist edges meet above the ribbon.
- Once dry, draw a small circle over the meeting point as the bow's knot. Add two ribbon tails pointing down towards the box.
Little tip: Let children decorate the gift box first, then help them add the handprint bow as the finishing touch.
11. Mistletoes Footprint Keepsake
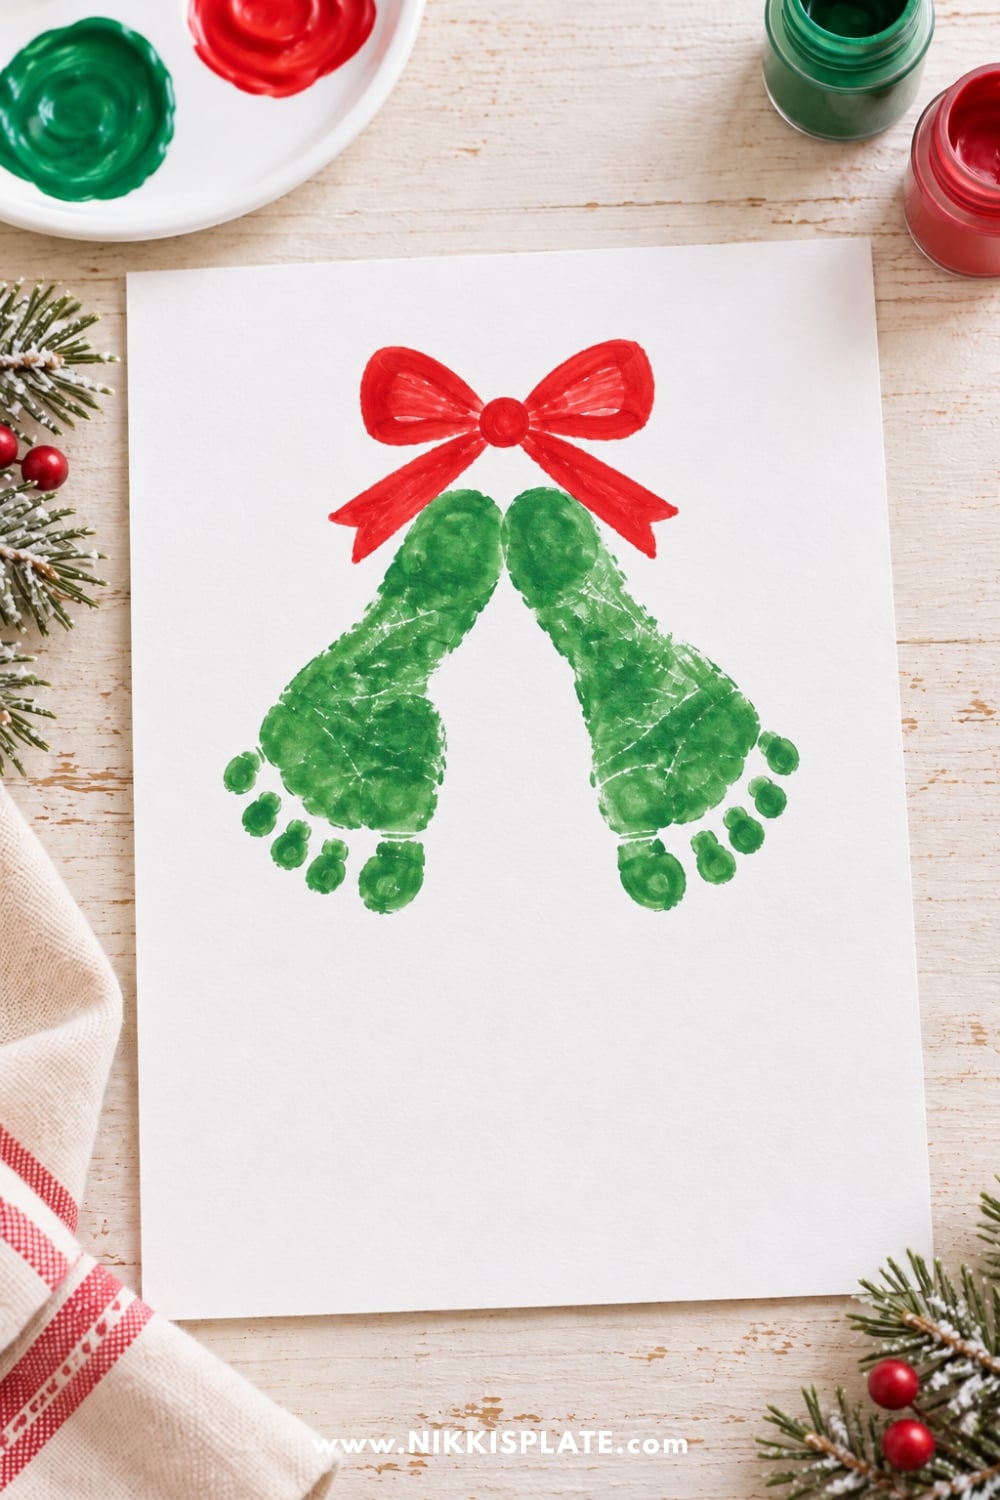
Two green footprints make a little mistletoe-inspired sprig. The toes are the detail to save, so keep the extra decoration light.
Materials: White cardstock, green finger paint suitable for the intended printing use, red marker and a pencil. Active time: About 10 minutes plus drying. Difficulty: An adult should manage the foot printing.
- Seat your child securely and apply a thin coat of paint to one sole, following the paint label. Bring the paper to the foot rather than asking the child to stand on it.
- Make two footprints with the heels near one another at the top and the toes pointing down and outwards in a gentle V.
- Wash and dry both feet. Once the artwork dries, draw a red bow above the heels and add "Mistletoes" beneath the prints.
Little tip: Trace both feet and colour the shapes green if painting feet does not suit your child or your supplies.
12. Footprint Snowman
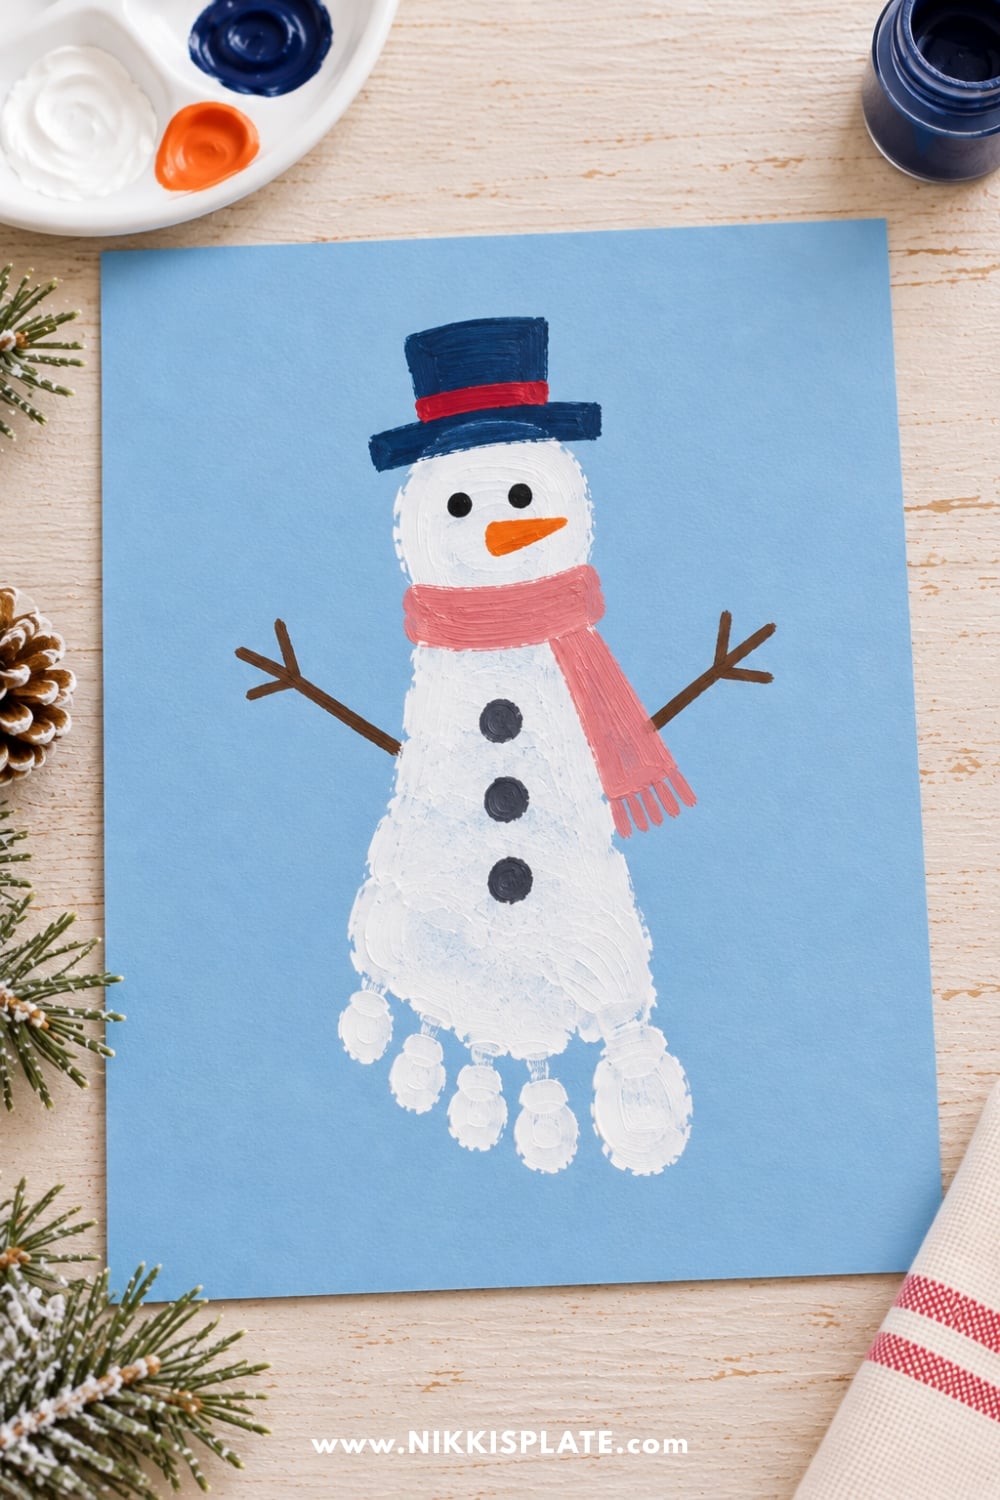
A white footprint turns into a snowman when the heel becomes the head. Pale blue or navy paper helps the print show up clearly.
Materials: Coloured cardstock, white finger paint suitable for the intended printing use, and black, orange and coloured markers. Active time: About 15 minutes plus drying. Difficulty: Adult printing help.
- With your child seated, make one white footprint with the heel towards the top of the page and the toes pointing down.
- Wash and dry the foot, then let the print dry. Draw eyes and a carrot nose in the heel area, and add a hat above it.
- Draw a scarf below the heel, buttons down the middle, and twig arms on either side of the footprint.
Little tip: An adult can add dark paper details with a glue stick if markers do not show clearly over the dried paint.
13. Fingerprint Christmas Lights
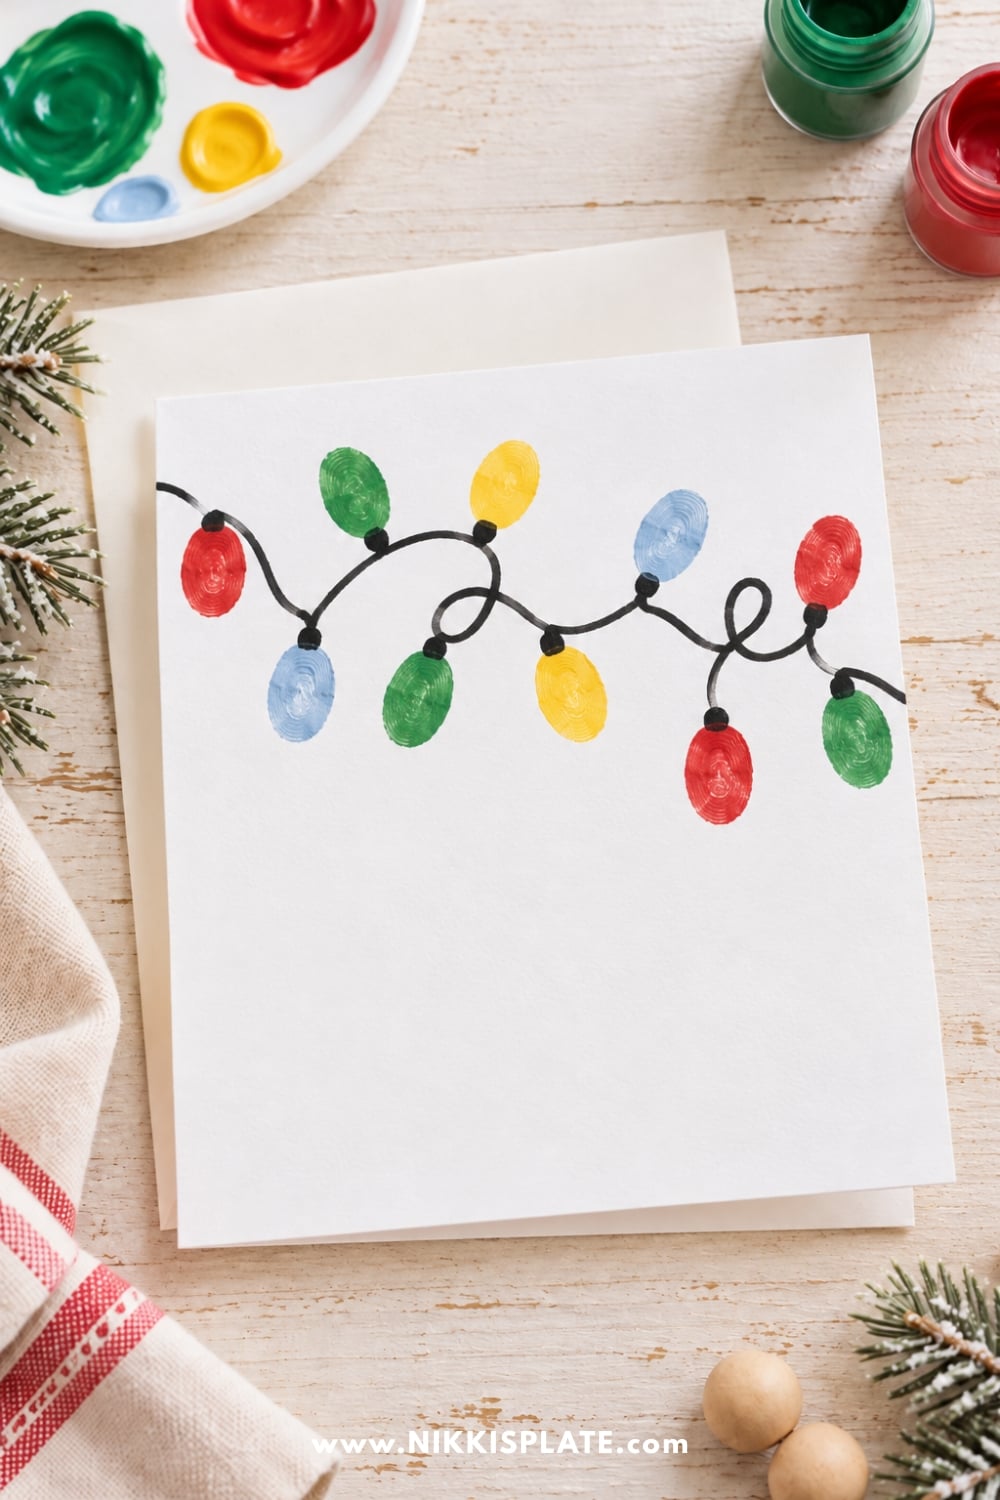
A strand of fingerprint lights is a lovely smaller project when a full handprint feels like too much. You can make it on a folded card or use it as a border around a family photo.
Materials: White cardstock, several colours of finger paint and a black washable marker. Active time: About 10 minutes plus drying. Difficulty: Easy with help drawing the cord.
- Draw a loose, looping line across the paper, leaving space around it for the bulbs.
- Add coloured fingertip prints beside the line, keeping a little gap between each print and the cord.
- Once dry, draw a short black connector between each fingerprint and the line to finish the string of lights.
Little tip: Wipe and dry the fingertip between colours, or use one colour at a time across the whole page.
14. Fingerprint Christmas Baubles
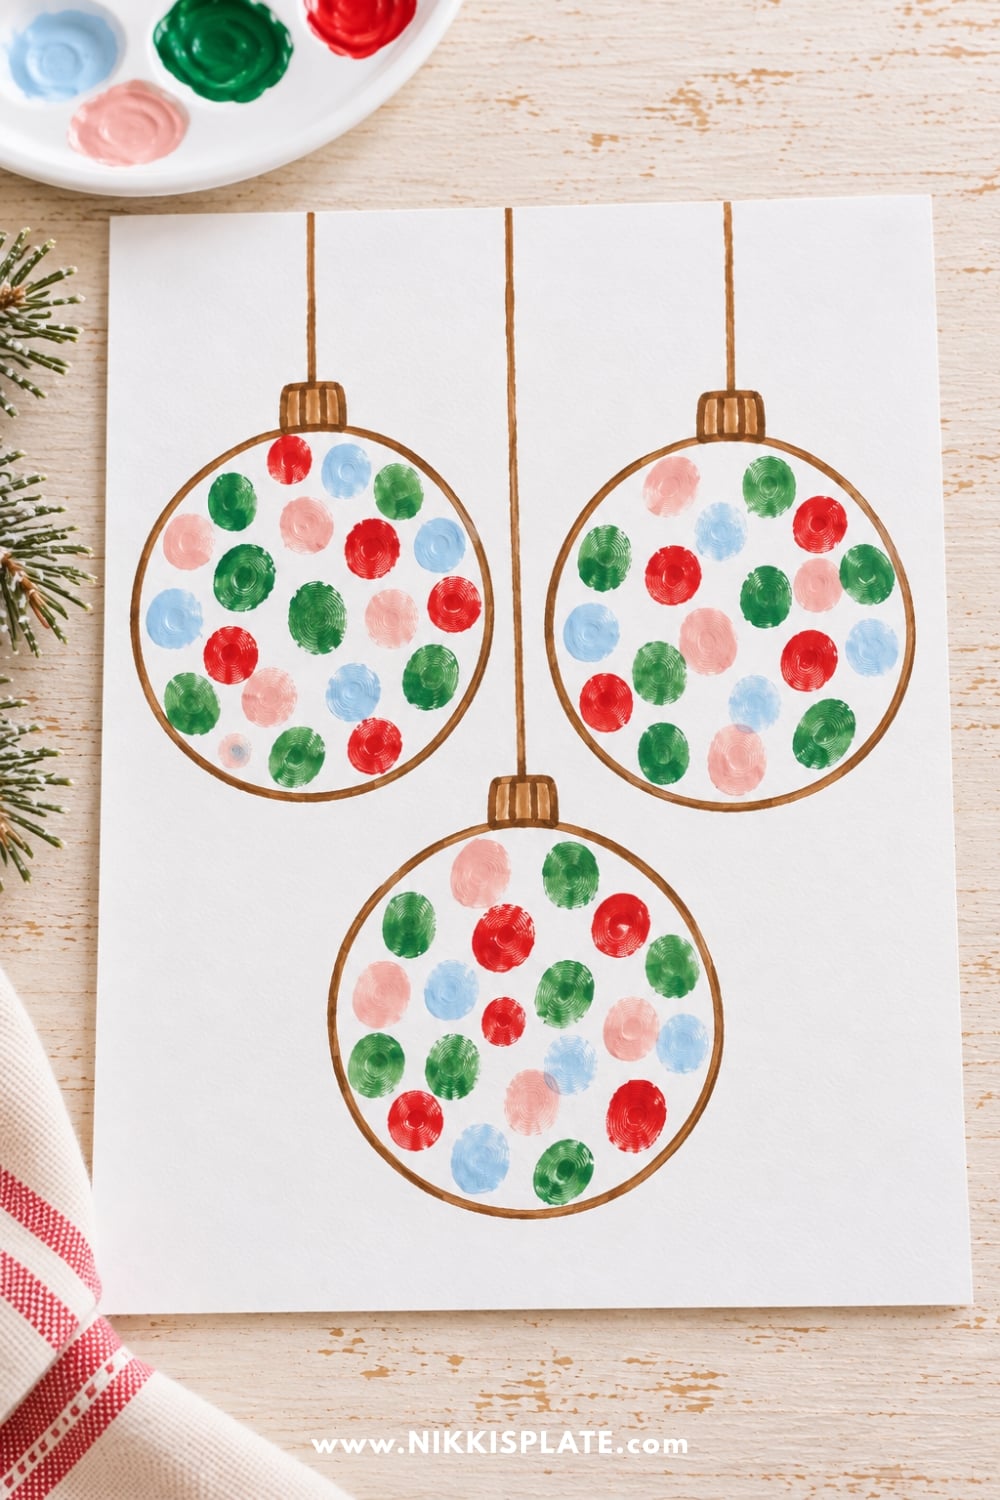
Turn a few drawn circles into colourful ornaments with tiny fingertip patterns inside. This is a good choice for children who enjoy choosing colours and filling a shape at their own pace.
Materials: White cardstock, a pencil, washable markers and finger paint. Active time: About 15 minutes plus drying. Difficulty: Easy with adult preparation of the circles.
- Trace two or three large circles with a cup or jar lid. Remove it, then draw a small ornament cap and hanging line above each circle.
- Let your child fill the circles with fingertip dots, using one or several colours. Leave a little white space between the prints.
- After the paint dries, go over the ornament outlines with marker and add a simple Christmas greeting.
Little tip: Keep the circles large enough for several fingerprints. Smaller circles can be frustrating for little hands.
15. Fingerprint Christmas Cookie Art
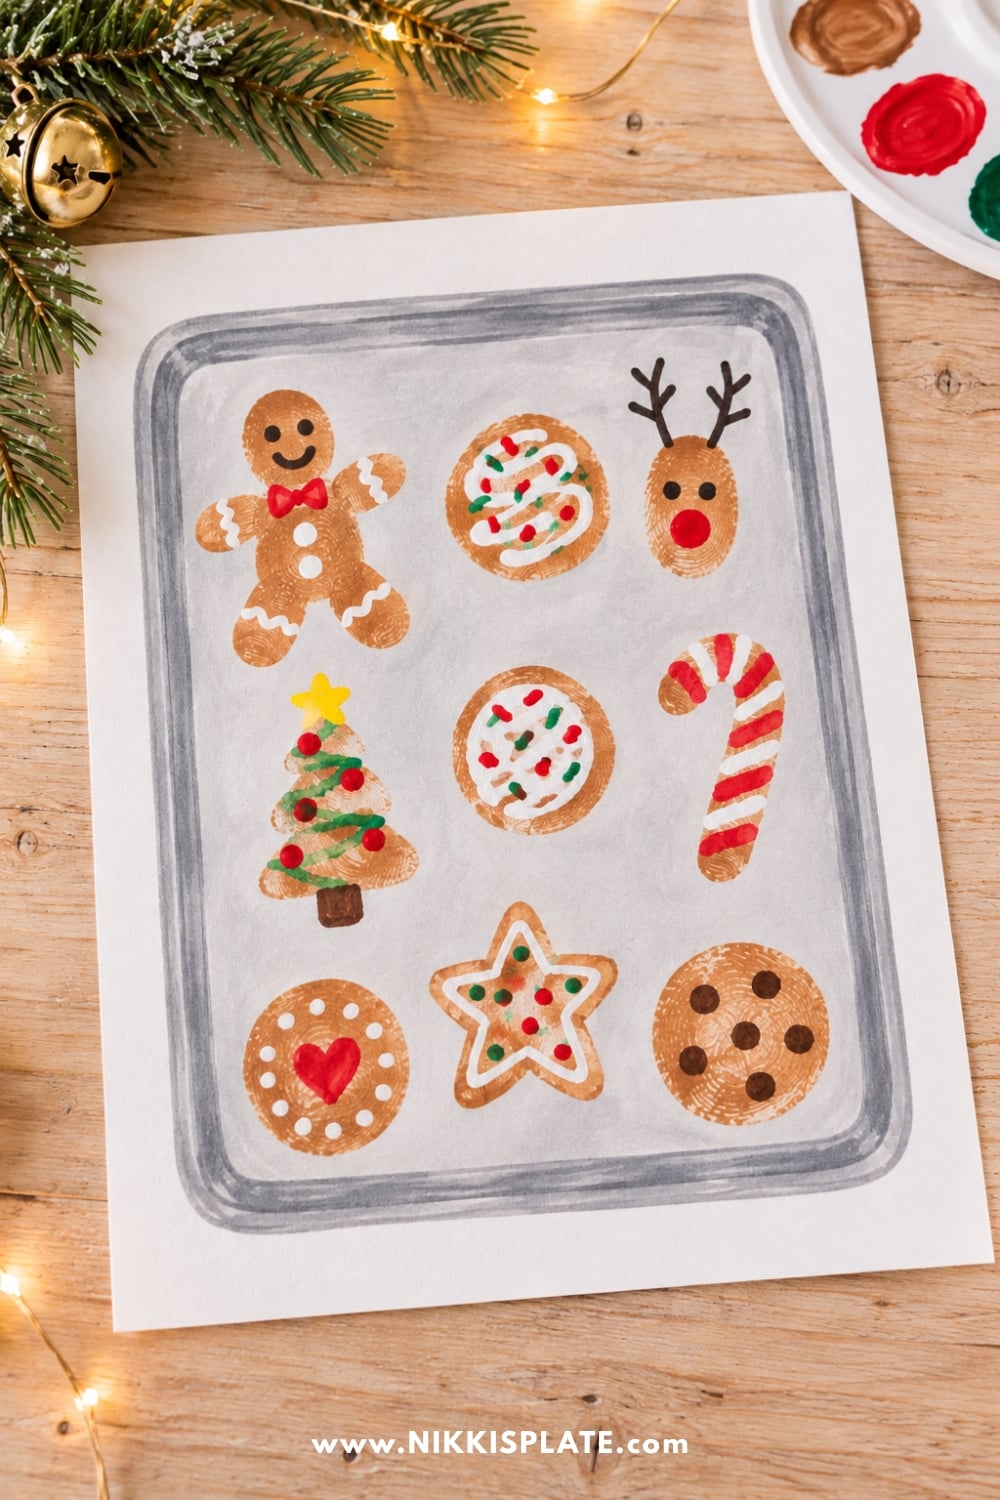
Little brown fingerprints become pretend Christmas cookies on a drawn baking tray. These cookies stay on paper, with simple crayon sprinkles and icing details added after the paint dries.
Materials: White cardstock, brown finger paint, a grey marker or crayon, and white and coloured crayons or pencil crayons. Active time: About 15 minutes plus drying. Difficulty: Easy with adult help drawing the tray.
- Draw a large rounded rectangle as a baking tray and add a smaller rectangle inside it to show the rim.
- Press brown thumbprints or fingertip prints inside the tray, leaving a gap between each pretend cookie.
- Once dry, add drawn white icing, coloured sprinkles or tiny chocolate-chip dots. Finish with a drawn oven mitt beside the tray if you like.
Little tip: Different-sized fingerprints make a charming mixed batch. Keep the actual snacks away from the paint table until hands are washed and craft supplies are put away.
Ways to Save and Gift Your Christmas Handprint Art
Write your child's name, age and the year on the back of each finished piece. A tiny note about what they added, such as choosing pink lights or drawing Santa's smile, can be just as lovely to rediscover later.
- Make a card: Fold the paper before printing, then leave room inside for a handwritten message.
- Frame a favourite: Choose a frame that fits the finished paper rather than trimming away fingertips or toes.
- Create a keepsake binder: Let the art dry completely before placing it in a clear sleeve: [[AFFILIATE LINK: acid-free archival-quality page protectors sized for the artwork]].
- Add a photo: Pair the artwork with a small picture of your child from the same Christmas. My DIY photo ornament ideas offer more ways to make a personal decoration.
- Make it a countdown: Add a craft day to your December plans. My Christmas activity Advent calendar includes ideas for building a family activity countdown.
Photograph each piece in good natural light before gifting it. Keep the camera parallel to the page and crop out the table edges so you have a clear digital copy.
More Christmas Activities for Kids
For another day of creating, browse my easy Christmas crafts for kids. The collection includes paper projects, homemade decorations and other seasonal activities beyond handprint art.
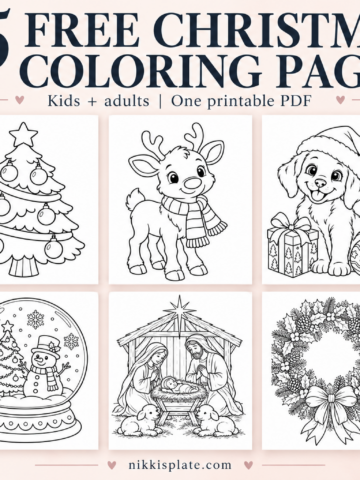
If you'd like a quiet colouring option while painted pages dry, try my free Christmas coloring pages or these farmhouse Christmas coloring pages. Older children who enjoy painting may also like these Christmas rock painting ideas.
Frequently Asked Questions
This post shares free ideas and instructions that you can use with blank paper or cardstock. It does not include a downloadable template bundle. My separate printable Christmas crafts collection is linked above if you would like ready-to-print paper activities.
Choose an approach that fits your child and the age guidance on every supply. For a baby or a child who still puts painted hands in their mouth, tracing a relaxed hand or foot is a practical way to capture the size without using paint on the skin. Do not force open a clenched hand or continue if your child is uncomfortable.
Give each child a different part of the picture, such as one set of reindeer antlers or a few lights on a shared strand. Use a larger sheet and label the prints on the back so you can tell whose is whose later. Let each painted layer dry before the next child adds an overlapping print.
Yes. Cards and paper keepsakes can be made whenever you have time, then stored flat once they are completely dry. Wait to seal them in an envelope or sleeve until there is no damp paint or tacky glue.
Some flat paper projects can be laminated, but test a spare painted sample first and follow the laminator and pouch instructions. Lamination is permanent and may change the appearance of the paper or paint. A removable sleeve or frame is another option when you want to preserve the original.
Some flat paper projects can be laminated, but test a spare painted sample first and follow the laminator and pouch instructions. Lamination is permanent and may change the appearance of the paper or paint. A removable sleeve or frame is another option when you want to preserve the original.
No. Choose a few favourites, save them for weekends, or make one when your child feels interested. A Christmas countdown can be a lovely structure, but the activities can fit around your family's plans.
A Christmas Keepsake to Remember
These Christmas handprint crafts for kids give you simple ways to turn an ordinary piece of paper into something personal. Start with one design, prepare the supplies, and let your child's little prints and creative choices shape the finished picture.
If you'd love to carry that idea through December, explore my Christmas keepsake countdown book, 25 Days of Little Hands. It's a lovely starting point for making little creations together and saving a reminder of this Christmas.
Until next time,



As Seen on TikTok
Come behind the scenes of our farmhouse build, decor projects, and cozy everyday life. Tap a video to watch, then follow @nikkisplate on TikTok for more.
Watch this video on TikTok
Watch this video on TikTok
Watch this video on TikTok



Leave a Reply