
Turn favorite family photos into Christmas keepsakes with 35 DIY photo ornament ideas, from wood slices and clear globes to felt frames, mini photo books, and printable crafts.
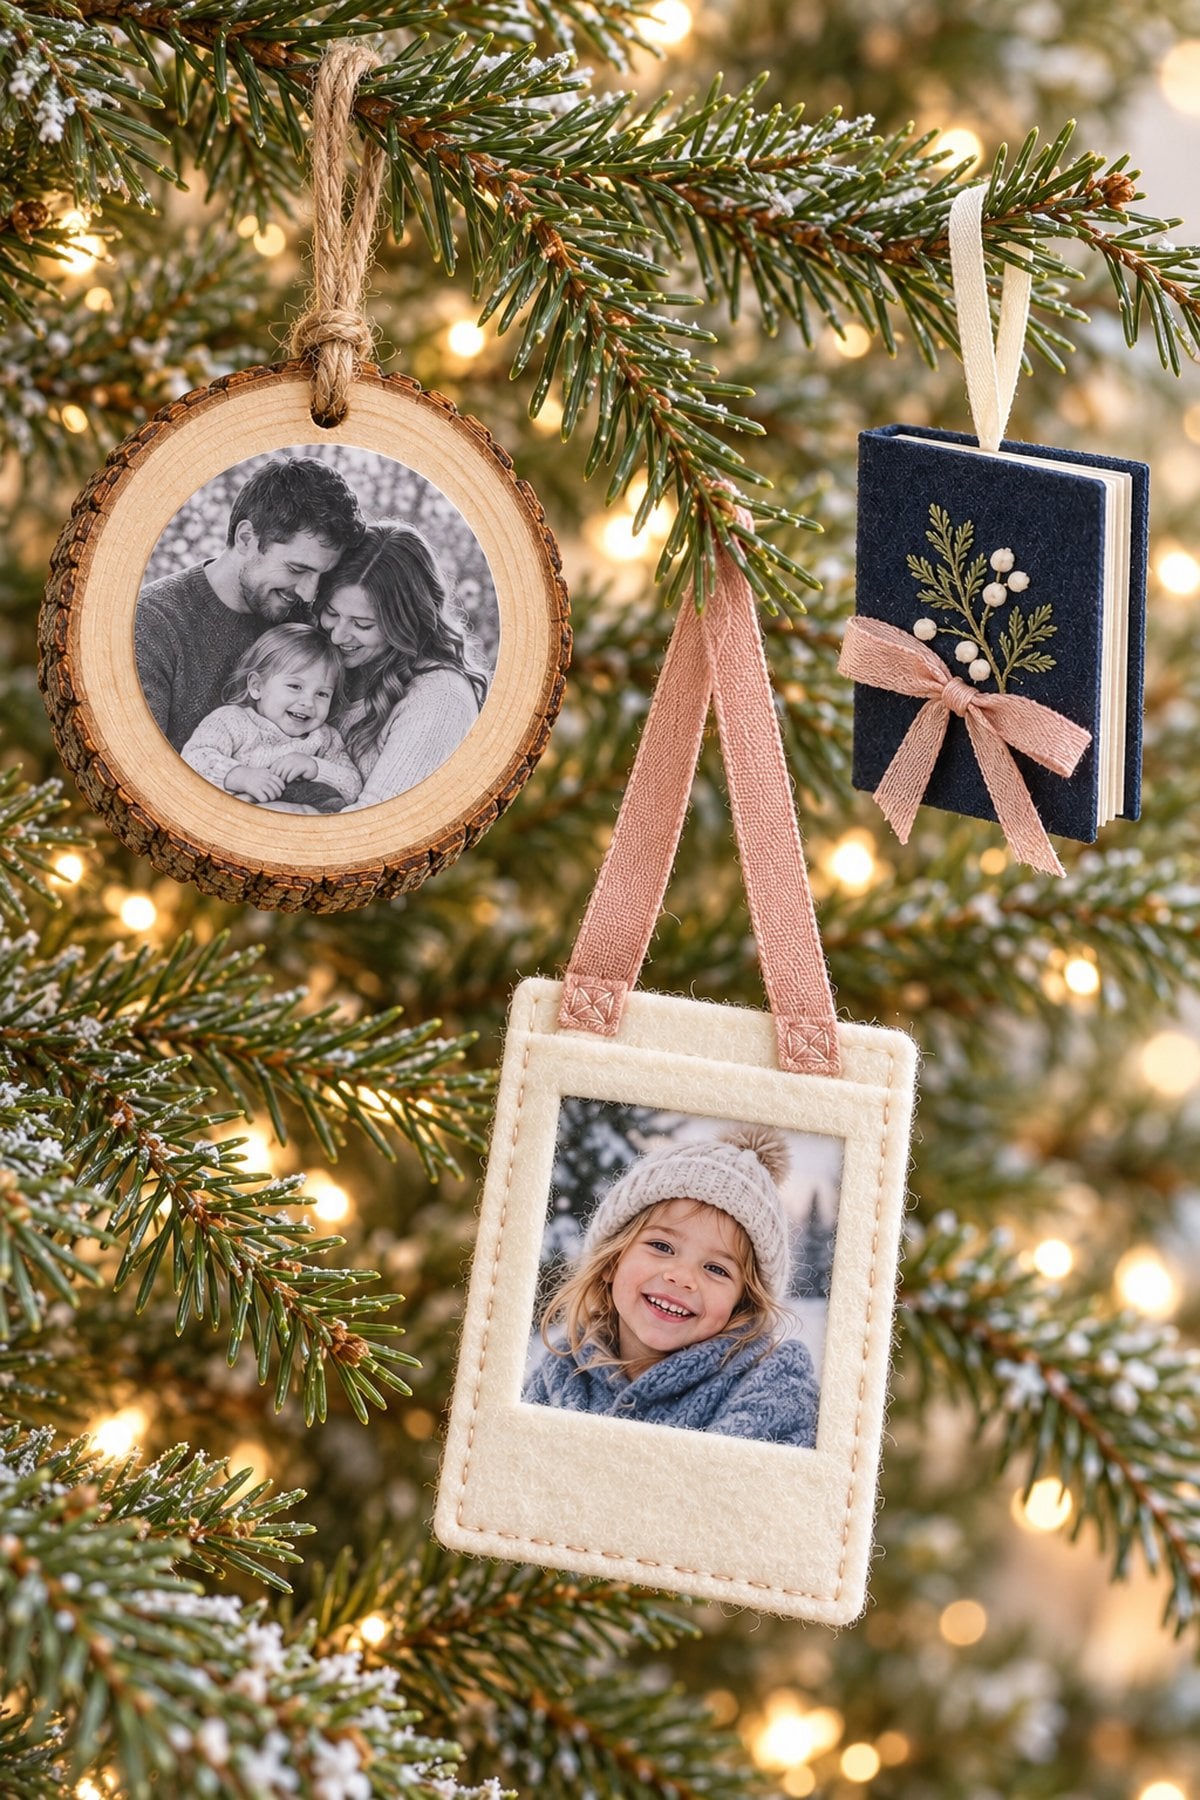
Hi Beauties! DIY photo ornaments are such a sweet way to turn favorite family pictures into Christmas decorations you can enjoy year after year. A small photo, a simple frame, and a ribbon hanger are enough to get started, and these 35 ideas give you plenty of ways to make each keepsake your own.
You'll find rustic wood slices, clear photo globes, colorful crafts for kids, soft felt frames, and little photo books that hold more than one memory. Choose a school picture, a baby photo, a pet portrait, or a snapshot from a favorite trip. They also make thoughtful handmade gifts for grandparents!
Start with the supplies you already have, then choose the project that fits your comfort level. For more family craft ideas, browse my easy Christmas crafts for kids, or try the photo-frame design in my printable Christmas crafts for kids collection.
Choose the Right Photo Ornament for Your Project
- For a simple first project: try a mini picture frame, pom-pom border, or printable paper ornament.
- For a rustic Christmas tree: choose a wood slice, mason jar lid, or nature-inspired frame.
- For children helping with decorations: use paper, craft sticks, felt, and glue labeled for their age. Adults can prepare the base and trim the photo.
- For several favorite pictures: make a photo collage, mini accordion book, or wooden photo cube.
- For a soft keepsake: try a felt pocket or quilted fabric frame.
Use copies of your pictures, especially when working with vintage family photographs. Measure the opening before printing, leave a little room around faces, and test the fit with plain paper first.
Supplies for DIY Photo Ornaments
You only need the supplies for the project you choose. These basics cover many of the ideas below:
- Copies of your photos, printed to fit the ornament
- Cardstock or clean, sturdy cardboard for backing
- Small frames, craft sticks, wood rounds, or clear ornaments
- Scissors, a pencil, a ruler, and a hole punch
- Glue or photo-safe adhesive appropriate for the materials
- Ribbon, yarn, or twine for a hanging loop
- Optional paint, felt, pom-poms, or paper decorations
Children need supervision with scissors and small parts. Leave hot glue, drilling, glass handling, ovens, irons, and laminators to adults. Keep tiny decorations and finished ornaments out of reach of children who still put things in their mouths.
How to Make a Simple Photo Ornament
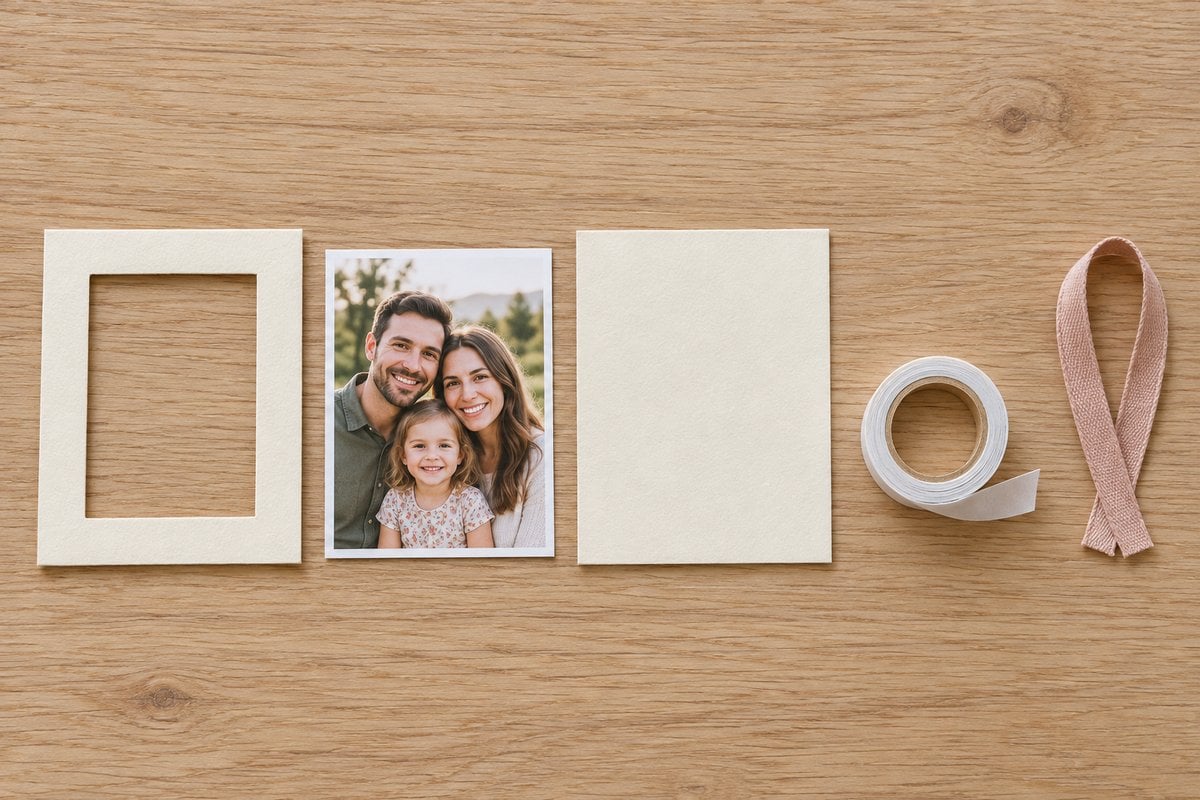
- Choose a base. A cardboard shape or small photo frame is a good starting point.
- Measure and print. Check the opening, crop the photo to fit, and print a copy. Test the size before cutting your final print.
- Attach the picture. Use an adhesive suited to the photo and backing, keeping glue away from the visible surface unless the product is designed for that use.
- Add a hanging loop. Fasten ribbon or twine to the base rather than relying on the photo paper to support the ornament.
- Finish the back. Add a backing if needed and write the name and year. Let adhesive dry or cure according to its label, then gently check the hanger before displaying it.

35 Creative DIY Photo Ornament Ideas
1. Wooden Snowflake Frame Photo Ornament

This wooden frame snowflake photo ornament blends simplicity with timeless holiday charm. Start with a small unfinished wood frame or embroidery hoop, add a black-and-white photo for a vintage feel, and decorate with wooden snowflake cutouts. The neutral tones and natural materials fit beautifully into farmhouse or Scandinavian-style Christmas decor. This is a nice project for children to decorate after an adult assembles the frame. Keep snowflakes away from faces so the picture remains the focus. Photo inspiration: Blonde Butterfly Home.
2. Clothespin Airplane Photo Ornament

Turn your little one into the pilot of a festive holiday airplane with this DIY clothespin photo ornament! Made from painted clothespins, mini craft sticks, and a touch of red-and-white baker's twine, this playful project makes a whimsical addition to your Christmas tree. It's an especially fun craft for kids - and a creative way to showcase their photo in a unique, memory-filled ornament.
BUY POPSICLE STICKS HERE
3. Salt Dough Photo Frame Ornaments

These classic salt dough photo ornaments are the perfect mix of handmade charm and sentimental value. Made with just flour, salt, and water, these ornaments are easy to bake, paint, and personalize with your favorite family photos. Seal them with Mod Podge to preserve the images and tie on a red ribbon for a timeless farmhouse Christmas touch.
4. Clear Globe Photo Ornament

This clear glass globe photo ornament adds a timeless and elegant touch to your Christmas tree. Simply roll your printed photo into a glass ornament, then secure it with a small piece of double-sided tape to hold it in place. Finish the look with a velvet ribbon or bow for a cozy, vintage-inspired feel that makes every memory sparkle under the twinkle lights.
5. Rustic Wood Slice Photo Ornament
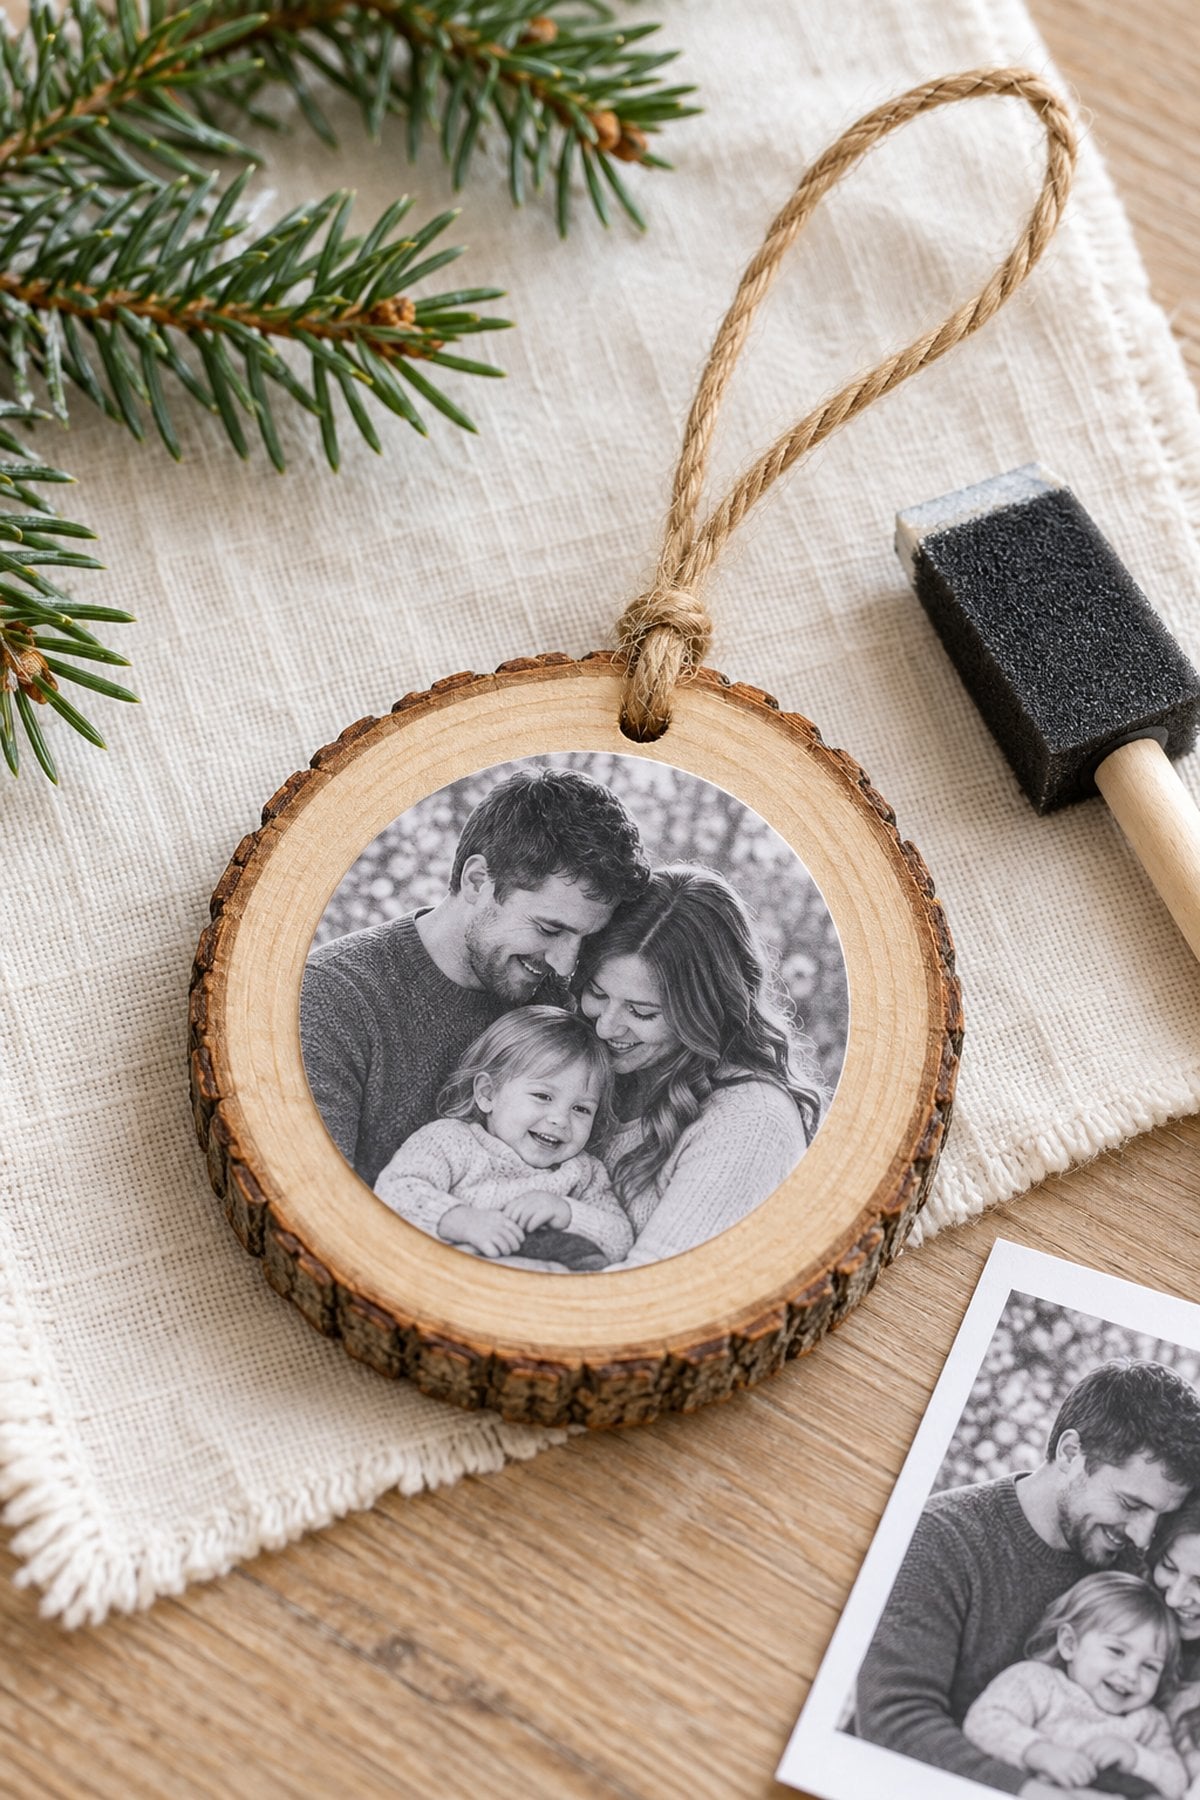
Bring natural farmhouse charm to your Christmas tree with this rustic wood slice photo ornament. Simply print your favorite family photo, mod podge it onto a smooth wood round, and finish with a jute twine hanger or bow. The warm wood tones and handmade texture make this ornament feel both timeless and cozy - a perfect keepsake for rustic or farmhouse-style holiday décor.
6. Clay Gingerbread Person Photo Ornament

These clay gingerbread photo ornaments by The Bland House are as sweet as they look! Crafted from brown polymer or air-dry clay, each gingerbread figure features a mini photo "face" and white painted icing details. Stamp names and the year into the clay before baking to create personalized keepsakes that your family will treasure for years to come.
7. Glass Frame Holiday Card Ornament

If you love a clean, modern look, this glass frame photo ornament is a beautiful way to showcase your family holiday card. Simply place a printed photo or mini card between two glass panes and secure it with a delicate frame or pressed-metal ornament holder. The result is a simple yet stunning keepsake that catches the twinkle of your tree lights and adds a personalized touch of elegance.
8. Nature-Inspired Photo Frame Ornament

These nature-inspired photo ornaments are perfect for anyone who loves earthy, organic holiday decor. Each frame is decorated with natural materials like mini pinecones, dried seed pods, or berries, creating a rustic woodland look. Pair your photos with a red or twine ribbon for hanging, and you'll have a beautiful ornament that feels both festive and handmade.
9. Mason Jar Lid Photo Ornament

These mason jar lid photo ornaments are a timeless favorite for farmhouse-style Christmas trees. Simply insert your printed photos inside the jar lid rings, add a backing of burlap or kraft paper, and tie them with twine or ribbon. The metallic rims and vintage-inspired look pair perfectly with cozy, neutral holiday décor - and they're easy enough to make in an afternoon.
10. Painted Pasta Photo Frame Ornament

These DIY pasta frame photo ornaments are a creative and nostalgic way to showcase cherished family photos on your tree. Made by gluing pasta noodles around small circular frames, then painting them in festive hues, these ornaments are full of charm and personality. The playful texture of the noodles, combined with vintage black-and-white photos, gives them a whimsical, handmade feel that's perfect for a family craft night.
11. LEGO Wreath Photo Ornament
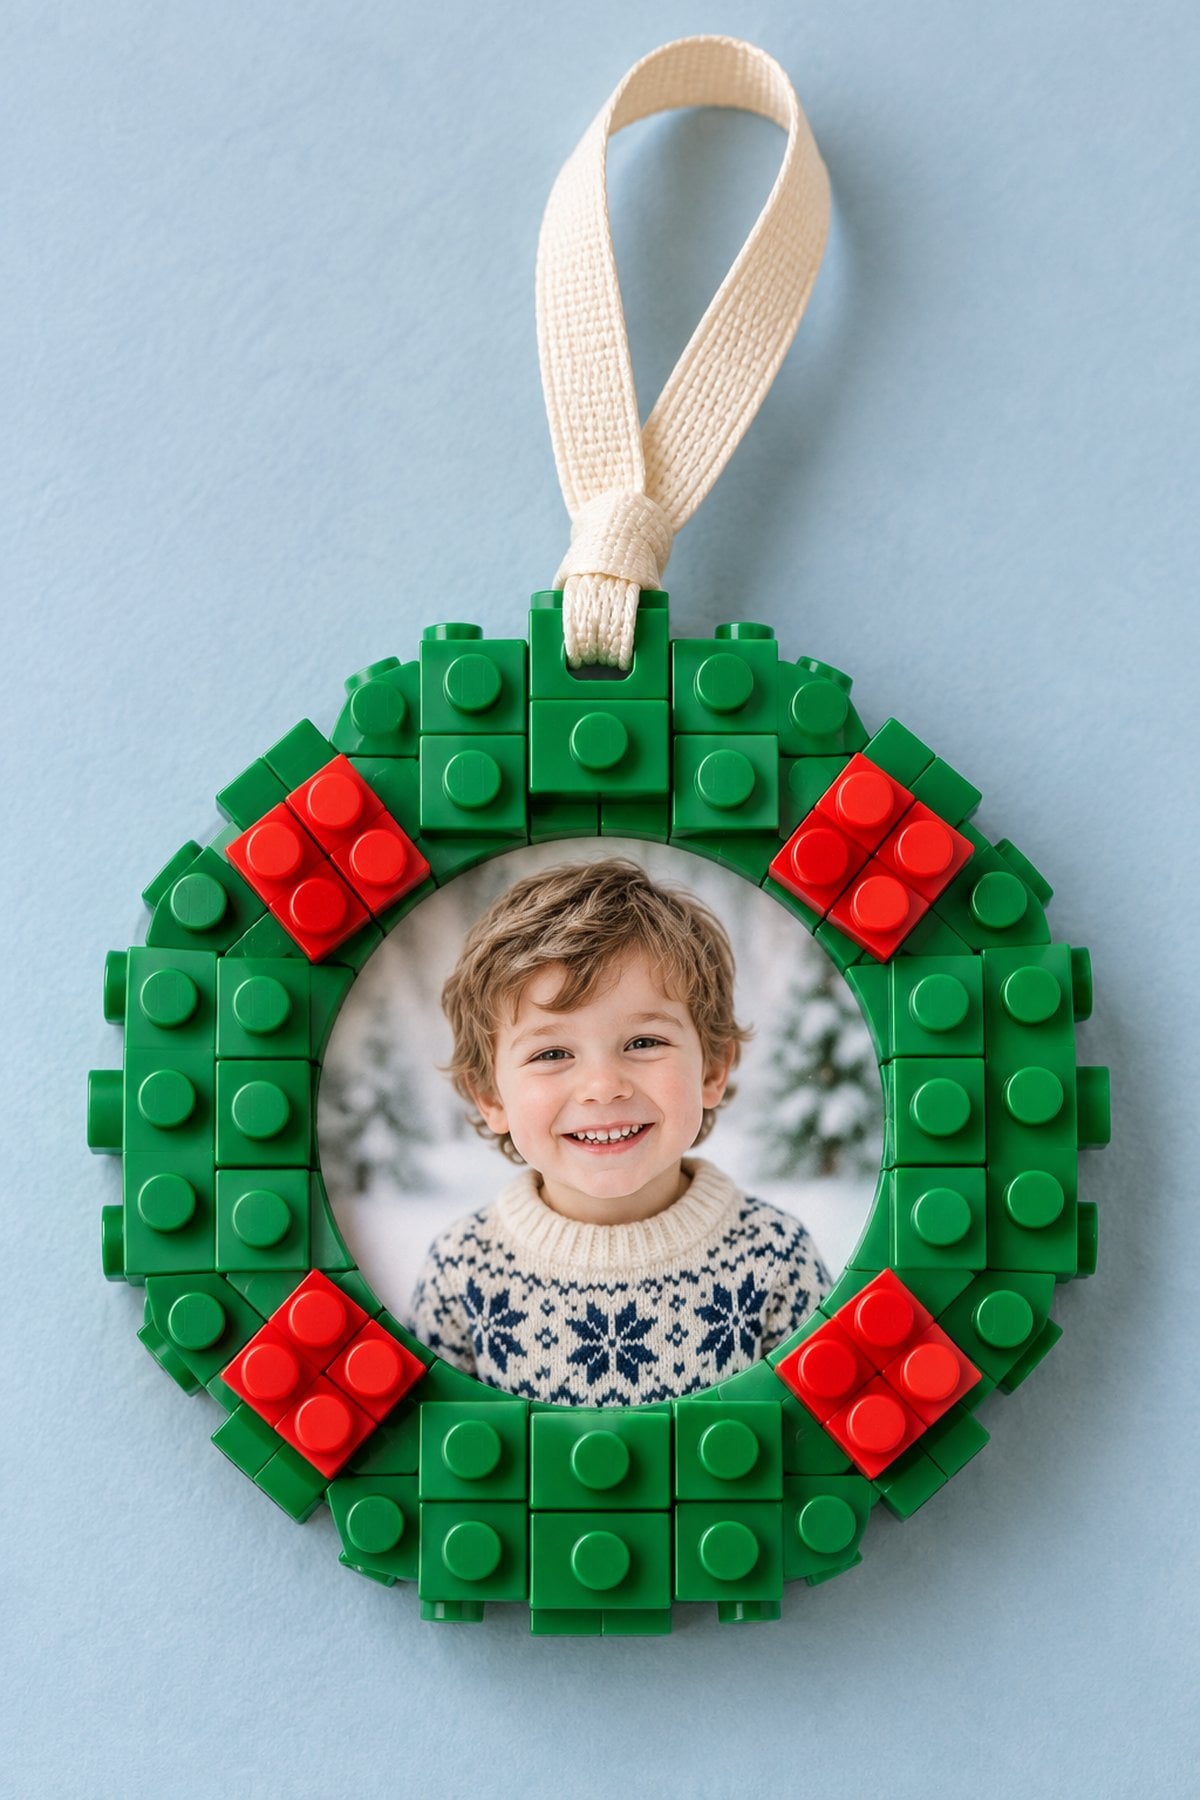
This DIY LEGO wreath photo ornament is a fun and festive craft for kids (and kids at heart!). Using green LEGO bricks to form a circular wreath shape, add red pieces for "berries," and attach a small photo in the center. Tie it with ribbon or string to hang on the tree. It's a playful and creative way to combine family memories with everyone's favorite building blocks!
12. Puzzle Piece Photo Frame Ornament
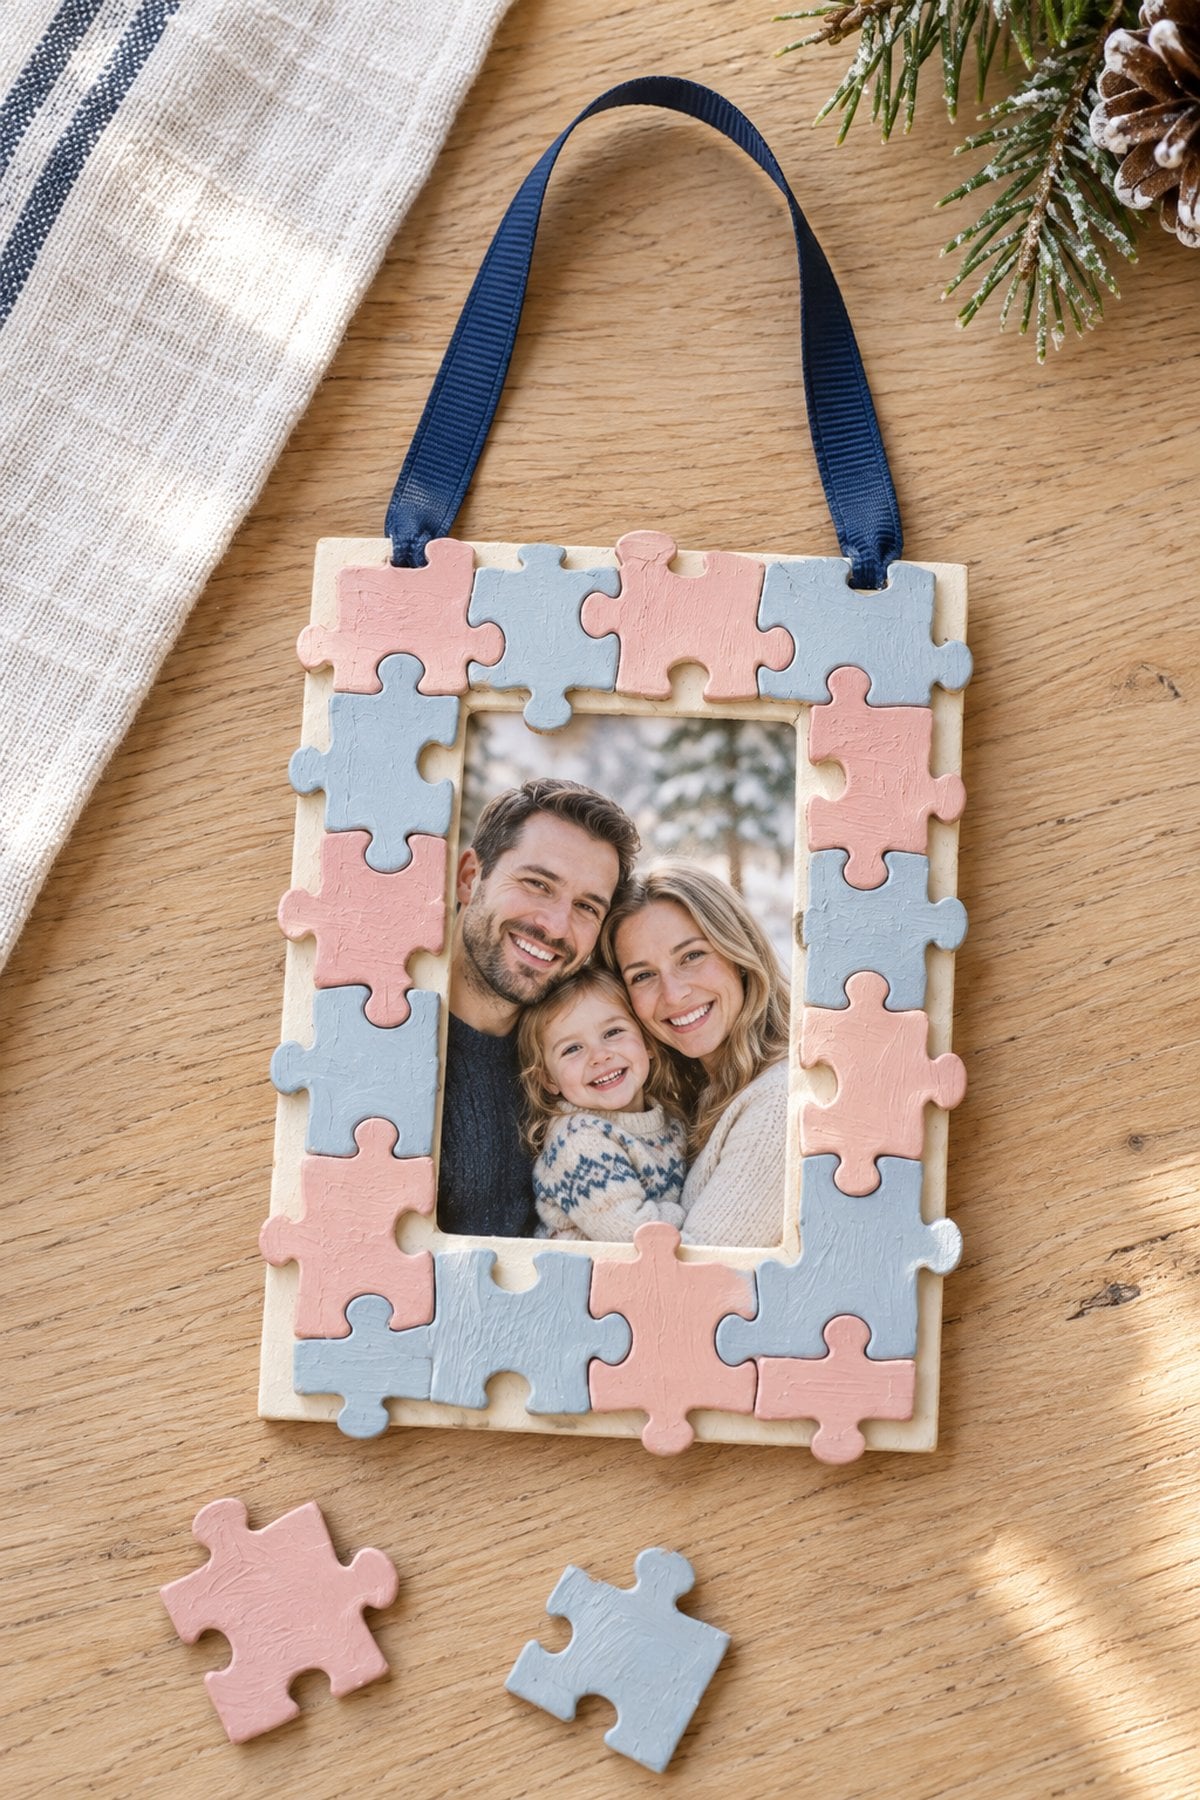
These DIY photo ornaments and puzzles combine creativity and personalization for a fun family project. Each ornament is made from lightweight wood in festive shapes like stockings, gingerbread houses, and snow globes-perfect for displaying your favorite photos. For an extra playful touch, turn your printed photos into mini puzzles that fit right into the ornament frames. They make wonderful keepsakes and thoughtful handmade gifts for loved ones.
13. Dry Snow Globe Photo Ornament
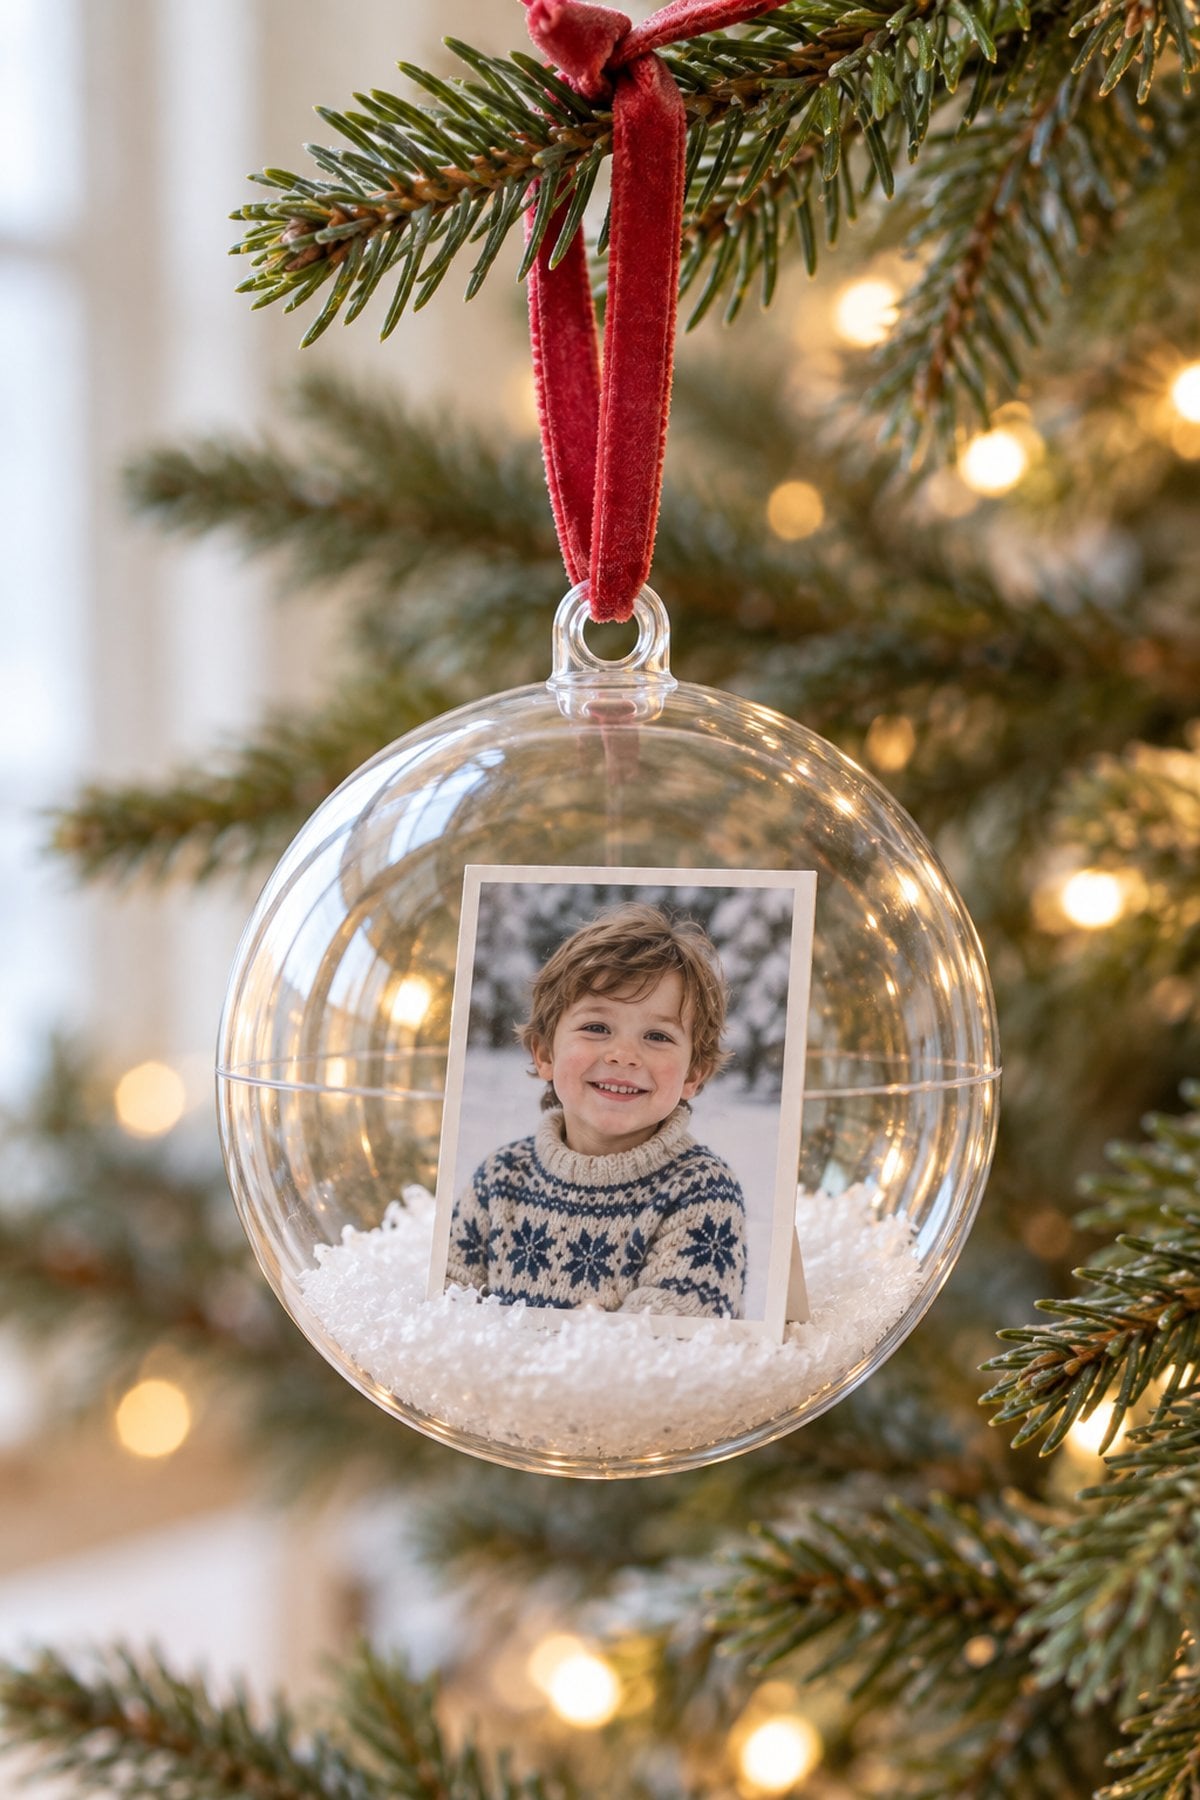
This clear snow globe photo ornament is a magical way to display cherished memories. Simply print and curl your photo to fit inside a clear plastic or glass ornament, then add faux snow and seal the top with a festive bow. The snowy effect gives your ornament a cozy, wintry charm that sparkles beautifully under the Christmas lights-perfect for baby's first Christmas or sentimental family photos.
14. Vintage Gold Portrait Frame Ornament

This vintage gold frame photo ornament adds a timeless and elegant touch to your Christmas tree. Use a small round gold frame, slip in a favorite family or baby photo, and tie it with a soft velvet ribbon for a refined look. The warm metallic tones pair beautifully with flocked branches and neutral ornaments, giving your tree that classic heirloom feel while keeping your memories front and center.
15. Felt Polaroid Photo Pocket Ornament
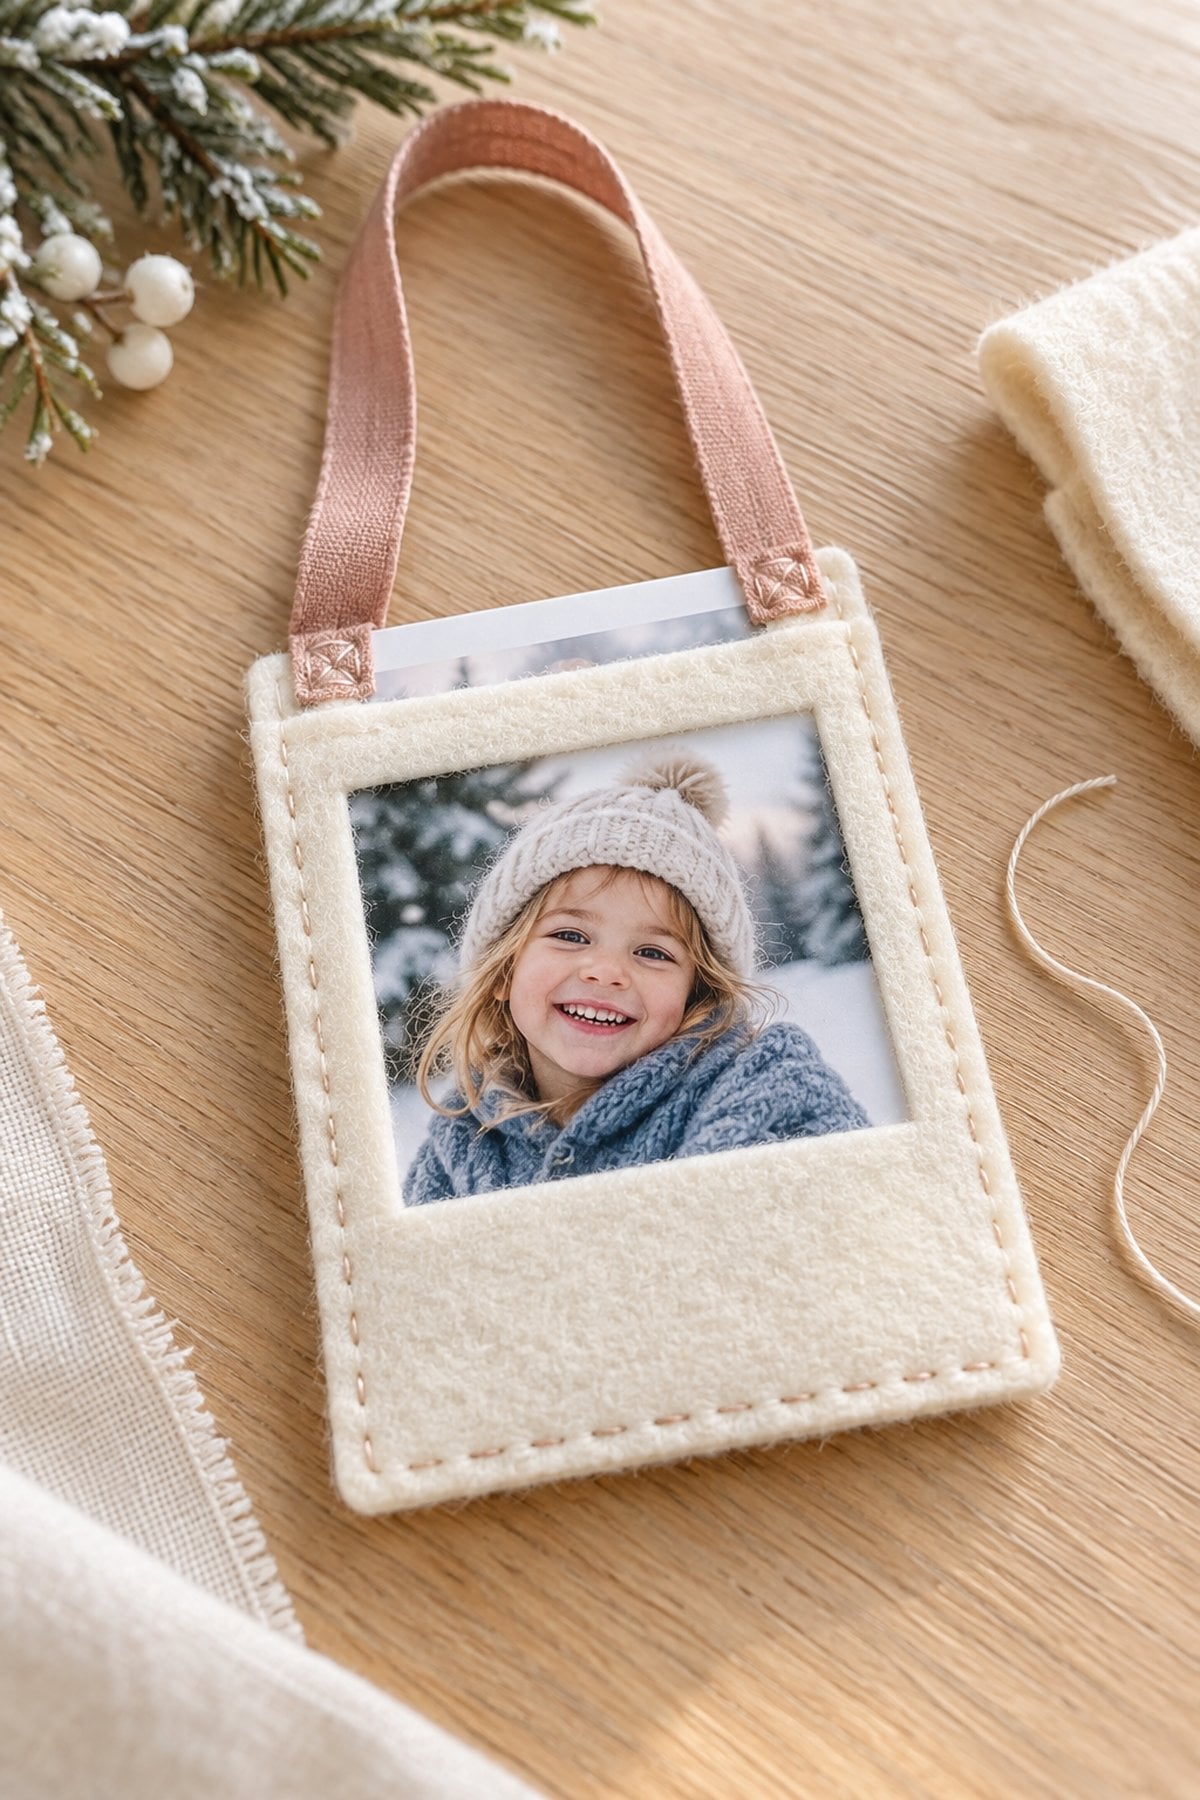
Cut two felt rectangles slightly larger than your printed picture. Make a square window in the front piece, leaving a wider strip underneath for that instant-photo look. Stitch the sides and bottom to the backing, keeping the top open so the photo can slide into the pocket.
Attach a ribbon loop securely to the backing. A close-fitting pocket helps hold the print in place, but you can add a small removable tab at the opening if needed. This soft frame is a lovely beginner sewing project with adult help for needles.
16. Christmas Tree Photo Collage Ornament
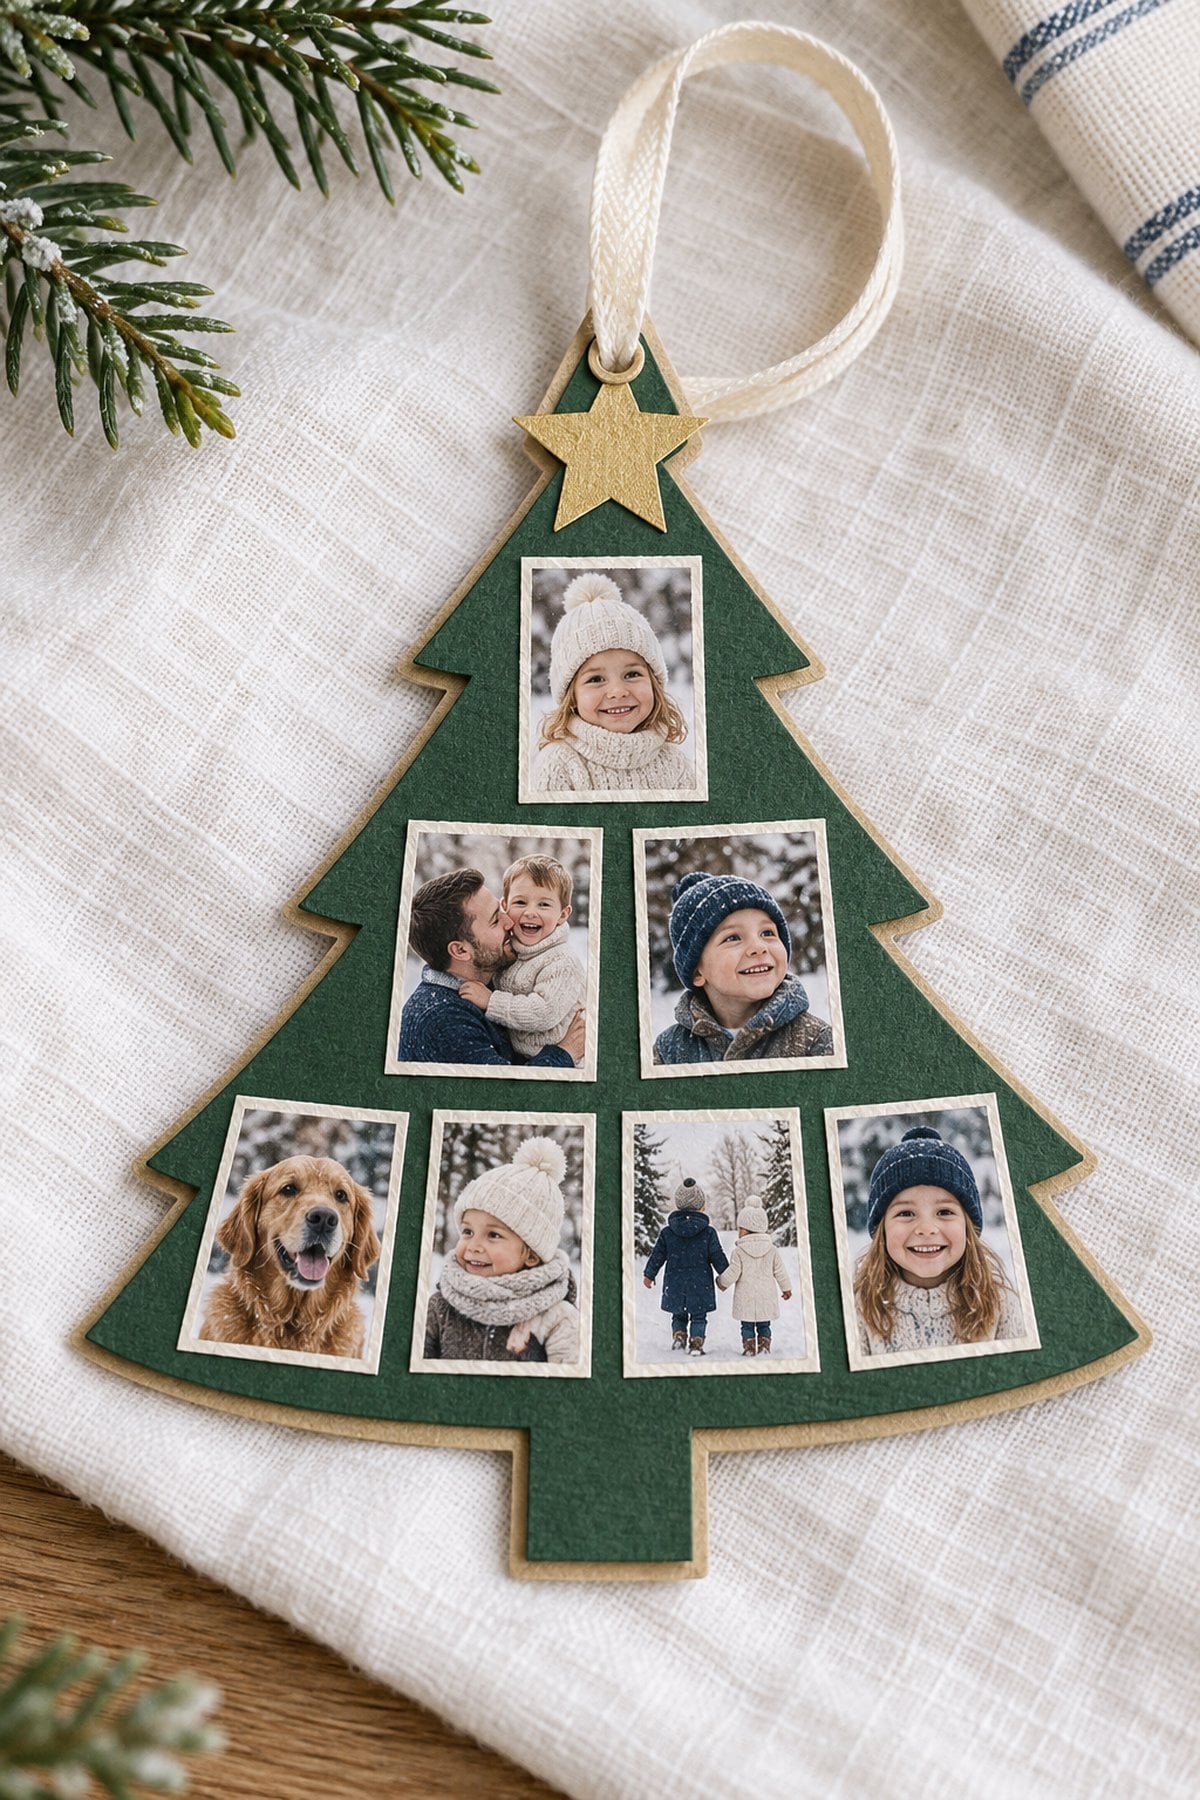
This DIY Christmas collage photo ornament is a creative way to showcase multiple memories in one festive keepsake. Arrange several small photos into the shape of a Christmas tree, then add a star topper and the year for a personalized touch. It's a fun project for families who love documenting each holiday season - and it makes a perfect gift for grandparents or loved ones.
17. Mini Bauble Photo Frame Ornament
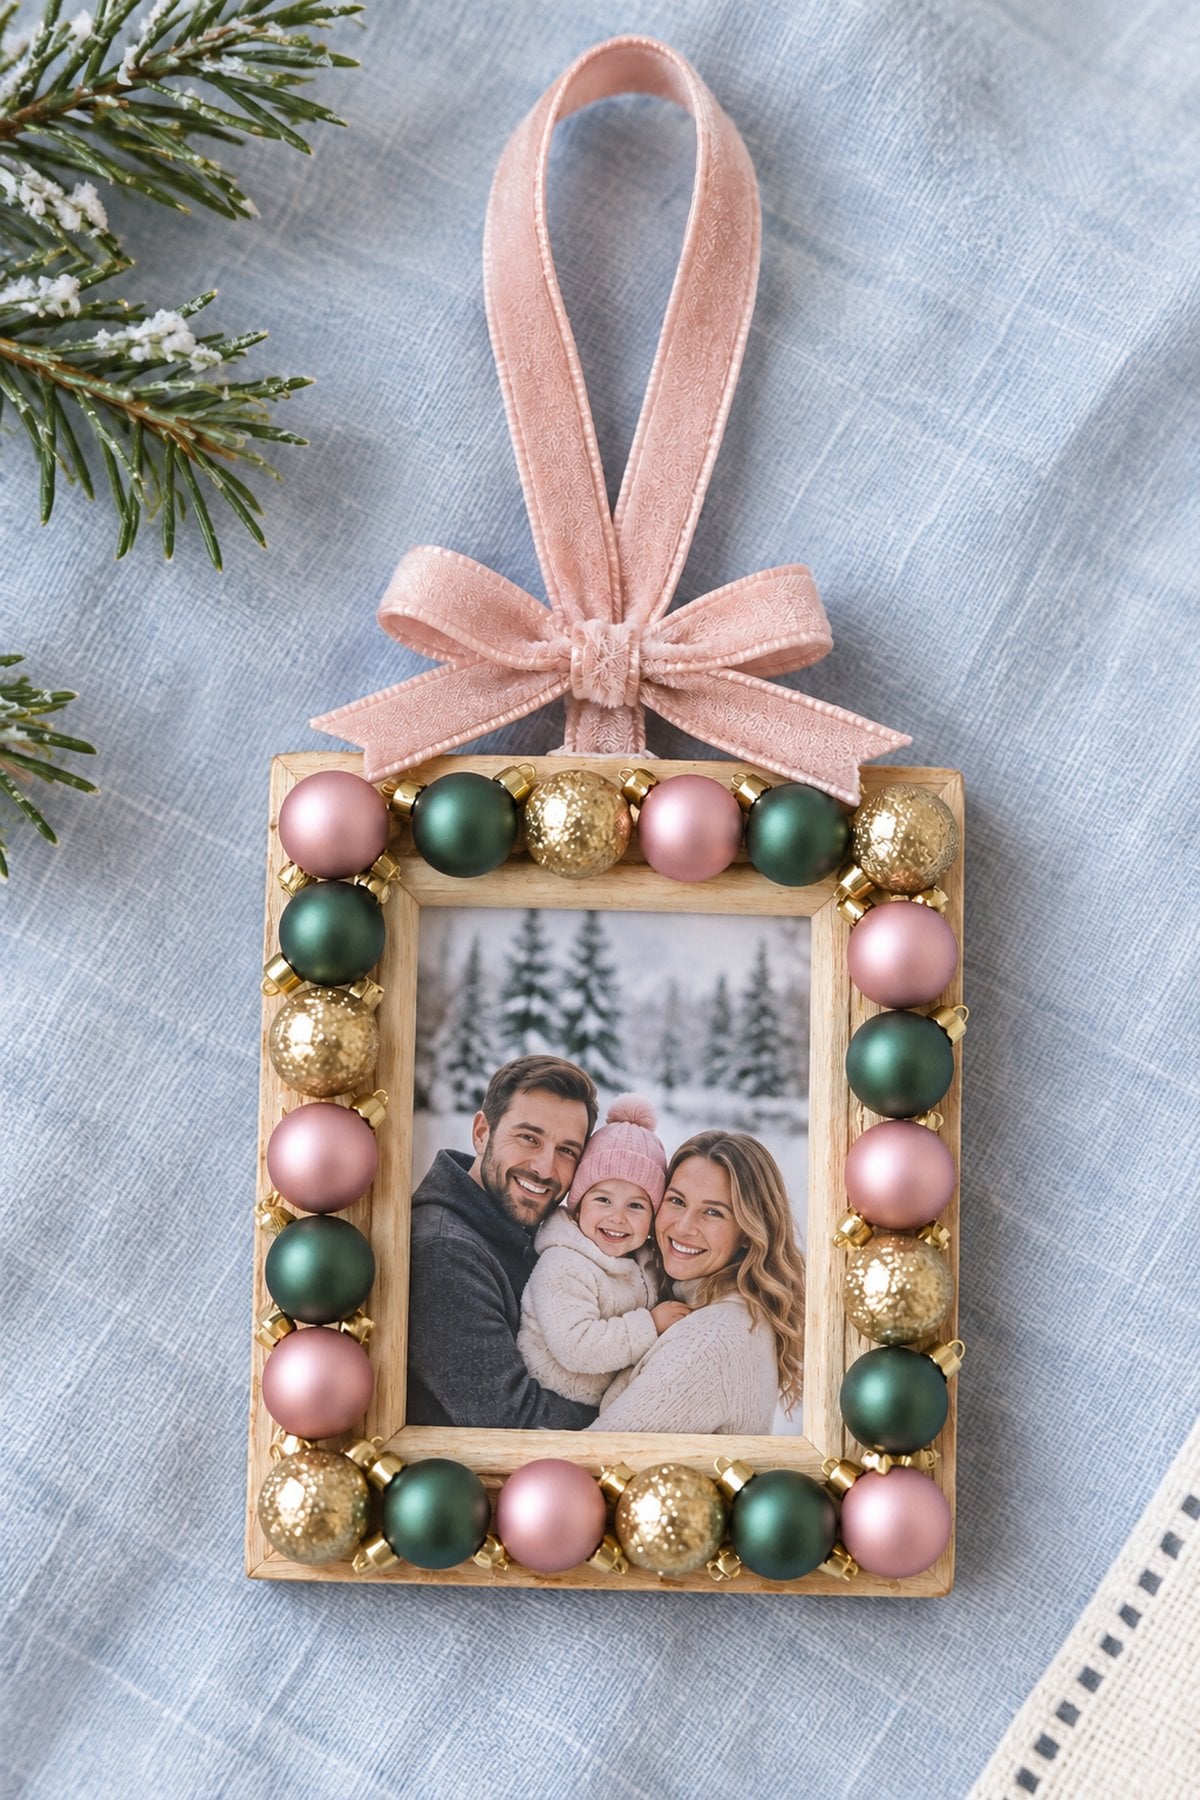
Bring a burst of color to your Christmas decor with this colorful bauble frame photo ornament. Start with a simple photo frame and hot glue mini ornaments around the edges in bright shades of pink, green, gold, and red. Add a velvet ribbon bow for a soft, festive touch. This playful and glamorous ornament pairs beautifully with modern or maximalist holiday themes and makes a lovely handmade gift idea.
18. Piped Craft Clay Photo Frame Ornament
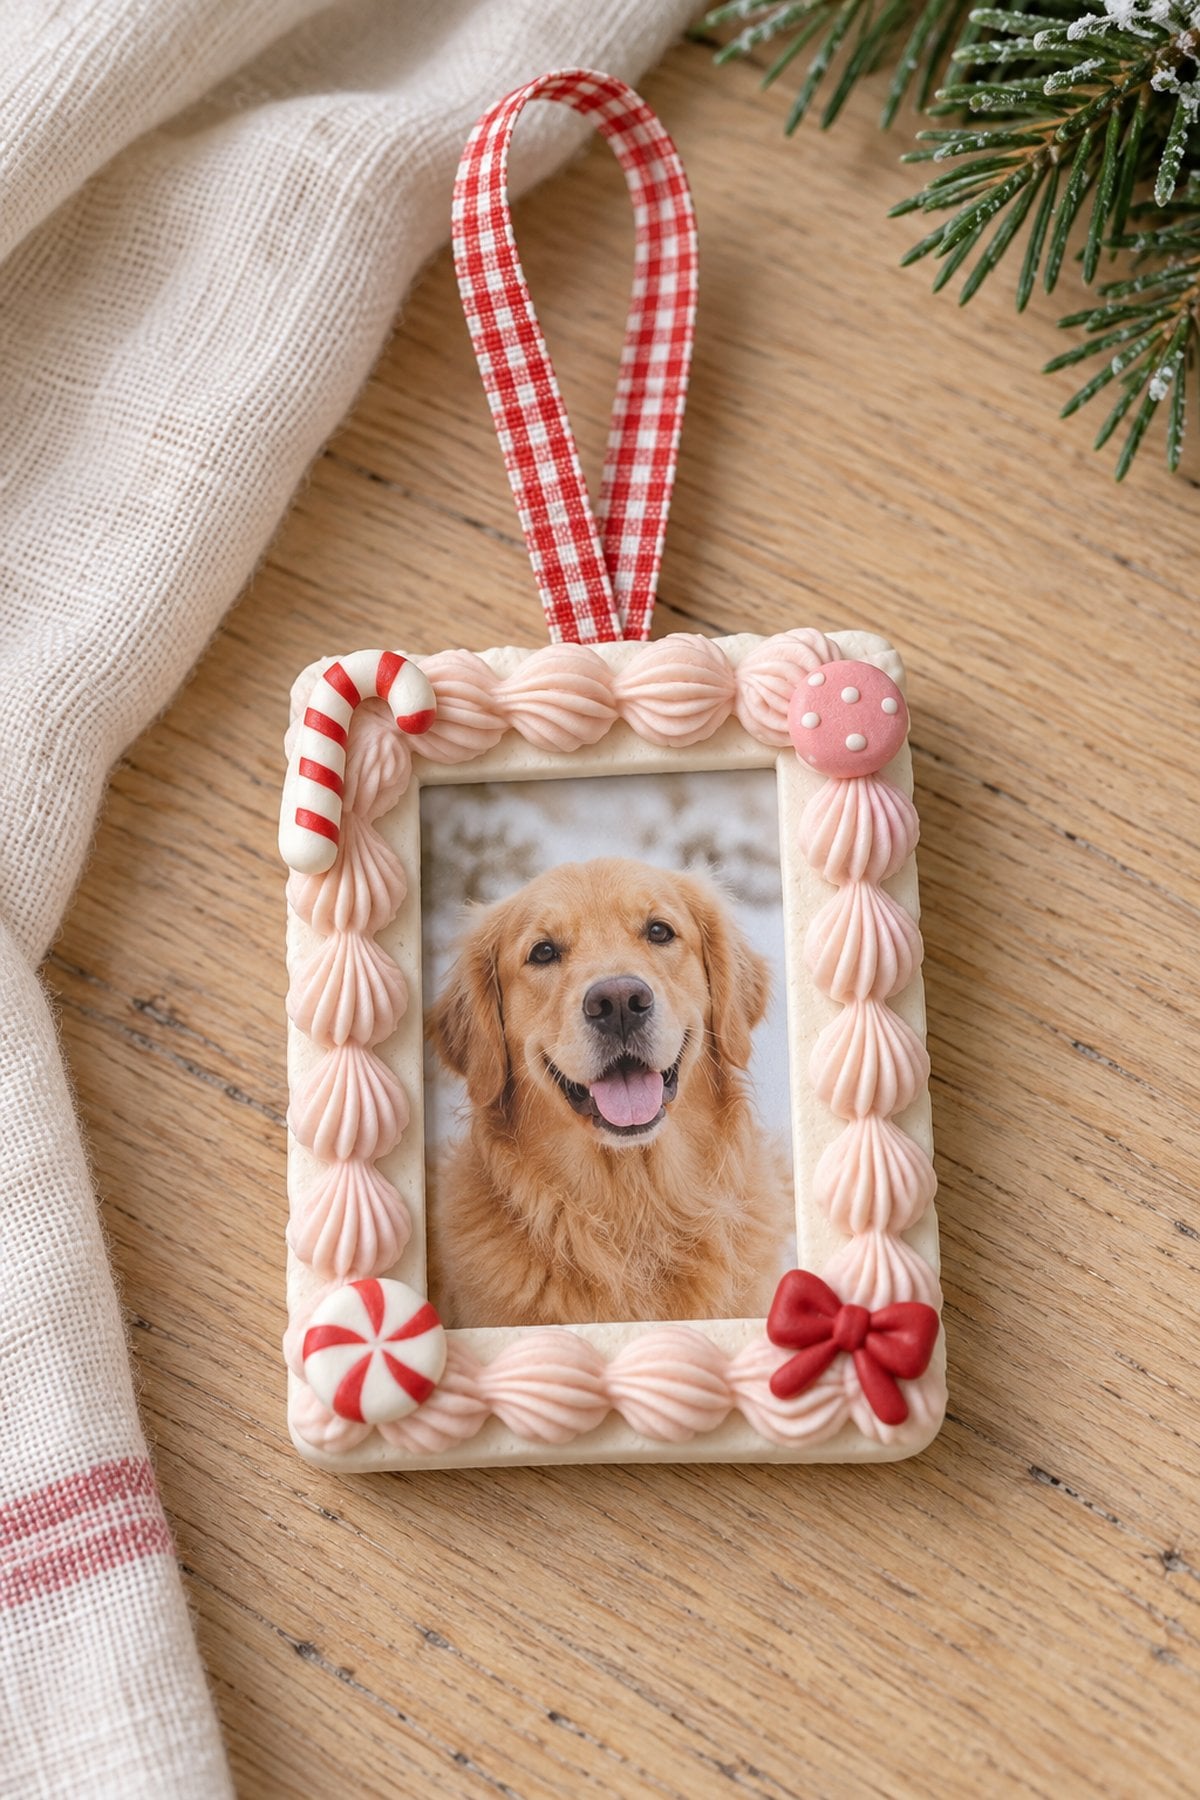
Use a lightweight frame and a ready-made craft product specifically designed for piping or decoden decoration. Pipe a border around the opening, add a few lightweight candy-shaped embellishments, and let the material dry or cure according to its label. Insert the photo only after the border is ready.
Choose supplies intended for the age and project; skip homemade mixtures or household caulk. This is an adult craft unless the material is explicitly labeled for children. Use craft tools rather than food tools, and keep the finished frame clearly separate from edible treats.
19. Craft Stick Gingerbread House Photo Ornament

These popsicle stick gingerbread house photo ornaments are as sweet as they look! Made using simple craft sticks, paint, and family photos, they're decorated with glitter, pastel pom-poms, and mini star details to resemble candy houses. This DIY is perfect for kids to help with and makes a fun keepsake that captures your family's holiday memories in a whimsical, handmade way.
20. Clay Gingerbread House Photo Frame
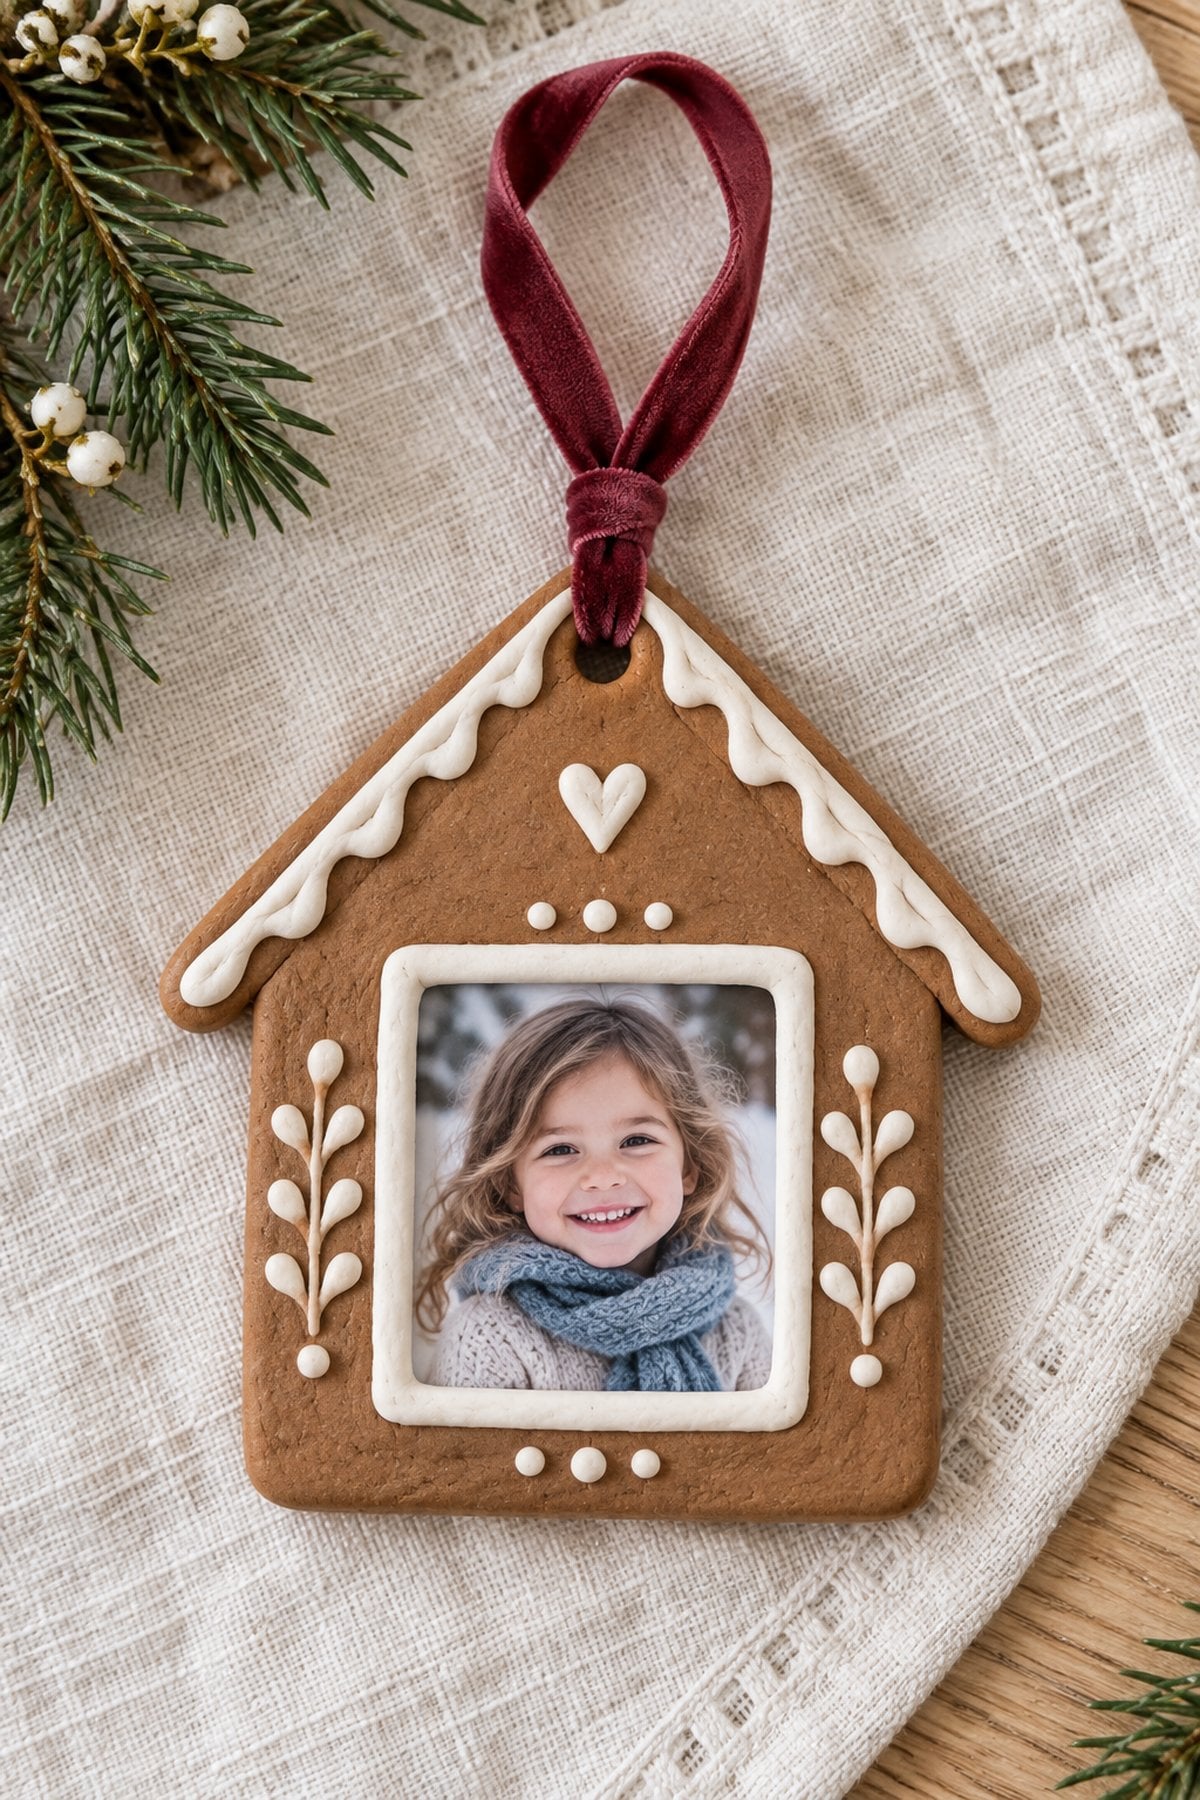
Shape a small clay house with an opening for the photo and a hole for the hanging cord. Add icing lines or roof details while the clay is workable, then dry or bake the base using the product directions. Once it is finished, add the photo behind the opening and cover the reverse with cardstock.
This design needs adult preparation because a narrow clay frame can be fragile. Keep the walls thick enough for the chosen material and avoid a heavy bow that strains the hanger. Children can help with painted details after the base is ready.
21. Clear Photo Ornament with Dried Flowers

Choose a fillable clear ornament and add a small photo with a few completely dry petals or flower sprigs. A two-piece plastic globe makes it easier to place the picture and flowers without forcing them through a narrow neck. Keep the flower layer light so the photo remains visible.
Tie a soft ribbon at the top and check the closure before hanging. Use copies of your photographs and keep the ornament dry; plant materials are decorative rather than archival protection for the print. This is a lovely option for a romantic or cottage-inspired tree.
22. Craft Stick Storefront Photo Ornament

Create a little holiday shop using craft sticks for the sides and base, then add a striped paper or felt awning above the photo window. Print a picture small enough to sit behind the opening, attach it to a backing, and decorate the storefront with a paper wreath.
Keep any shop sign short so it is readable at ornament size. An adult can assemble the structure, while children choose the awning colors and decorate the front. The projecting awning gives this design a different look from a flat house frame.
23. Pom-Pom Trim Photo Ornament
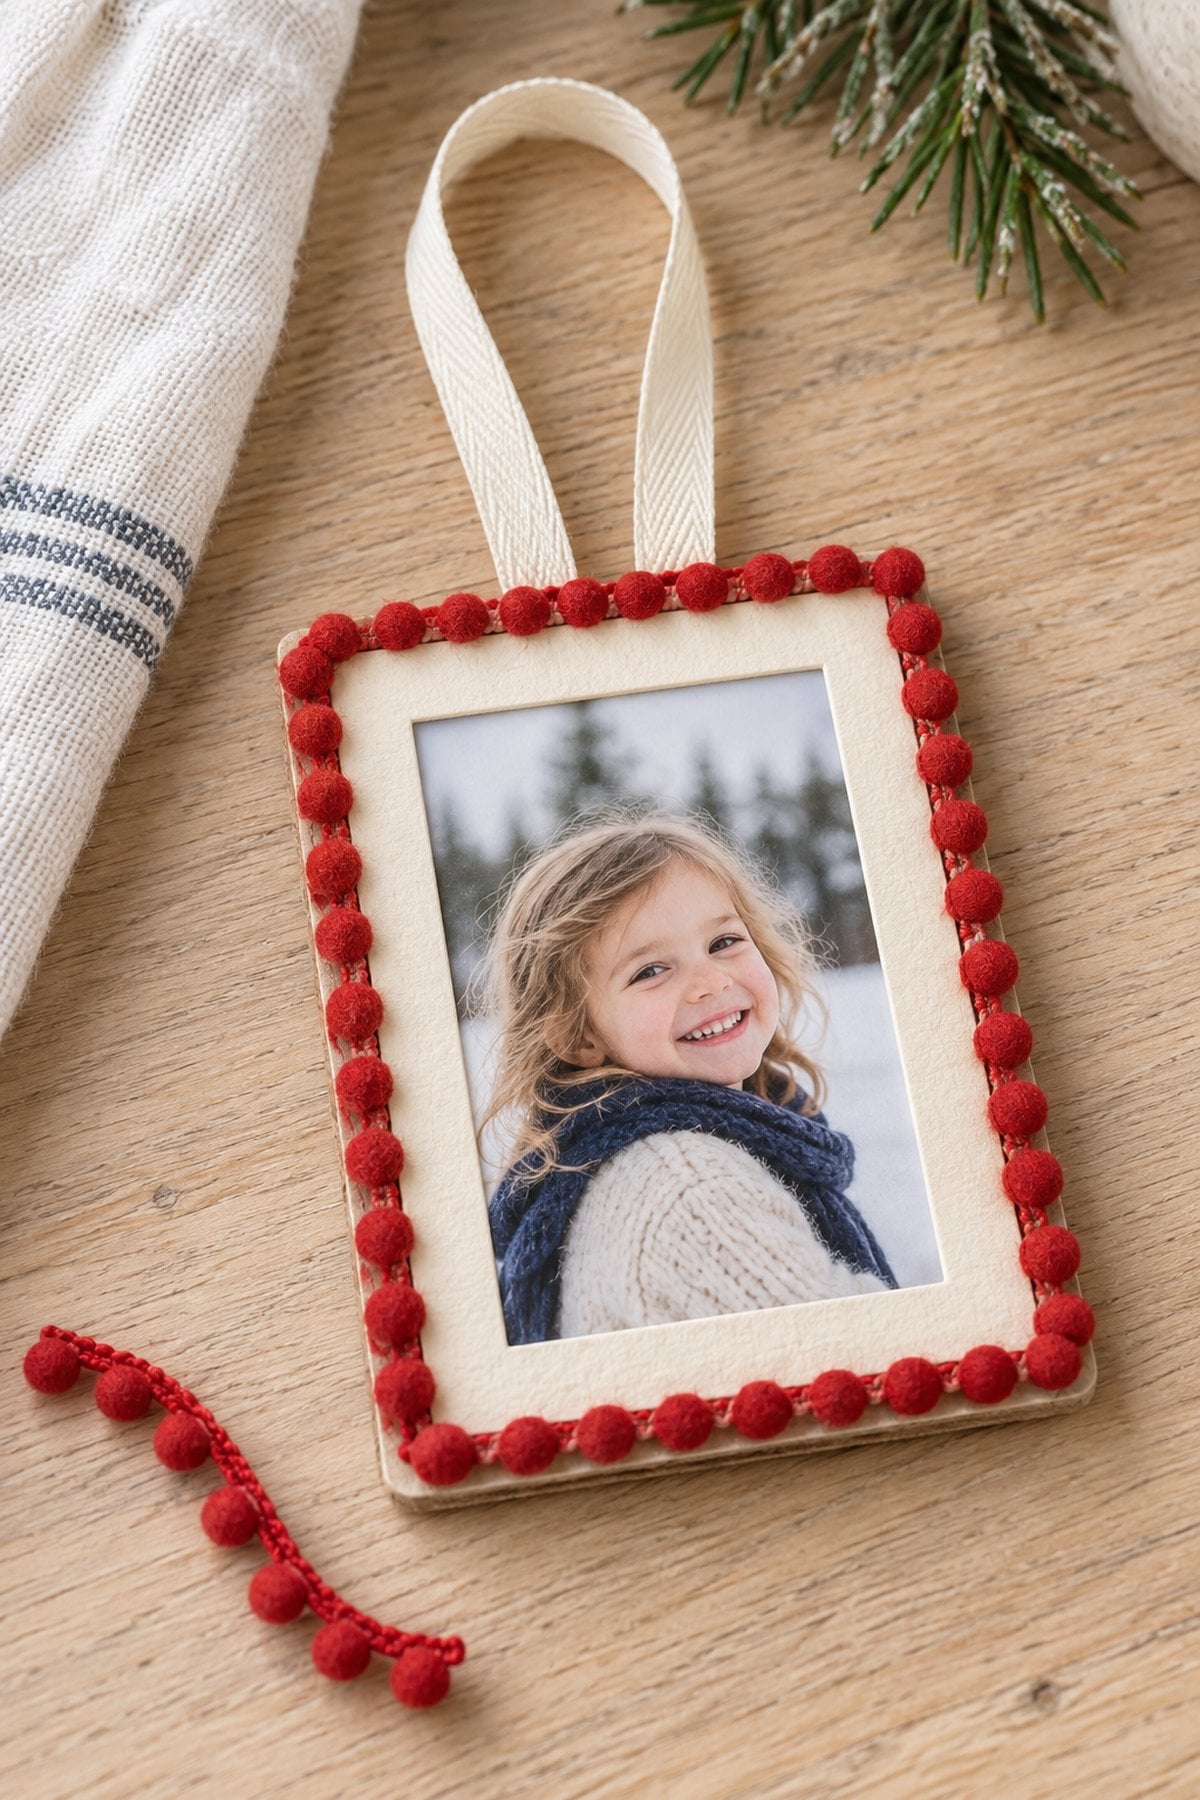
Mount a photo on a firm cardstock or cardboard rectangle, then run pom-pom trim around the border. Attach the hanging loop to the backing and add a small bow if you like. Keep the trim outside the photo area so it does not cover faces.
This is a simple way to make a coordinated set: repeat the trim color and use pictures from the same occasion. Adults should attach small pom-poms or use stronger adhesive when needed. A wider backing border makes the finished frame easier to decorate neatly.
24. Acrylic Disc Photo Ornament
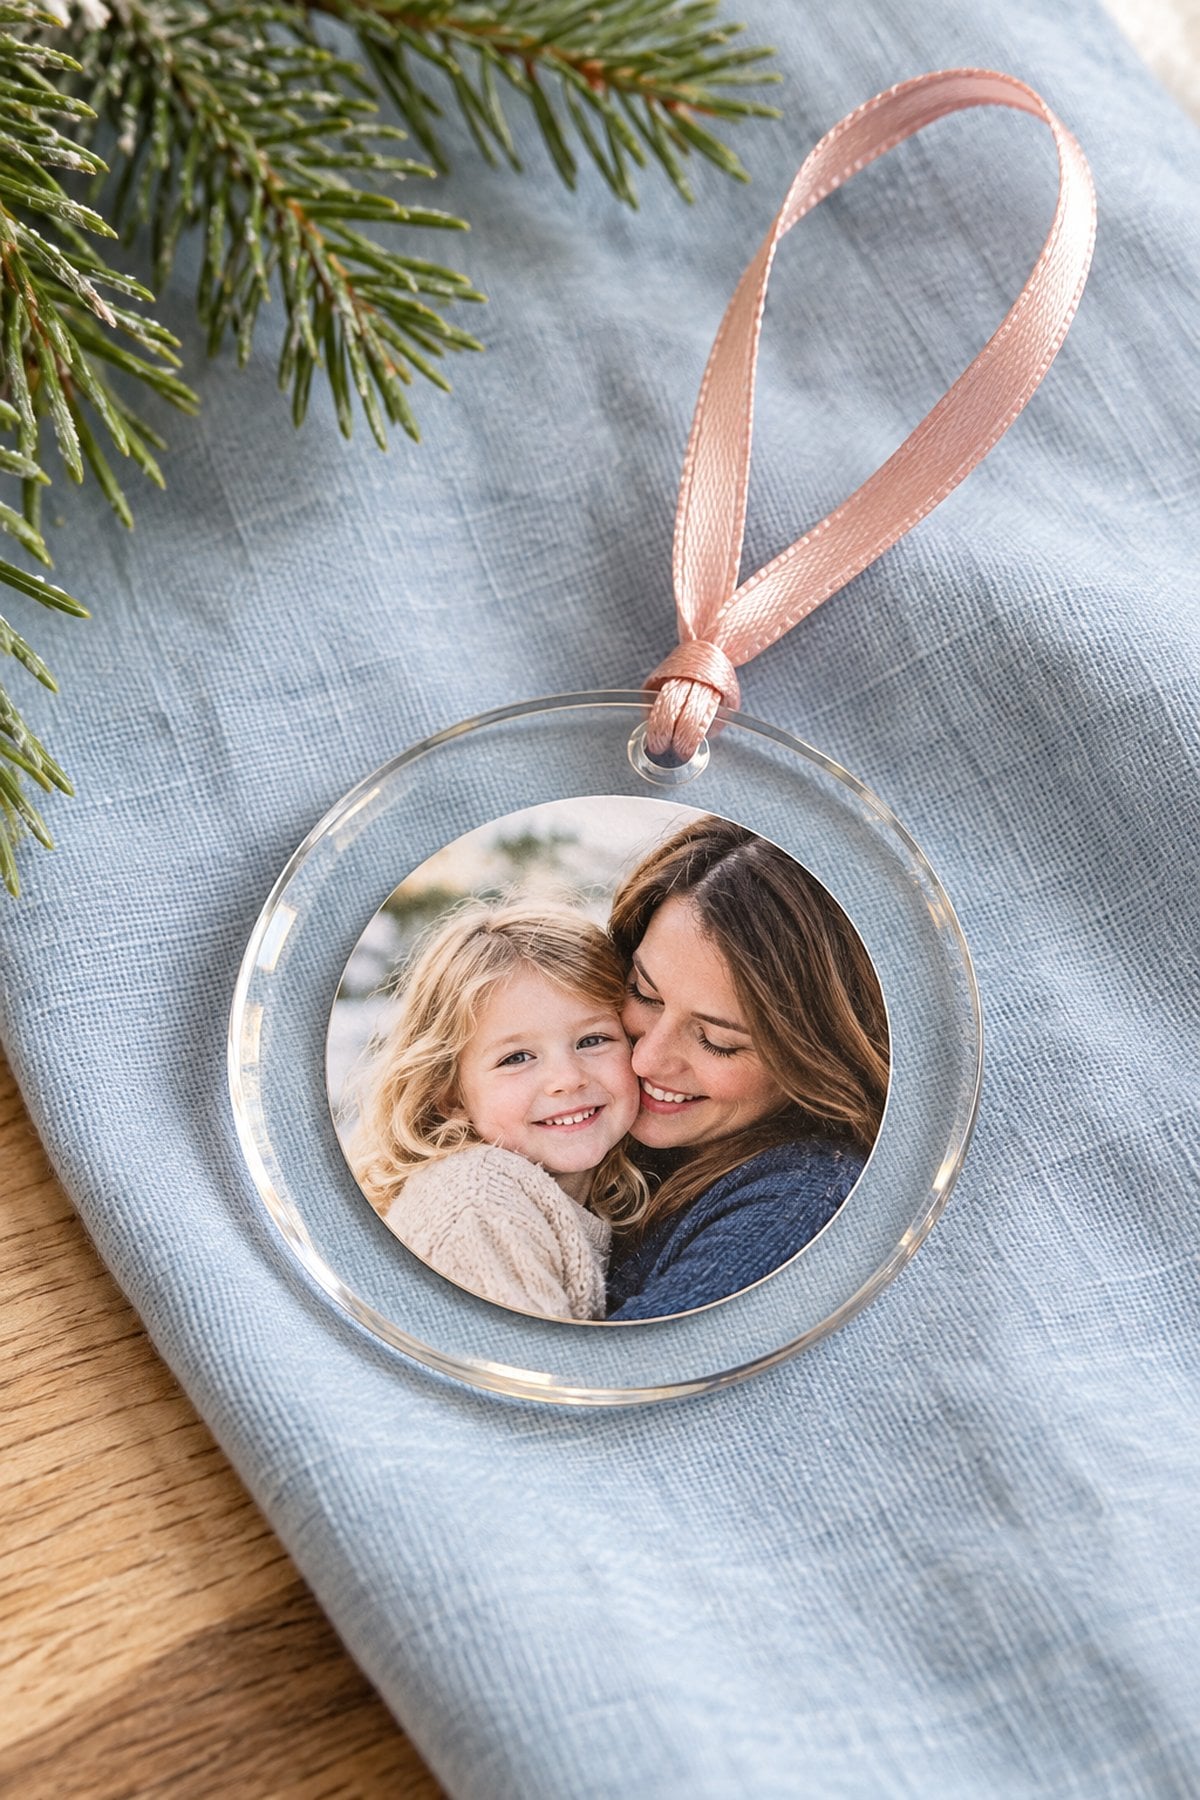
Use a precut acrylic disc with a hanging hole and a photo copy trimmed to fit on one face. Attach the picture with a photo-safe adhesive that is also suitable for smooth plastic. Keep the image smaller than the disc so a clear border remains visible, then add a narrow ribbon through the hole.
Remove any protective film before assembly and test the adhesive on a spare piece first. This version uses a printed photo; it does not require sublimation equipment, resin, or a cutting machine. Add a cardstock reverse if you want space for a name or date.
25. Mini Picture Frame Ornament Set

Turn several small square or rectangular frames into a little family gallery. Measure each opening, print the photos to match, and use the frames' hanging points or securely attached ribbon loops. Check the weight before placing them on delicate branches.
Matching frames give the tree a coordinated look, while a few different finishes create a collected feel. Unlike a single vintage portrait ornament, this idea works especially well as a set of school pictures or family snapshots. Keep a spare print with your decorations so you can refresh the set later.
26. Pastel Craft Stick House with a Hanging Photo

Build an open house outline from craft sticks and paint it in soft pink, peach, or mint. Instead of filling the whole opening, suspend a small photo card inside the house with a short thread fastened beneath the roof. Leave a little space around the photo so it hangs freely.
Add a paper star or a small piece of trim along the roofline. The separate hanging photo creates a lighter, mobile-style design than a fully backed gingerbread house. Adults should secure both the ornament hanger and the shorter photo thread.
27. Craft Stick Train Photo Ornament

Make a small train engine from craft sticks and add lightweight cardstock wheels. Position a cutout photo in the cab, then finish with a paper Santa hat or a tiny wreath. Paint the engine before attaching the picture so the print stays clean.
Keep the hanging loop above the engine's center so it balances. This is a fun adult-prepared craft for children to decorate in their favorite colors. See Studio DIY's train ornament project for its original design inspiration.
28. Accordion Paper Rosette Photo Ornament

Fold patterned paper into an accordion strip and join the ends to form a ring. Press the inner edges together to create a rosette, then secure both sides with small cardstock circles. Add a round photo to the front circle and fasten a hanging loop to the backing.
Fine folds need patience, so this works well for older children and adults. Try coordinating scrapbook papers with a single photo style for a matching set. See The Homes I Have Made's family photo medallions for the original inspiration.
29. Embroidered Fabric Portrait Ornament

Transfer a photo copy to fabric using a product designed for your printer and chosen cloth. Cut around the portrait with room for a seam, add a fabric backing, and stitch around the edge. A little stuffing creates a soft keepsake, and a few embroidered details can add color without covering the face.
Adults should handle the transfer process, iron, and needles. Follow the transfer product's directions, including any mirroring requirement. The original fabric photo heirloom ornaments from The House That Lars Built are a lovely inspiration for this style.
30. Craft Stick Sled Photo Ornament

Make a miniature sled from craft sticks, using two long runners beneath the shorter seat pieces. Paint or cover the seat with patterned paper, then attach a small photo in the center. Add a twine loop to the sled structure and check that the runners are secure.
An adult can prepare the base, while children choose paper and paint. Keep the photo small enough that the sled shape is still visible. For the original version, see The Craft Patch's homemade sled ornament.
31. Printable Paper Photo Ornament
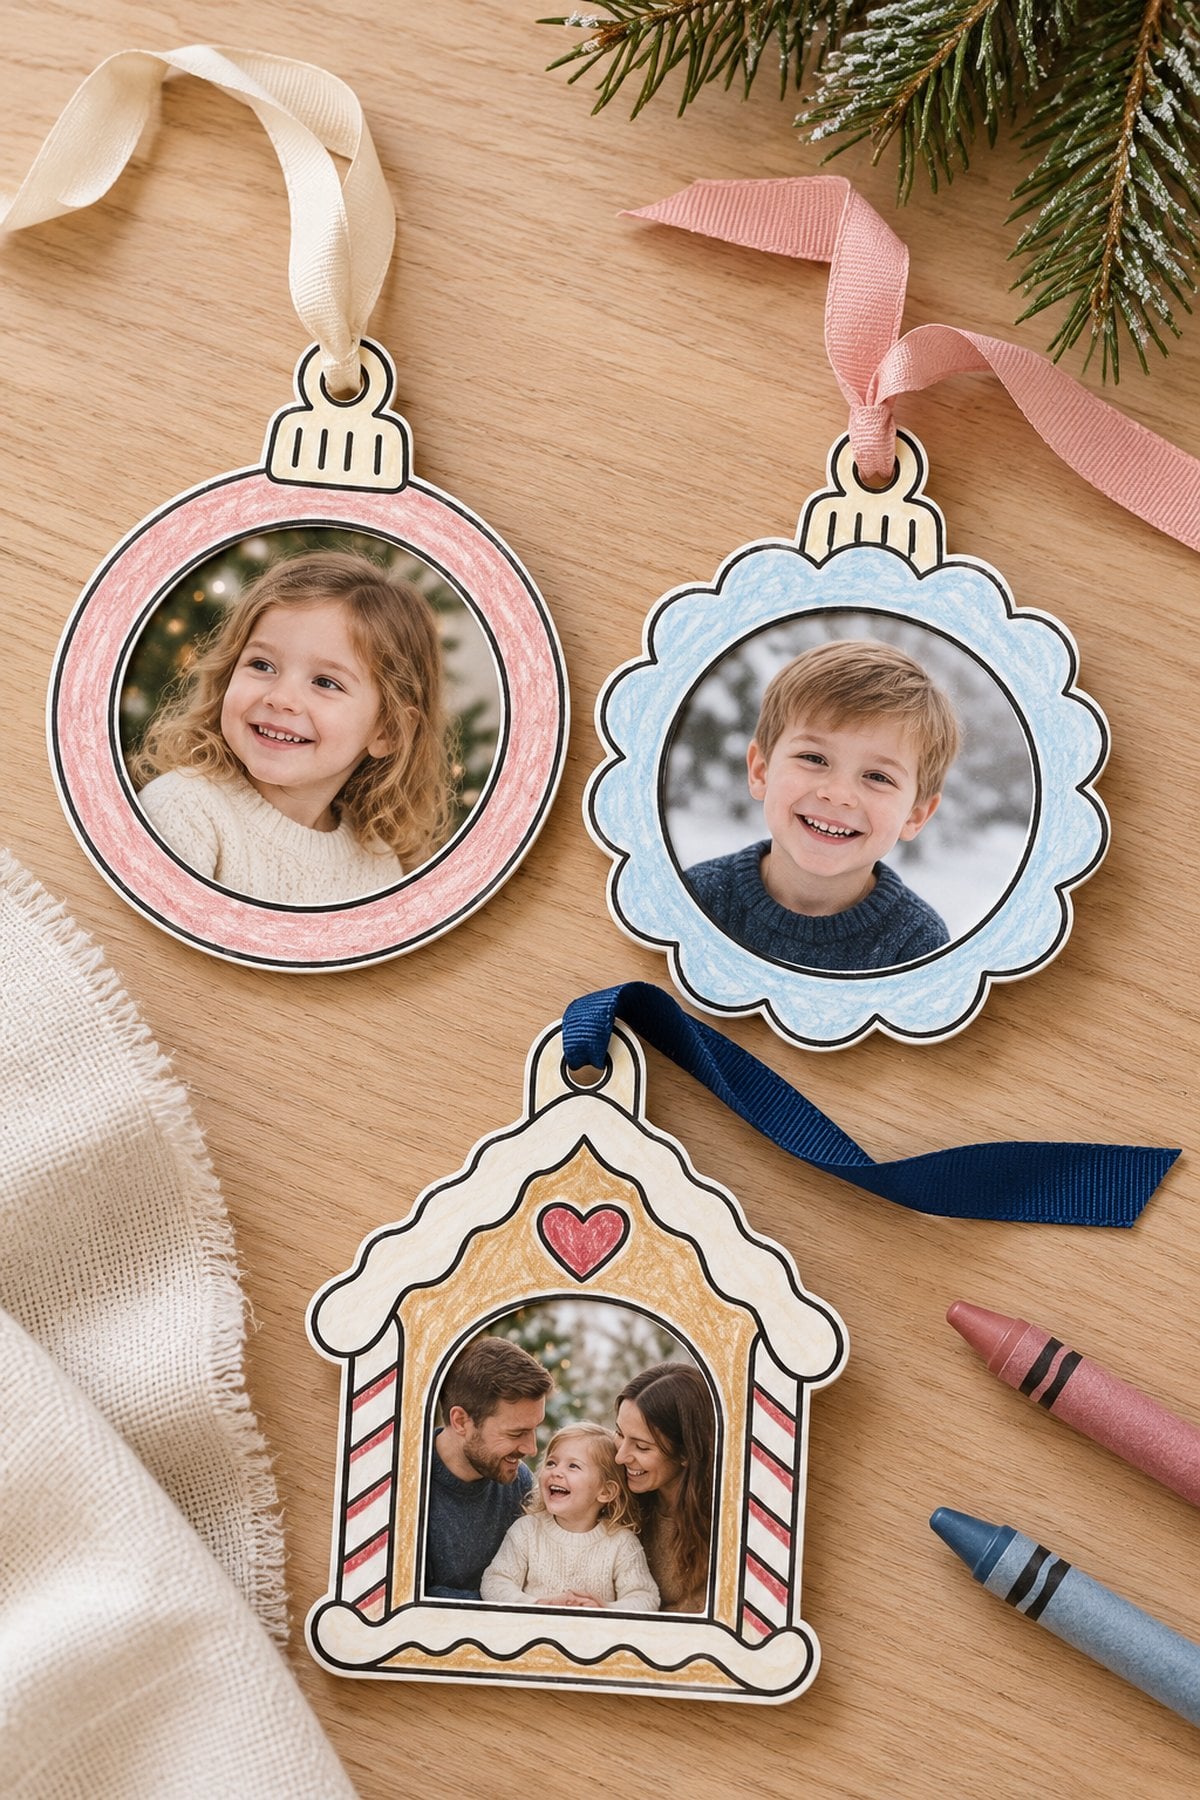
Use the photo-frame sheet on page 9 of my Christmas craft bundle PDF. It includes round, scalloped, and gingerbread-house frames with blank centers. Print on US Letter cardstock, color the frame, and have an adult cut out the opening before taping a photocopy behind it.
Add a backing and ribbon loop, then write the name and year on the reverse. Print at Actual Size first and check the preview; use Fit if your printer clips the edges, then measure the printed opening before sizing the photo. The designs are for personal use; please do not resell, redistribute, or upload the printable files elsewhere
32. Quilted Fabric Photo Frame Ornament
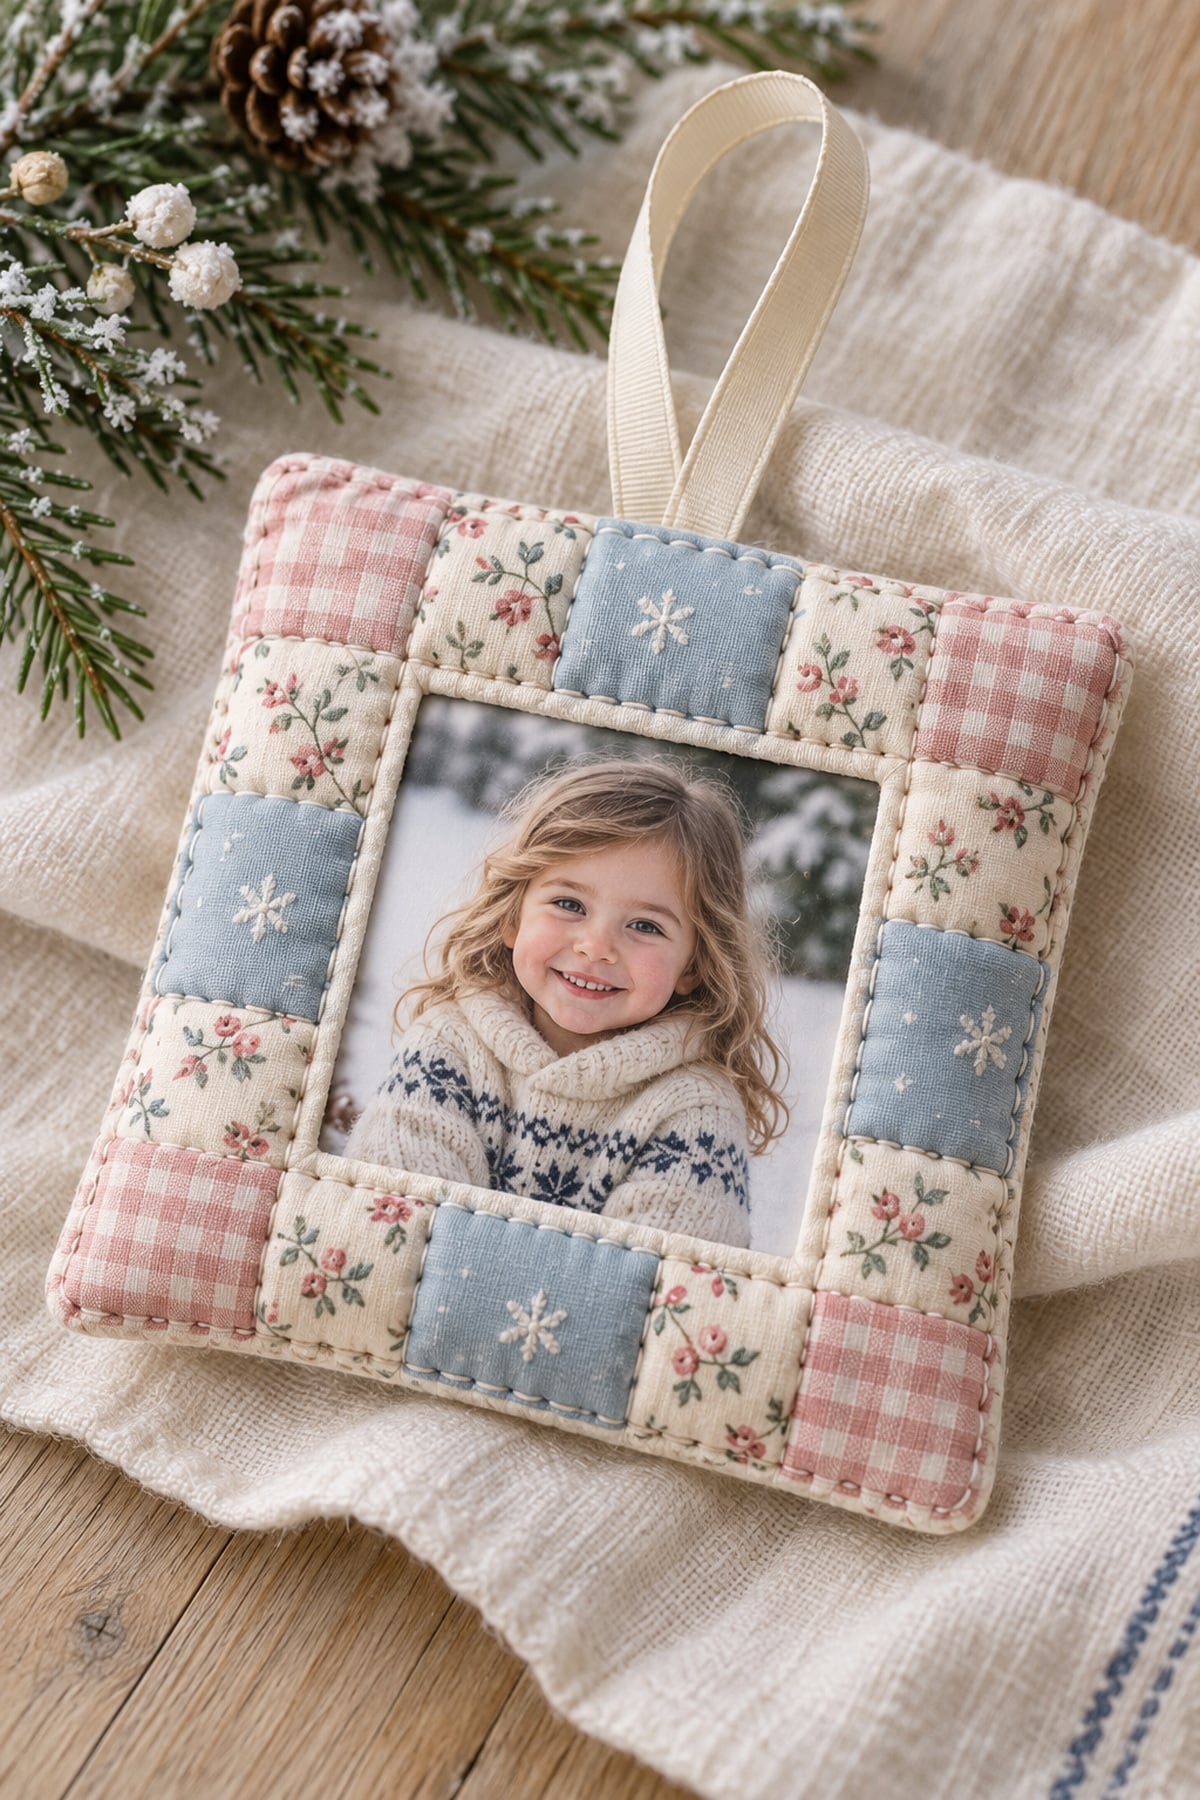
Piece together a small border from cotton fabric scraps, then stitch it to a backing with a photo-sized opening. Add a little batting around the border for a quilted feel, keeping the picture pocket flat. Leave an opening at the back so the photo can slide in after sewing.
This is an adult or experienced sewing project. Use a removable paper print inside the pocket rather than ironing the photo itself. Gingham, tiny florals, and a ribbon loop make a sweet combination, and the fabric scraps can coordinate with a Christmas quilt or stocking.
33. Mini Accordion Photo Book Ornament
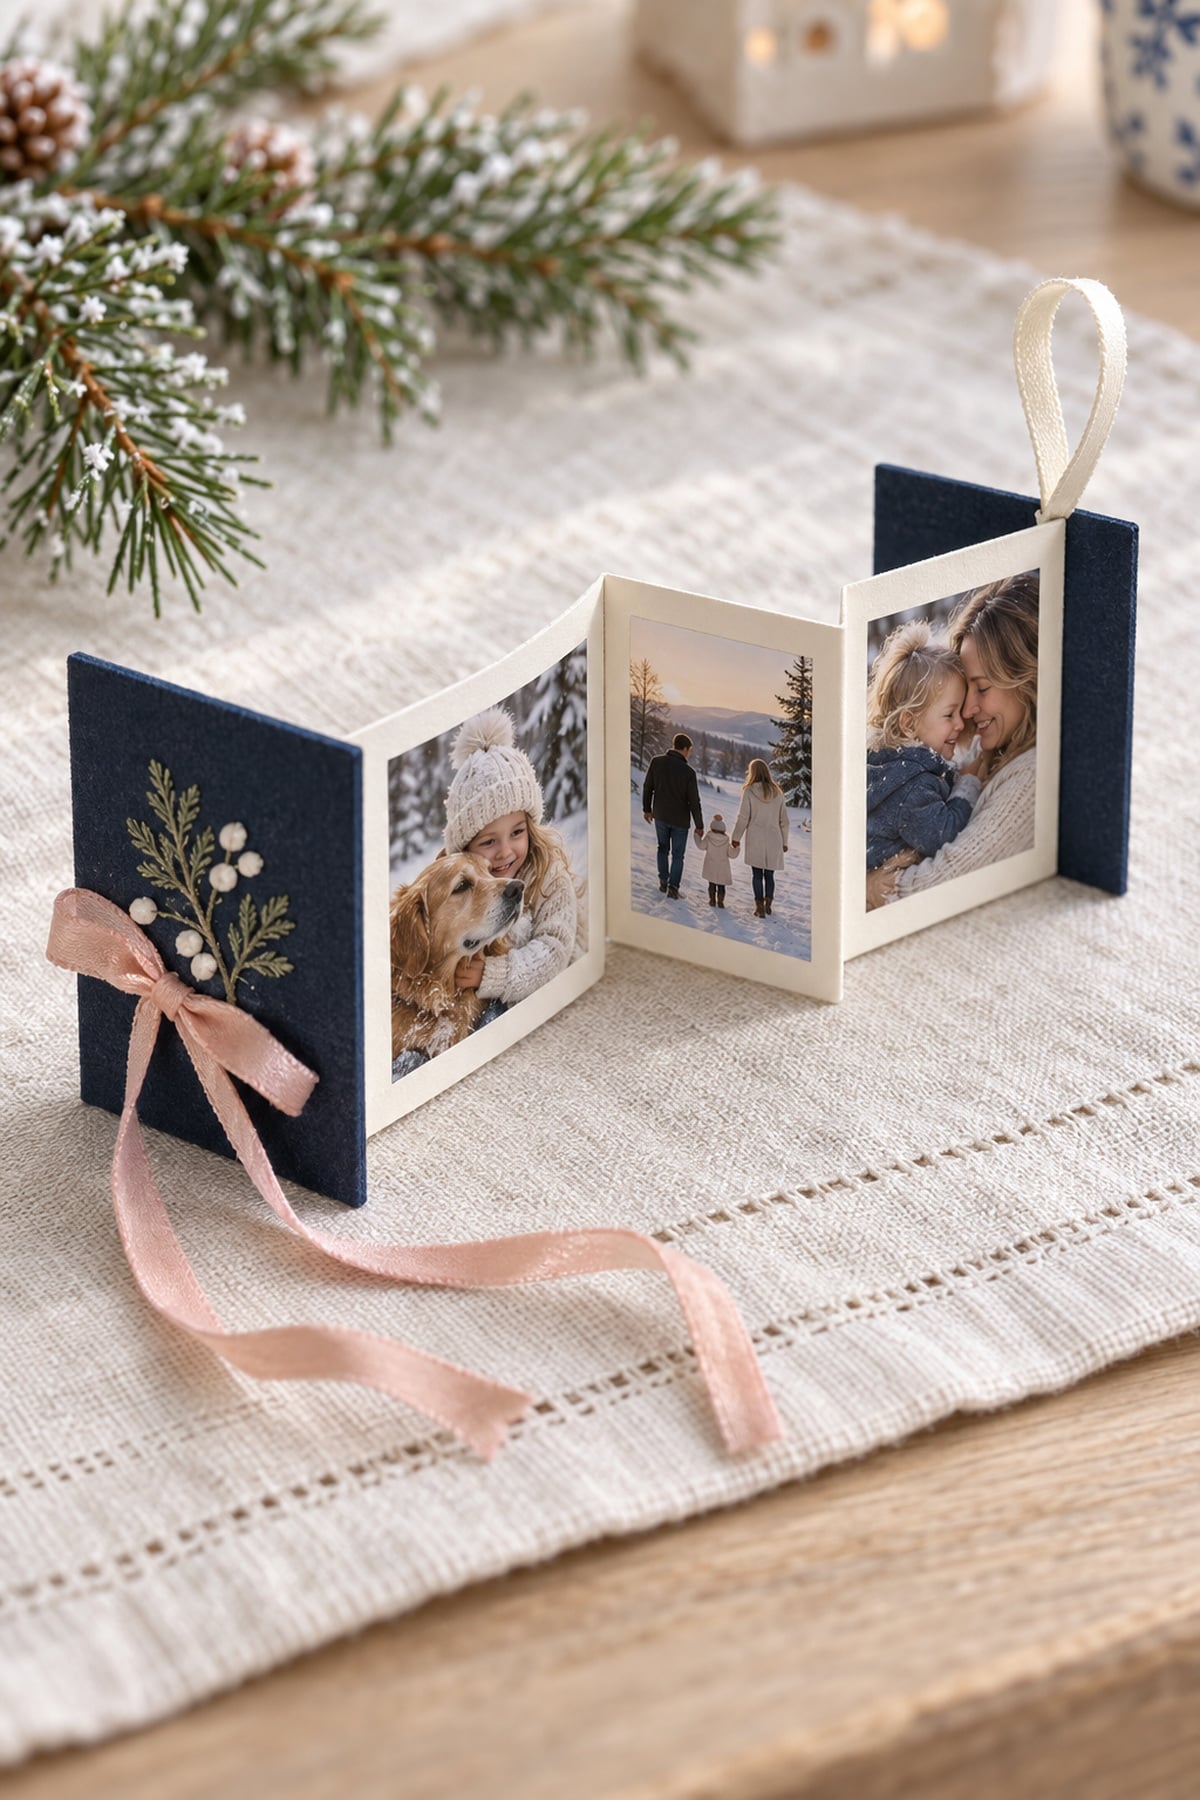
Fold a narrow cardstock strip into equal panels and attach small photo copies to the inside pages. Glue a slightly larger cover to each end, then fasten a ribbon hanger to the back cover. Add a separate ribbon tie around the book so it stays closed on the tree.
Keep the book light and use only a few panels; too many pictures make it bulky. Open it to show a few moments from the year, a family trip, or pictures of each grandchild. This is a lovely choice when picking one favorite photo feels impossible.
34. Handprint Photo Keepsake Ornament
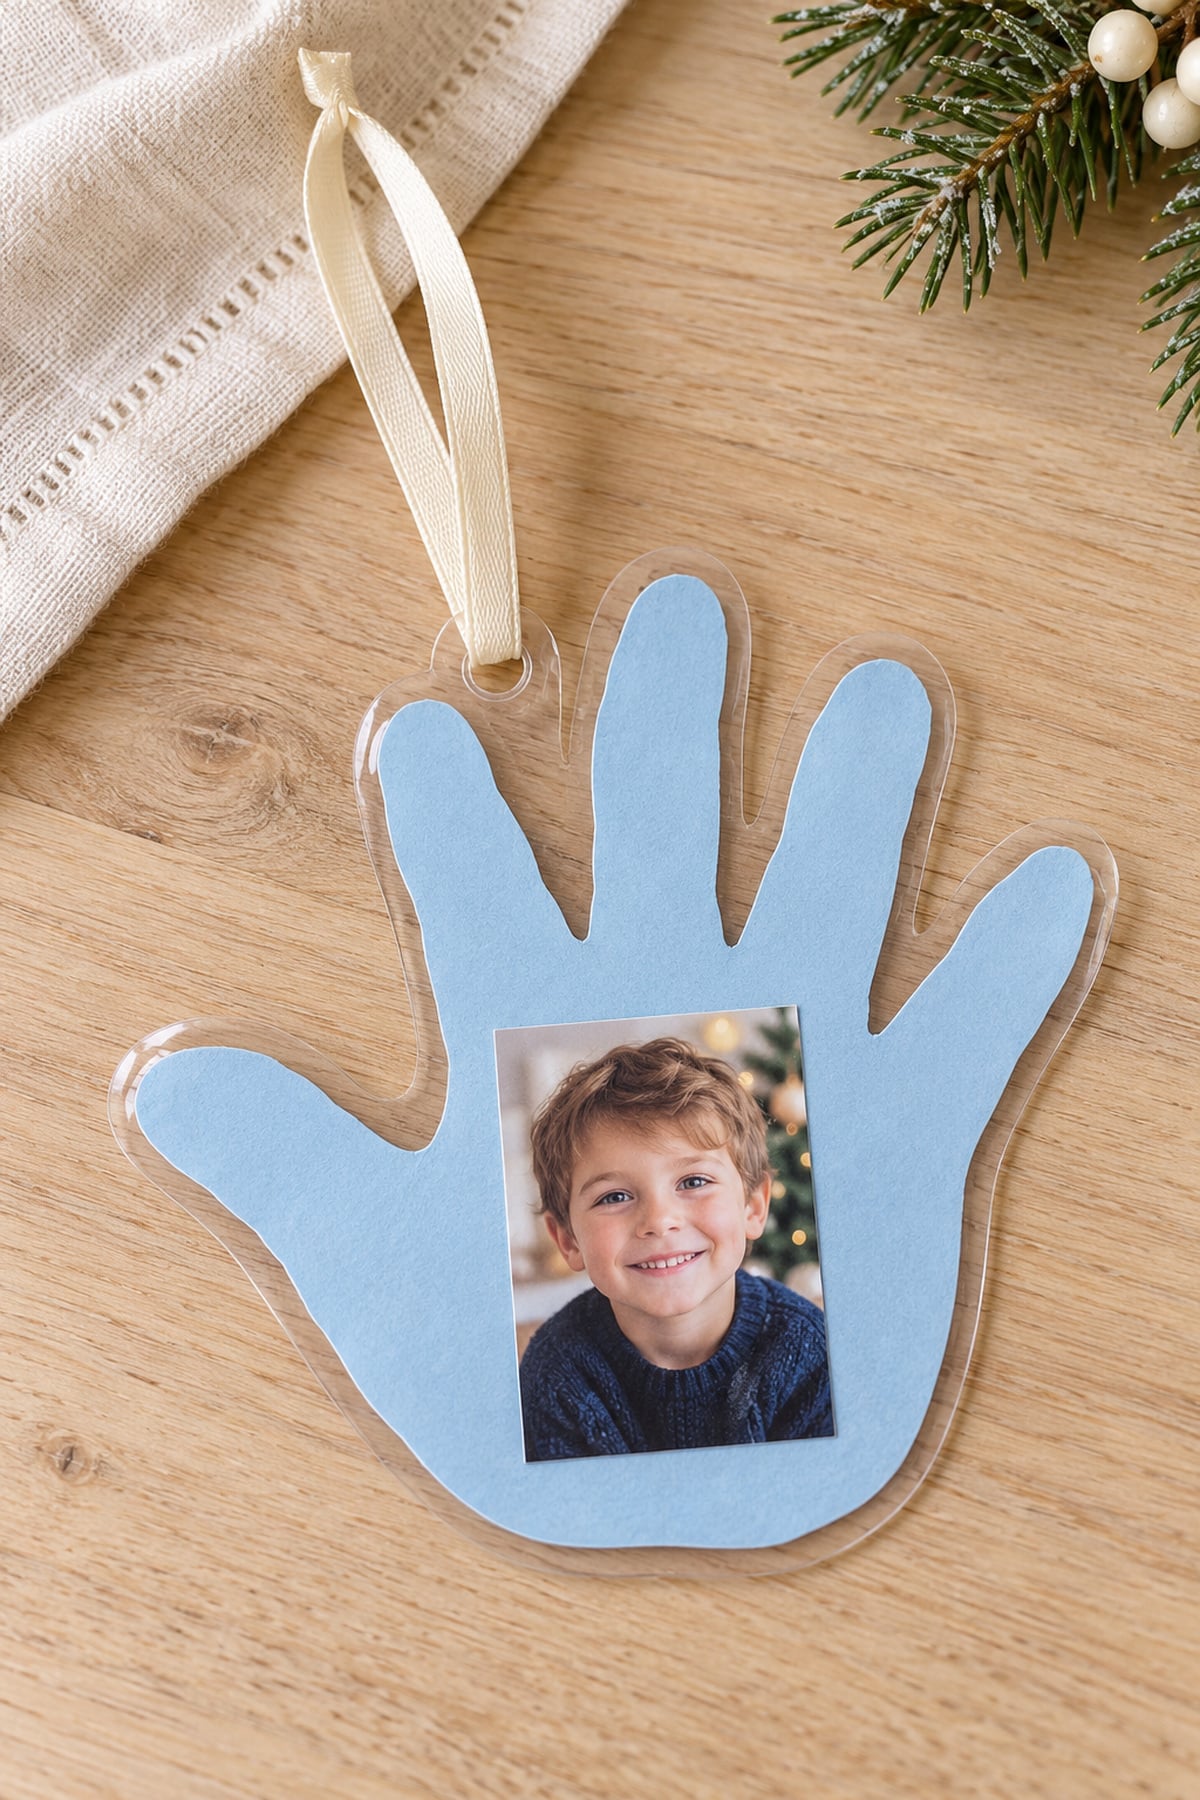
Trace a child's hand on cardstock, cut out the shape, and place a small photo on the palm. Add their name and year on the back, then protect the paper with clear self-adhesive film or an adult-operated laminator following its directions.
Leave a sealed margin around the shape, punch a hole through the margin above the palm, and thread a ribbon loop through it. Children can choose colors and decorate the paper before the protective layer is added. The finished ornament captures both a little face and a growing handprint.
35. Wooden Photo Cube Ornament
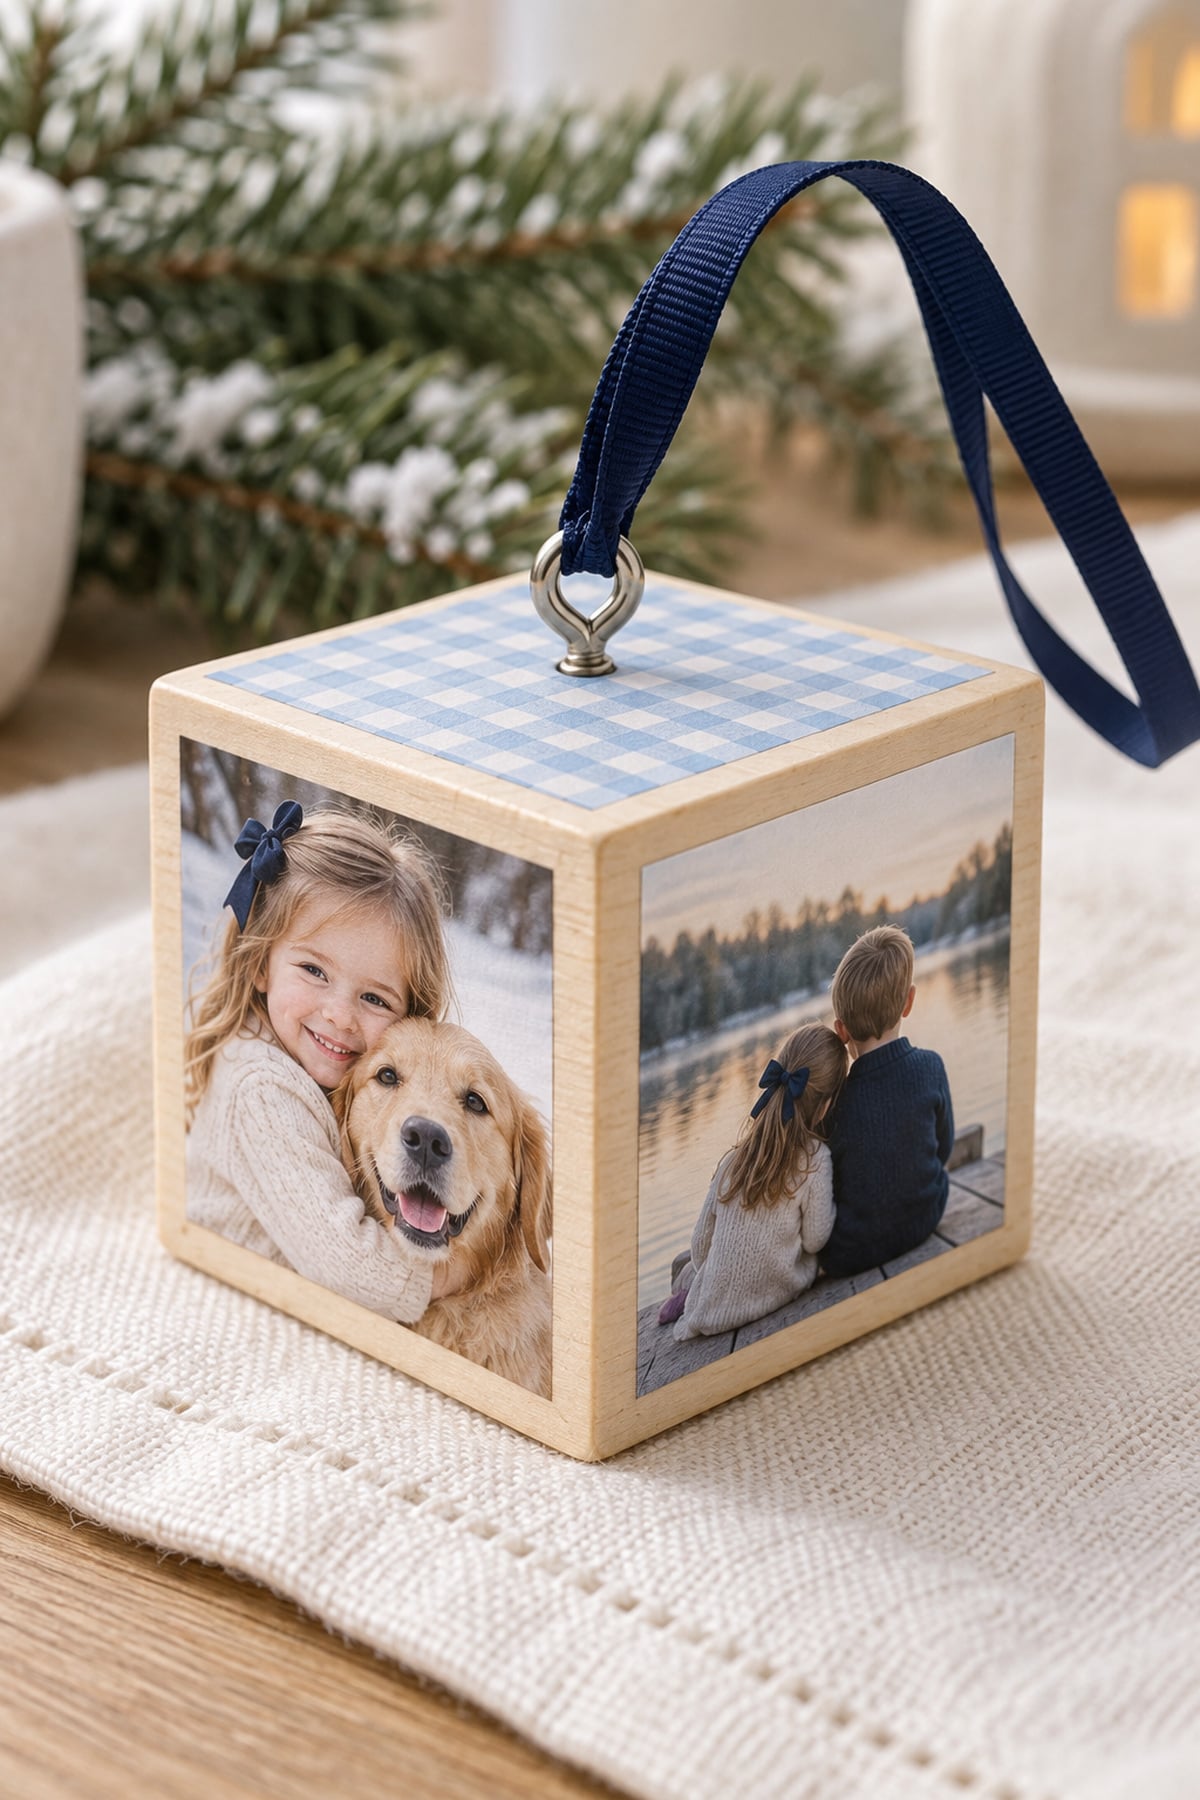
Choose a small, smooth wooden cube and attach a different photo copy to each side. Measure the faces first and trim the pictures slightly smaller so the edges stay neat. Finish the top and bottom with patterned paper, paint, or a small year label.
Have an adult fit an appropriate screw eye into a predrilled pilot hole in the top, then add a ribbon loop. Check its hold and choose a sturdy branch because a wooden cube weighs more than a paper frame. Use the adhesive's directions for paper on wood and avoid coating the images without a compatibility test.
Tips for Printing and Protecting Your Photos
Start with a clear photo file and use a copy rather than the original. For tiny ornaments, a close crop usually works better than a wide scene with several small faces. Print a plain-paper test first, then choose paper that suits the construction: flexible prints for globes, firm card for paper ornaments, and the specified transfer paper for fabric projects.
- Match the printer to the method. Gluing a print onto a base and transferring an image are different jobs. For its photo-transfer method, Plaid recommends laser-printed copies on regular copy paper, rather than photo paper. Follow the exact instructions for the product you buy, including whether to mirror the image.
- Test before sealing. A clear coating is optional for many framed or enclosed photos. Test any adhesive or sealer on a spare print first, let it dry fully, and check for bleeding, cloudiness, curling, or a changed finish. "Acid-free" supplies can help with paper projects, but a homemade ornament is not a guarantee of archival preservation.
- Keep the hanger strong. Attach ribbon to the frame or backing, reinforce paper holes, and allow the adhesive its full drying or curing time. Add the year to the back so you can remember when each ornament was made.
How to Store Handmade Photo Ornaments
Let every ornament dry fully before packing it away. Wrap fragile or raised designs individually in plain tissue or soft fabric, and separate them so frames and decorations do not rub together. Lay flat paper ornaments in a firm envelope or shallow box.
Store them somewhere dry and away from strong heat or sunlight. Keep salt dough and natural-material ornaments especially well protected from moisture and pets. Check the hanging loops and glued parts before putting the ornaments back on the tree next year.
DIY Photo Ornament FAQs
A small ready-made frame or a cardstock photo ornament is a good starting point. Both let you attach a printed picture without baking, transferring an image, or bending a photo into a globe. Add a secure ribbon loop and a backing, then keep the decorations simple.
Measure the actual opening rather than relying on a standard wallet size. Make a plain-paper test, check that faces are not covered by the border, and print the final copy at that size. For a round ornament, test the circular crop before cutting.
Yes, for many projects where the picture is framed or attached with compatible photo tape. Wet glue or sealer may affect some inkjet prints, so test first. A transfer process may need laser toner or a specific transfer sheet; follow that product's printer instructions.
Use a picture sized to the inside of the ornament, gently roll it to pass through the opening, then help it open with a blunt tool. A thread secured through the cap can keep it upright. A two-piece plastic ornament is easier when the picture or decorations will not fit through a narrow neck.
Children can decorate prepared paper frames, craft-stick houses, pasta borders, and printable ornaments with age-appropriate supplies. Adults should manage detailed cutting, hot glue, raw dough, ovens, glass, tools, irons, and laminators. Choose the project around the child's abilities and supervise throughout.
No. A photo protected inside a frame or globe may not need a coating. For an exposed print, use a compatible product only after testing it on a spare copy. A sealer should not be treated as a promise that the ornament is waterproof or fade-proof.
Try a child's school picture, a family portrait, a pet photo, or a favorite shared memory. A mini photo book or cube is useful for several pictures. Add a name, year, or short note to the back so the recipient knows which moment the ornament celebrates.
More Christmas DIY Posts You'll Love
For another hands-on project, browse my Christmas DIY ideas. If you're decorating around your new ornaments, these Christmas tree decoration ideas can help you choose coordinating ribbons and natural accents.
You can also pair a photo keepsake with something from my farmhouse gift ideas, or carry the handmade look into your home with these Christmas plate wall ideas. Browse my Christmas collection for more seasonal projects and decorating inspiration.
- 🎄 30 Pretty Christmas Lantern Ideas - Brighten up your porch or mantel with these cozy, glowing lantern designs.
- 🕯️ 35 Beautiful Farmhouse Christmas Front Porch Decor Ideas - Transform your entryway into a warm and welcoming winter wonderland.
- ❄️ 40 Christmas Window Box Ideas - Add festive curb appeal with greenery, ornaments, and twinkling lights.
- 🎁 DIY Christmas Plate Wall Ideas - Get creative with vintage plates and turn your wall into a holiday statement piece.
- 🌟 Cute Christmas Window Painting Ideas - Try easy window art projects to make your home sparkle from the outside in.
Keep exploring my Christmas category for more festive crafts, recipes, and décor ideas to fill your home with holiday cheer.
A Little Memory for Your Christmas Tree
The sweetest DIY photo ornaments start with a picture you want to remember. Choose one design that suits your supplies, keep a copy of the original photo, and add a little detail that makes the finished keepsake feel personal.
Save your favorite idea for your next Christmas craft day, or make an extra ornament for someone who shares that memory. I'd love to hear which project you're trying, so leave a comment below!
Until next time,



As Seen on TikTok
Come behind the scenes of our farmhouse build, decor projects, and cozy everyday life. Tap a video to watch, then follow @nikkisplate on TikTok for more.
Watch this video on TikTok
Watch this video on TikTok
Watch this video on TikTok



Leave a Reply