
Dig into DIY gardening with our step-by-step guide on building raised garden beds. Perfect for green thumbs looking to elevate their garden game. Grow on, friend!

Disclaimer: this post may contain affiliate links, and every purchase made through these links will give me a small commission (at absolutely no extra cost for you!) AS AN AMAZON ASSOCIATE AND REWARDSTYLE MEMBER, I EARN FROM QUALIFYING PURCHASES. See Privacy Policy for additional info.
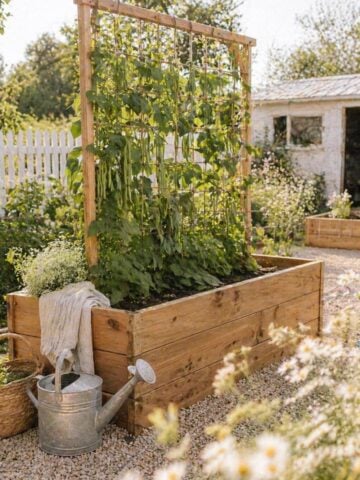
The word "garden" usually produces one kind of image in our minds - the most basic one, where a garden is planted directly into the ground. And don't get me wrong, I have absolutely nothing against those, but I much prefer raised garden beds, and I think many people would, too.
But it seems to me that it's easy to get intimidated by raised garden beds. First, they're not cheap if you have someone make them for you, and second, they look like you need to be an expert at gardening to find your way around them.
But the truth is, if you can garden in general, you can handle raised garden beds. In fact, I find them much easier because I don't need to break my back to do garden work and it's easier to control the quality of the soil. The best part? I can teach you how to build your own raised garden beds and I promise it will be easier than you think.
Benefits of Raised Garden Beds
Take Pennsylvania, for instance. The soil there is dense and it's clay, so traditional gardening can be difficult. Then you have states like Ohio, where heavy rains can cause flooding. Again - raised garden beds will make your life easier because your garden isn't directly planted into the ground. So, before I went to find landscaping supplies near me to start my garden, and I got everything I needed to ensure the garden bed was raised.
With raised garden beds, I'm able to create my own, custom soil mixes that help roots develop better and improve drainage. If you know anything about plants, you know these two factors are key for a thriving garden. I also find it way easier to control pests and weeds because I have a defined planting area and I can protect it with covers and barriers.
Another major benefit is accessibility. Like I said, no more breaking my back, and my knees are a lot happier, too so I can enjoy gardening way more than before. I honestly can't think of any downsides to raised garden beds, other than the upfront cost if you have them made by someone else.

The Building Process
As far as DIY projects go, this is one of the more straightforward ones and you can get it done without any fancy tools or materials. The basics will do just fine.
This is what you'll need in terms of tools:
- Wood planks: Use cedar, redwood, or untreated pine because they're the most durable options
- Screws or nails: They need to be weather-resistant because you probably plan on using your garden beds for a while
- Drill or a screwdriver: You'll need these for assembling the frame
- Garden fabric or mesh (optional): These can prevent weeds
- Soil mix: Use a mix of garden soil and compost
1. Plan and Measure
First, decide on which size you want and what you want to plant. The location the garden bed is in has to get at least 6-8 hours of sunlight, so take that into account. Mark the outline with stakes or string so it's easier to visualize it and make even measurements.
2. Gather Your Materials
Then, get high-quality wood. Cedar and redwood are excellent because they don't rot and they will last you for a long time. Don't buy pressure-treated wood because it usually has chemicals and they can leach into the soil. Before you start building, have all your materials ready.
3. Build the Frame
Get your wood planks and cut them in the length and width you want. Then, assemble your frame; connect the corners with screws or nails and make sure that the structure is sturdy and everything is aligned. This part took me a while because I was checking everything multiple times until I was 100% sure it looks good.
4. Prepare the Ground
The area you'll use for your raised garden bed should be clean, so get rid of grass, weeds, and debris. I used garden fabric here, although you don't have to if you don't feel like it. I put a layer of fabric down to block weeds and to allow the water to drain and that saved me from a lot of maintenance.
5. Place and Secure the Bed
Put the frame above the ground you just prepared and make sure it's even. Once you're certain it's leveled, fill it with soil mix. Leave 2-3 inches of space from the top edge so that the soil doesn't spill over when you water it.

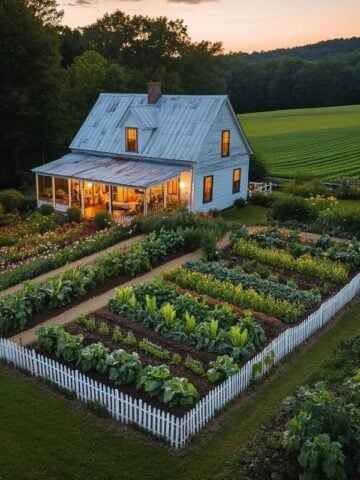
Conclusion
Growing your own garden is incredibly rewarding. I was so incredibly proud of myself the first time I served food I grew myself, and to tell you the truth, I still feel a deep sense of pride every time I do it. And ever since I've had raised garden beds, gardening has become more enjoyable than ever, so I'd wholeheartedly advise you to give them a try.

As Seen on TikTok
Come behind the scenes of our farmhouse build, decor projects, and cozy everyday life. Tap a video to watch, then follow @nikkisplate on TikTok for more.
Watch this video on TikTok
Watch this video on TikTok
Watch this video on TikTok


Leave a Reply