
Download free Lilo and Stitch Pumpkin Carving Stencils! Create a Disney pumpkin this Halloween with easy printable Stitch templates, carving tips, and family-friendly ideas.
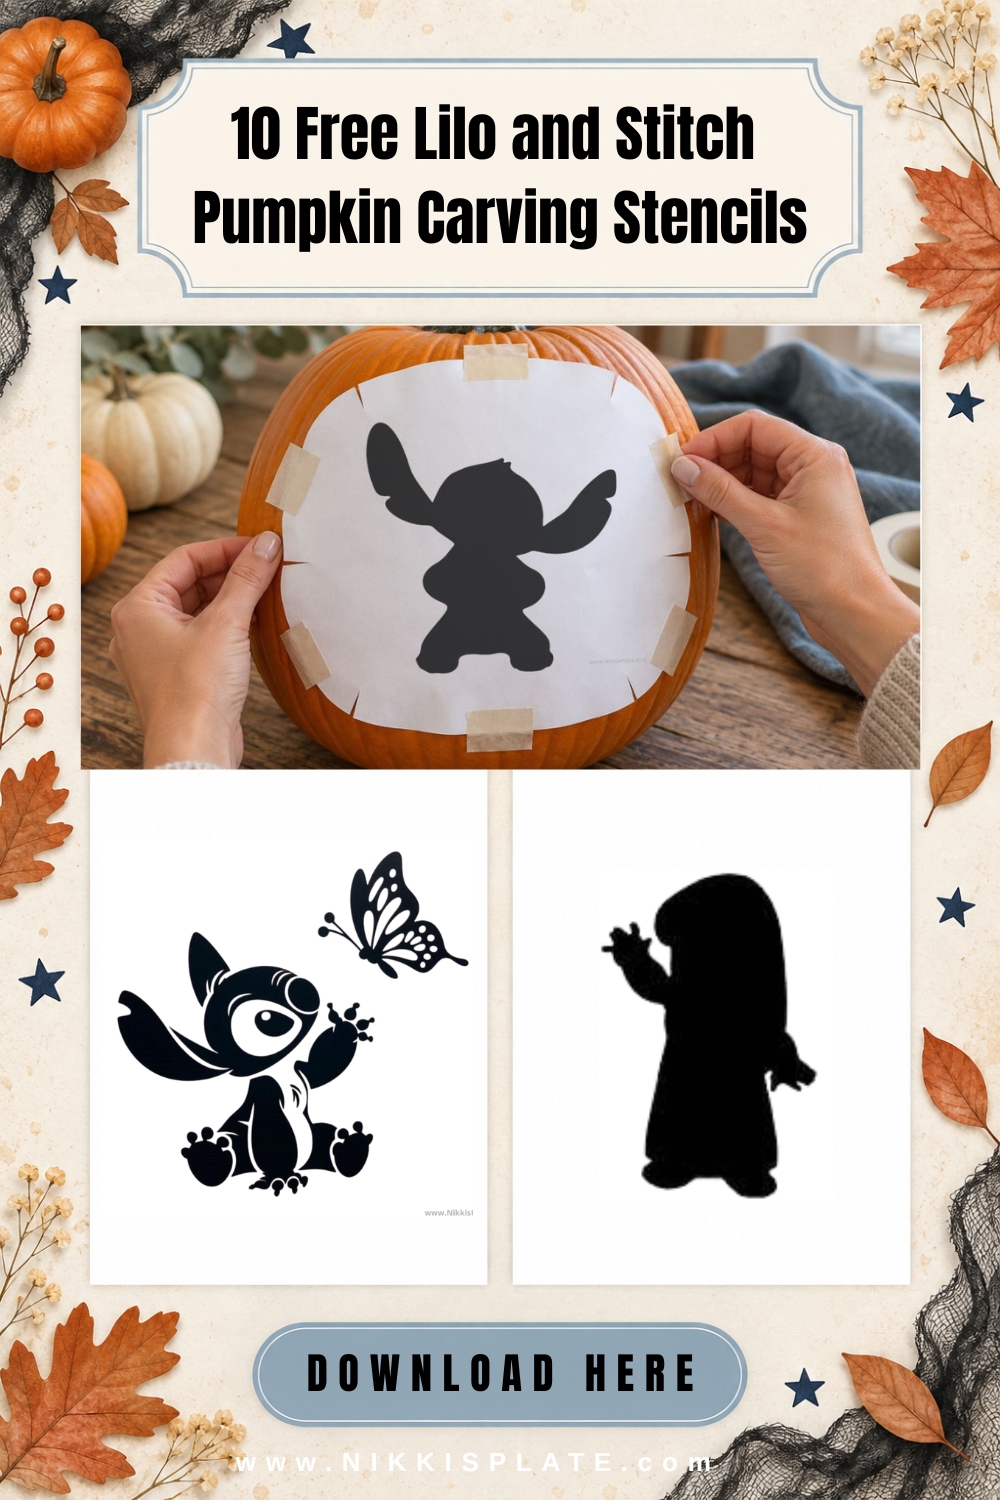
Hi beauties! Looking for a free Stitch pumpkin stencil for Halloween? This printable collection includes 10 Lilo and Stitch pumpkin carving stencils featuring cute Stitch poses, simple character silhouettes, Lilo designs, and more detailed patterns for experienced pumpkin carvers.
All 10 designs are included in one free printable PDF. You can download the complete collection, print only the pages you want, and resize each stencil to fit your pumpkin.
Some of these Stitch pumpkin stencils have bold shapes that are easier to carve, while the more detailed designs work best with a combination of carving and shallow etching. Whether you are planning a family pumpkin-carving night or decorating for a character-inspired Halloween party, these templates make it much easier to create a recognizable jack-o'-lantern.
If you would like more family-friendly options, you can also download my 15 free pumpkin carving stencils for kids or browse these 20 free Disney pumpkin carving stencils.
Inside the free printable PDF:
- 10 full-page pumpkin stencil designs
- Stitch faces and character silhouettes
- Lilo-inspired pumpkin templates
- Simple and detailed carving options
- Pages formatted for 8.5 × 11-inch paper
- Free download for personal use
Please note: These are unofficial, fan-made printable templates intended for personal use. Lilo & Stitch and the associated characters are owned by Disney. Nikki's Plate is not affiliated with, sponsored by, or endorsed by Disney.
10 Free Lilo and Stitch Pumpkin Carving Stencils
The free PDF contains 10 different designs. Choose your favorite below, then use the download button to access the complete collection.
1. Stitch Standing Pumpkin Stencil

This playful Stitch pumpkin stencil features the character standing with his ears raised and arms stretched into the air. The large silhouette makes a strong centerpiece for a medium or large pumpkin.
Because the ears and arms create thinner sections, carve slowly and leave small support bridges wherever necessary. You can also etch those delicate areas instead of cutting completely through the pumpkin.
2. Sitting Stitch Pumpkin Stencil

This cute sitting Stitch stencil captures his recognizable oversized ears and sweet expression. It is a fun choice for a family pumpkin-carving night or a not-too-spooky Halloween display.
Use a medium pumpkin with a wide, smooth surface so there is enough room for the ears. The larger body areas can be fully carved, while the smaller facial details can be etched.
3. Stitch Peeking Pumpkin Stencil

The peeking Stitch pumpkin stencil creates the illusion that Stitch is popping up from behind the edge of your pumpkin. Its playful design makes it one of the cutest templates in the collection.
Position this stencil closer to the bottom or side of your pumpkin to emphasize the peeking effect. It can also be traced and painted if you would rather make a no-carve pumpkin.
4. Stitch Face Pumpkin Stencil

Create a recognizable character pumpkin with this close-up Stitch face stencil. The large ears, eyes and mischievous expression make it an eye-catching design once illuminated.
This is one of the more detailed Stitch pumpkin carving templates, so use a large pumpkin and work slowly. Etching the facial features will help preserve the smaller shapes and create more dimension.
5. Lilo Silhouette Pumpkin Stencil

This simple Lilo pumpkin stencil features a full character silhouette with a sweet, storybook-inspired appearance. The clean outline makes it a lovely companion to one of the Stitch designs.
Choose a tall pumpkin that complements the vertical shape. If the hands, hair, or dress contain narrow areas, add support bridges or use shallow etching to prevent breakage.
6. Lilo Head Pumpkin Stencil

This Lilo head stencil focuses on her recognizable hair and facial outline. It is a simpler alternative to the full-body design and fits nicely on a medium pumpkin.
Use the template as a guide for carving, etching, painting or drawing. For a glowing jack-o'-lantern, fully carve the largest areas and etch the finer facial details.
7. Lilo and Stitch Together Pumpkin Stencil

Celebrate Lilo and Stitch's special friendship with this sweet stencil of Lilo kissing Stitch. It is a lovely option for fans who want both characters represented on one pumpkin.
Because this design contains two characters and several small details, it works best on a large pumpkin. Shallow etching is recommended for faces, hands and other delicate interior sections.
8. I Love Stitch Pumpkin Stencil

This I Love Stitch pumpkin stencil combines a recognizable Stitch silhouette with a heart-inspired design. It is a cute choice for a Stitch fan's Halloween party or front-porch display.
The heart and larger shapes can be fully carved for a bright glow. Work slowly around the lettering or small details, adding support bridges wherever an interior section needs to remain attached.
9. Stitch and Butterfly Pumpkin Stencil

This gentle design shows Stitch reaching toward a butterfly. It has a softer, whimsical look that is perfect for anyone who prefers cute Halloween pumpkins over scary jack-o'-lantern faces.
The butterfly and Stitch's fingers are delicate, so this pattern is best for an experienced carver or pumpkin etching. A large, smooth pumpkin will provide the clearest finished result.
10. Stitch and Castle Pumpkin Stencil

The final stencil features a Stitch silhouette paired with a magical storybook castle. It is the most detailed design in the collection and creates a dramatic character-inspired pumpkin.
Use a large pumpkin and combine carving with etching to preserve the castle's narrow towers and interior shapes. This pattern will look especially beautiful with a warm white or soft blue LED light inside.
Download the Free Stitch Pumpkin Stencil PDF
Ready to start carving? Click the button below to download all 10 Lilo and Stitch pumpkin carving stencils in one printable PDF.
The PDF includes one design per page, so you can print the entire collection or select individual page numbers in your printer settings.
These printable pumpkin stencils are intended for personal use only. Please do not sell, redistribute, reproduce commercially or upload the PDF or individual files to another website.
How to Print the Stitch Pumpkin Stencils
Follow these steps to print the design you want:
- Click the download button to open the PDF.
- Save the printable to your computer or device.
- Open your printer settings.
- Select the specific stencil page you want to print.
- Choose black-and-white printing.
- Use standard 8.5 × 11-inch printer paper.
- Select "Actual Size" or adjust the scale to match your pumpkin.
- Print the stencil and trim away some of the excess paper.
Regular printer paper is usually better than cardstock because it bends more easily around a pumpkin's curved surface.
Try printing at 70% to 85% for a smaller pumpkin. The original 100% size should work well for most medium or large pumpkins.
How to Use a Stitch Pumpkin Stencil
1. Choose the Right Pumpkin
Select a fresh, firm pumpkin with a sturdy stem and at least one smooth, relatively flat side. A smooth carving surface makes detailed character stencils much easier to attach and transfer.
Medium pumpkins work well for the simple silhouettes. Use a large pumpkin for the Stitch face, Lilo and Stitch together, butterfly or castle designs.
2. Prepare Your Pumpkin
Have an adult cut an opening in the pumpkin and remove the seeds and pulp. Scrape the inside wall behind the carving area until it is approximately one inch thick.
Children can help scoop out the pumpkin, but an adult should handle all sharp carving tools.
3. Attach the Printed Stencil
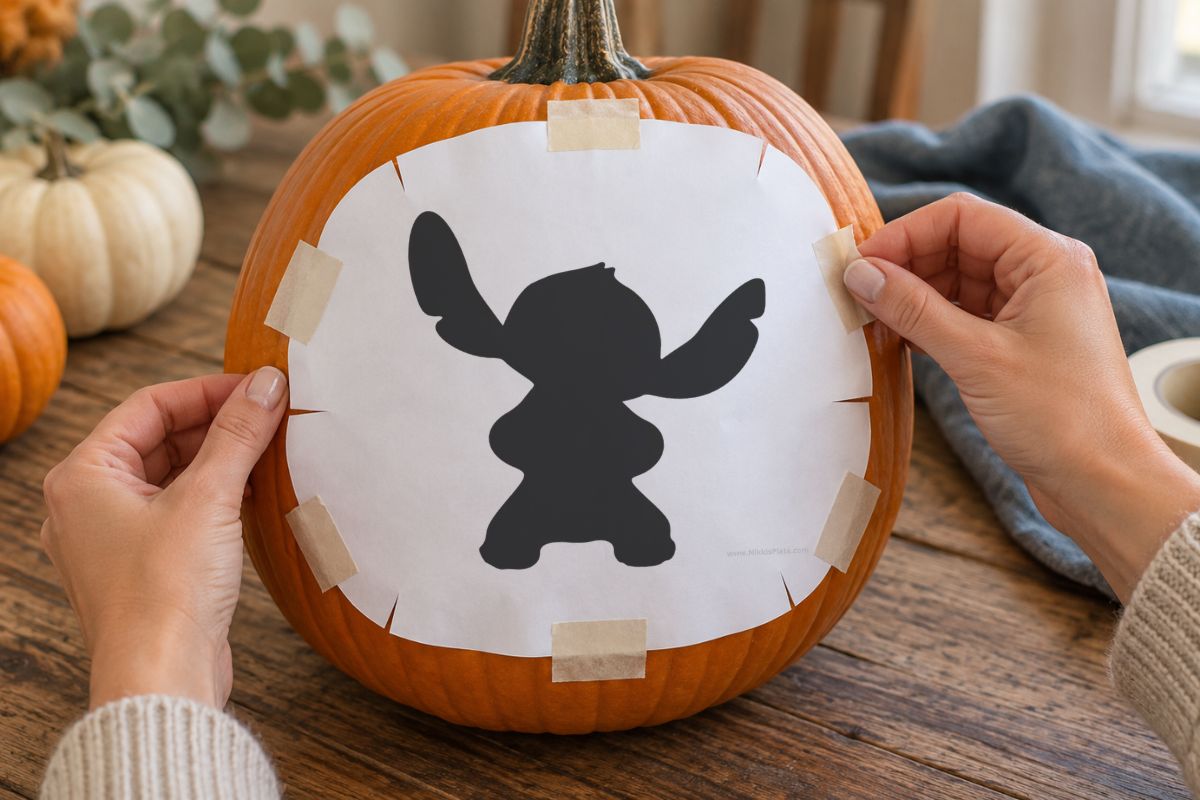
Trim some of the empty paper from around the design. Place the stencil against the smoothest side of the pumpkin and secure it with painter's tape.
Make several small relief cuts around the outer edge of the paper. These cuts allow the paper to overlap slightly and sit more smoothly against the pumpkin's curved surface.
4. Transfer the Design
Use a pushpin, thumbtack or pumpkin stencil transfer tool to make closely spaced holes around the shapes you plan to carve or etch.
Remove the paper once the complete design has been transferred. If the puncture marks are difficult to see, connect them gently with a washable marker.
5. Check the Design for Support Bridges
Before carving, look carefully at every interior shape. Any section completely surrounded by a cut-through area will fall out unless it is connected to the rest of the pumpkin.
Add narrow support bridges where necessary, or etch delicate sections instead of cutting all the way through.
6. Carve the Smallest Areas First
Use a small serrated pumpkin saw and work from the smallest interior details toward the larger outside sections. Slow, gentle sawing motions will give you more control than pushing a large kitchen knife through the pumpkin.
7. Add Etched Details
For Stitch's eyes, facial features, Lilo's hair or detailed castle sections, scrape away only the dark outer skin. Leaving some pumpkin flesh intact creates a softer glow and protects the structure of the design.
8. Light and Display Your Pumpkin
Place a battery-operated LED tea light inside the pumpkin. Warm white creates a traditional jack-o'-lantern glow, while blue or purple lighting can give your Stitch pumpkin a fun character-inspired look.
Carving Versus Etching a Stitch Pumpkin
Traditional pumpkin carving removes a section of the pumpkin wall completely. This technique produces a bright glow and works well for large, uncomplicated shapes.
Pumpkin etching removes only the dark outer skin, leaving some of the pale flesh underneath. When the pumpkin is illuminated, the etched areas produce a softer glow.
Etching is especially useful for these character templates because it can preserve:
- Facial features
- Eyes and noses
- Fingers and hands
- Narrow ears
- Hair details
- Butterflies
- Castle towers
- Small interior shapes
You can use both methods on the same pumpkin. Fully carve the largest shapes, then etch the smaller details to create depth and prevent fragile sections from breaking.
Helpful Pumpkin Carving Supplies
Disclosure: This section contains Amazon affiliate links. As an Amazon Associate, I earn from qualifying purchases at no additional cost to you.
A few simple supplies will make these Stitch pumpkin carving stencils much easier to use:
- A pumpkin carving kit with small serrated saws
- A sturdy pumpkin scoop for removing pulp and thinning the walls
- A pumpkin stencil transfer tool or pushpin
- Painter's tape for attaching the stencil
- A washable marker for connecting transfer dots
- A rounded etching tool for detailed sections
- Battery-operated LED tea lights for a flameless glow
- A non-slip cutting mat to help keep the pumpkin stable
Always check the manufacturer's age recommendations and safety instructions before using carving tools or battery-operated products.
Pumpkin Carving Safety for Families
An adult should always handle sharp pumpkin carving tools. Children can choose their favorite Stitch stencil, scoop out the pumpkin, attach the paper and help transfer the design.
For younger children, turn the printable into a no-carve activity. Trace the design onto the pumpkin and decorate it with washable paint or markers.
Use battery-operated LED lights or glow sticks instead of open-flame candles, especially when pumpkins are displayed near children, costumes or other Halloween decorations. You can find additional Halloween safety recommendations from the American Academy of Pediatrics.
Tips for Carving Detailed Character Stencils
- Choose a smooth pumpkin. Deep ridges can distort Stitch's face, ears and other recognizable details.
- Use a large pumpkin for detailed designs. More surface area makes small shapes easier to transfer and preserve.
- Thin the wall behind the design. A pumpkin wall approximately one inch thick is easier to carve.
- Keep transfer holes close together. This creates a clear outline after removing the paper.
- Begin with the smallest details. Carving large openings first can weaken the pumpkin.
- Add support bridges. Keep narrow connections around pieces that would otherwise fall out.
- Use etching where necessary. You do not need to cut through every part of the design.
- Take your time around curves. Short, controlled sawing motions help preserve Stitch's ears and facial shape.
- Carve close to Halloween. Your pumpkin will look freshest if it is carved shortly before you plan to display it.
- Keep the finished pumpkin cool. Store it in a cool, shaded location when it is not on display.
Want More Pumpkin Carving Stencils?
If pumpkin carving is one of your family's favorite Halloween traditions, take a look at my two Books of Pumpkin Carving Stencils. Dont worry about having to print your own, just order one of my books on Amazon!
FAQ: Lilo & Stitch Pumpkin Carving Templates
You can download them right here on Nikki's Plate post! I've created free printable Stitch pumpkin stencils so you can easily carve your own Disney pumpkin at home.
Yes! These Lilo & Stitch stencils are designed to be simple enough for beginners. Kids will still need some adult help with carving, but the templates make it much easier.
Absolutely. You can adjust the size in your printer settings to fit different pumpkins, whether you want a small, medium, or extra-large Stitch design.
Yes! I also share Disney pumpkin carving templates along with other fun Halloween printables. Make sure to explore those if you want more characters like Mickey, Minnie, or Frozen designs.
No. These are unofficial fan-made printables. Nikki's Plate is not affiliated with, sponsored by or endorsed by Disney.
The templates are intended for personal, non-commercial use. Do not sell, redistribute, upload or include the files in another product. If you are unsure whether your planned use is permitted, contact Nikki's Plate before printing multiple copies.
Yes. Make sure your artificial pumpkin is specifically designed for carving and follow its manufacturer's instructions. A foam pumpkin is a good option if you want to display your design again each year.
More Free Pumpkin Carving Printables
Keep planning your family pumpkin-carving night with these free collections:
- 15 Free Pumpkin Carving Stencils For Kids
- 20 Free Disney Pumpkin Carving Stencils
- 15 Free Pumpkin Carving Stencils for Kids
- 30 Free Printable Pumpkin Carving Stencils
- 20 Free Cat Pumpkin Carving Patterns
- 15 Free Witch Pumpkin Carving Stencils
- Free Ghost Face Pumpkin Carving Templates
- Browse All Free Pumpkin Carving Printables
Download Your Free Stitch Pumpkin Stencils
These free Lilo and Stitch pumpkin carving stencils make it easier to create a playful character-inspired jack-o'-lantern without drawing the entire design freehand.
Choose a simple Stitch silhouette for a quicker project or try one of the detailed Lilo, butterfly, or castle designs using a combination of carving and etching.
Download the free 10-page PDF, choose your favorite stencil, and enjoy a creative Halloween pumpkin-carving night at home.
Which design will your family choose first?
Happy carving, beauties!
Until next time,


As Seen on TikTok
Come behind the scenes of our farmhouse build, decor projects, and cozy everyday life. Tap a video to watch, then follow @nikkisplate on TikTok for more.
Watch this video on TikTok
Watch this video on TikTok
Watch this video on TikTok

Leave a Reply