
Make the season extra sweet with 35 easy Christmas crafts for kids. Find simple ornaments, paper projects, keepsakes, cards and low-mess ideas for toddlers, preschoolers and school-age children.
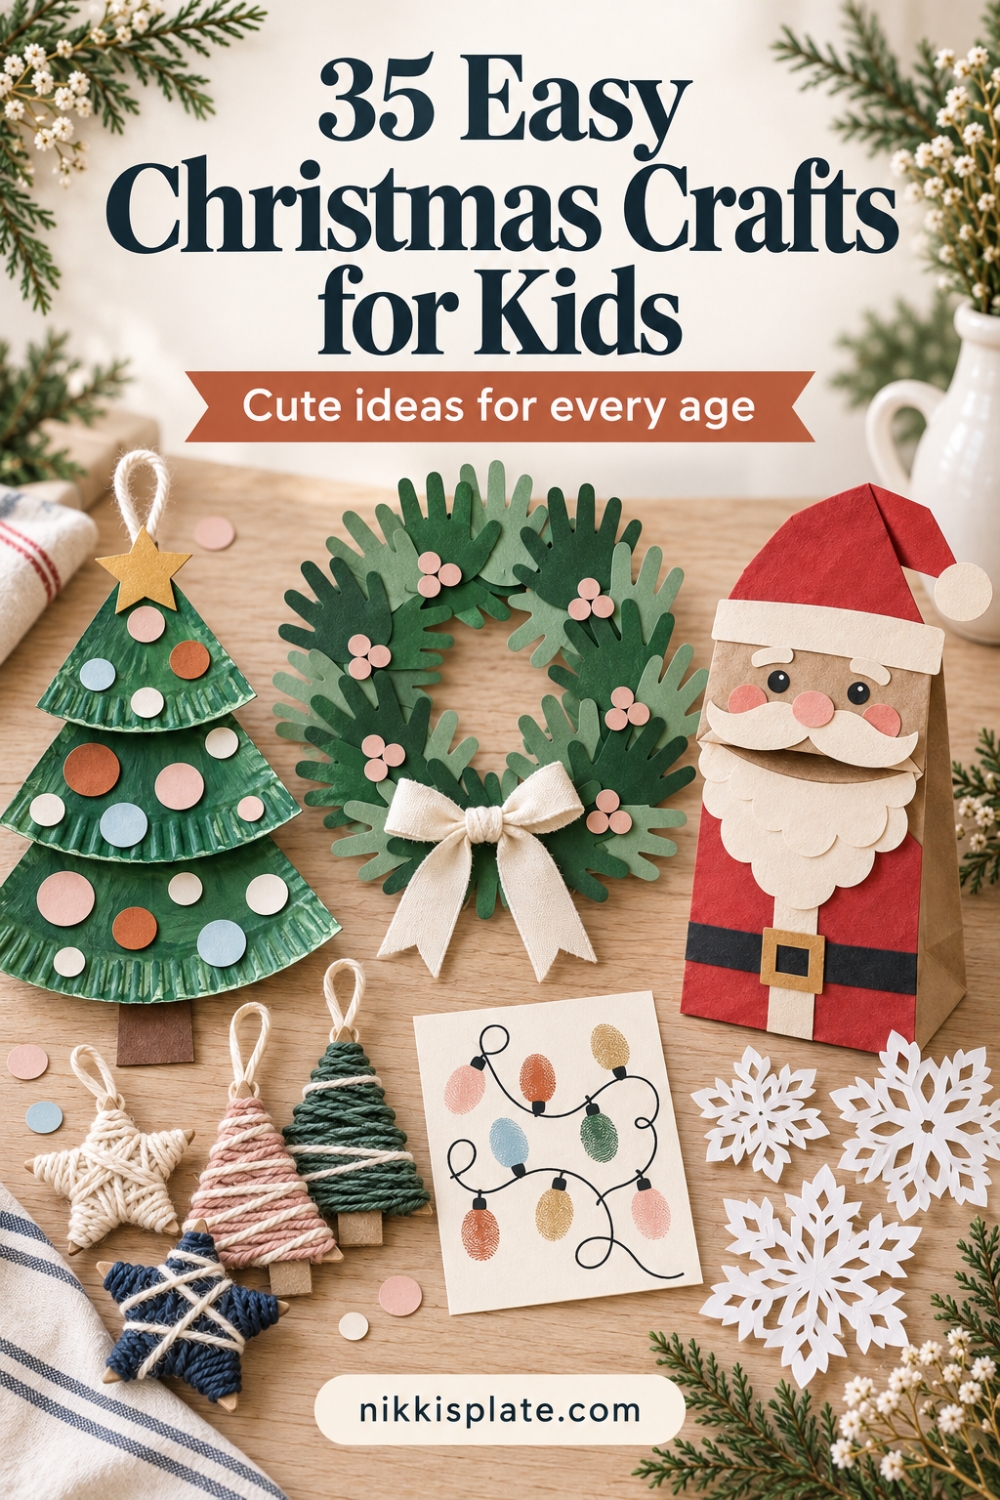
Hi beauties! If you are looking for easy Christmas crafts for kids, you are in the right place. A simple afternoon with paper, paint and glue can turn into handmade ornaments, sweet keepsakes and the kind of little holiday memories you will want to save.
These ideas are designed for real family life, with affordable supplies, manageable steps and plenty of low-mess options. I have included crafts for toddlers, preschoolers and older kids, plus quick notes about time, mess level and the parts an adult should prepare.
You will find 35 Christmas trees, Santas, reindeer, snowmen, snowflakes, ornaments, cards and meaningful holiday projects below. If you need a completely no-prep activity, print a few of my free vintage Christmas coloring pages or farmhouse Christmas coloring pages while you set up the craft table.
Easy Christmas Crafts for Kids
Christmas crafting does not need to mean buying a cart full of specialty supplies or planning a project that takes all afternoon. The best activities use familiar materials, give children room to make their own choices and still produce something they feel proud to display or gift.
This list includes quick paper crafts, simple painting activities, ornaments, puppets, garlands and keepsakes. Choose the project that fits your child's age and attention span, then prepare only the supplies needed for that one idea.
Christmas Craft Supplies to Keep on Hand
You do not need every item on this list. A small bin of reliable basics makes it easy to choose a project without another store run:
- Construction paper, cardstock and recycled cardboard
- Paper plates, paper lunch bags and clean cardboard tubes
- Washable markers and crayons
- Washable, child-labelled paint
- Glue sticks and white or tacky craft glue
- Kid-safe scissors
- Heavy white cardstock
- Clear contact paper
- Wooden craft sticks
- Tissue paper, yarn, ribbon and pipe cleaners
- Large paper shapes, sticker dots and child-safe decorative pieces
- A shallow tray, washable mat and damp cloth for easier cleanup
Choose supplies labelled for children and follow every package direction. The U.S. Consumer Product Safety Commission art-material guidance explains that children's art materials are subject to additional requirements. Supervise scissors, staplers and any small parts, and reserve hot glue, ovens and detailed cutting for adults.
35 Easy Christmas Crafts for Kids
Each project includes a quick guide so you can see the age range, active time and mess level before you begin. Ages are flexible and always assume the adult supervision noted in the instructions.
1. Paper Plate Christmas Tree
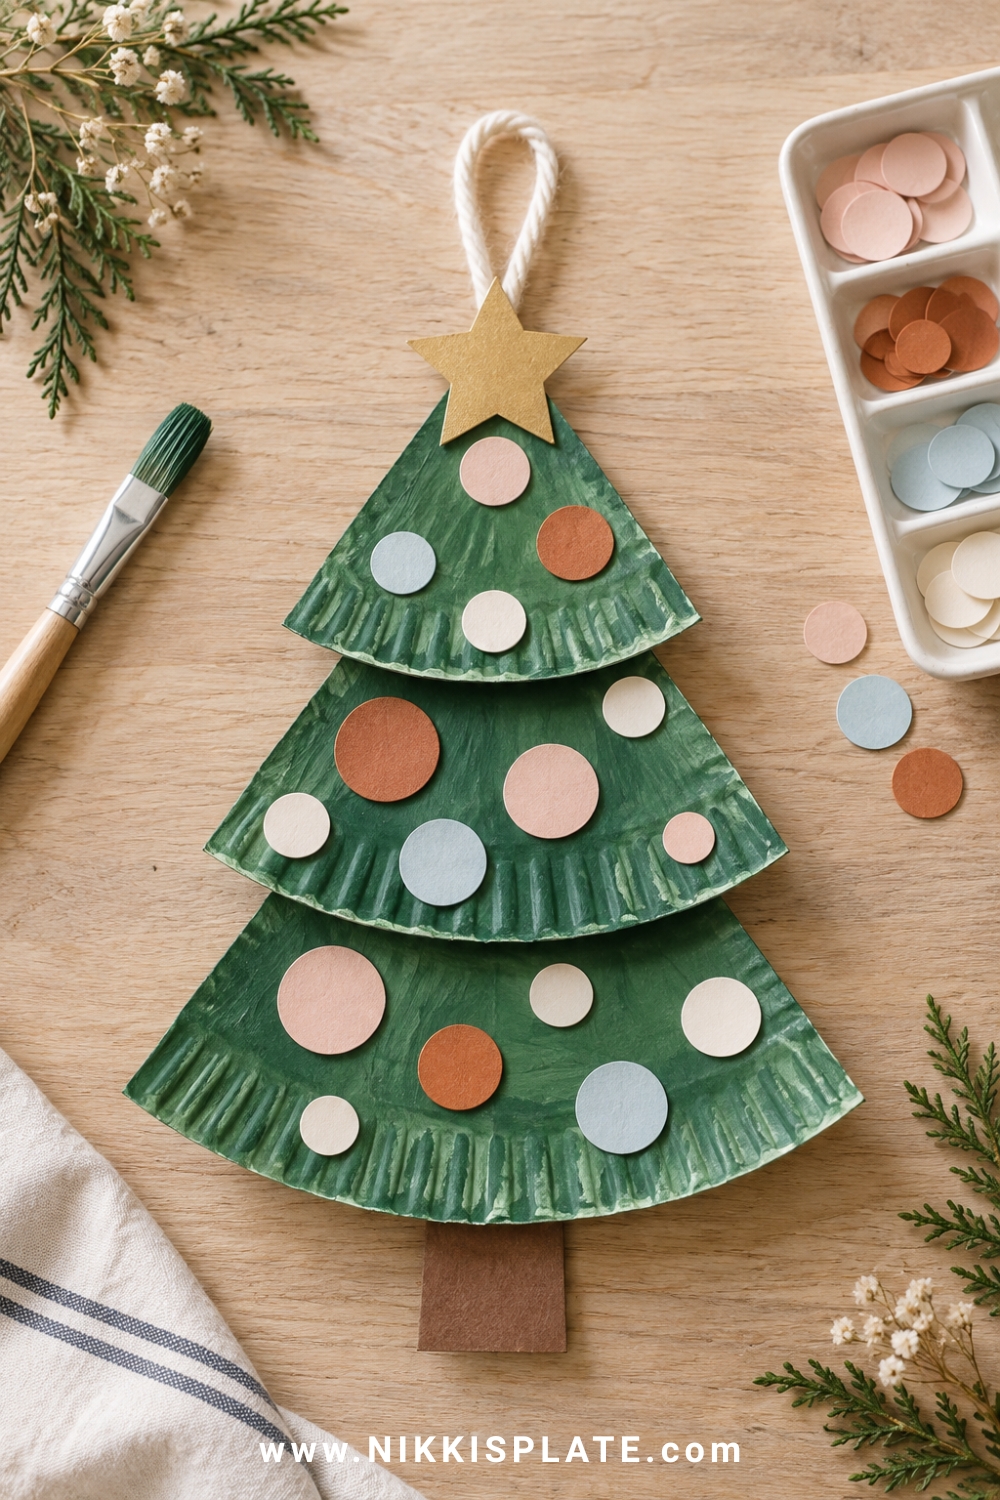
Quick guide: Best for ages 2 to 6 with adult preparation | Time: 20 minutes plus drying | Mess level: Medium
Materials: Paper plate, green washable paint, glue stick, paper scraps, star cutout and yarn
How to make it:
- Cut a paper plate into three graduated triangles, or prepare the pieces before craft time for younger children.
- Paint the pieces green, let them dry, then stack and glue them into a tree shape.
- Decorate with paper circles, tiny bows or sticker dots, then add a star and yarn loop if you want to hang it.
Helpful tip: Set the decorations in a muffin tin so children can choose their own colours without scattering supplies across the table.
2. Sponge Painted Christmas Trees
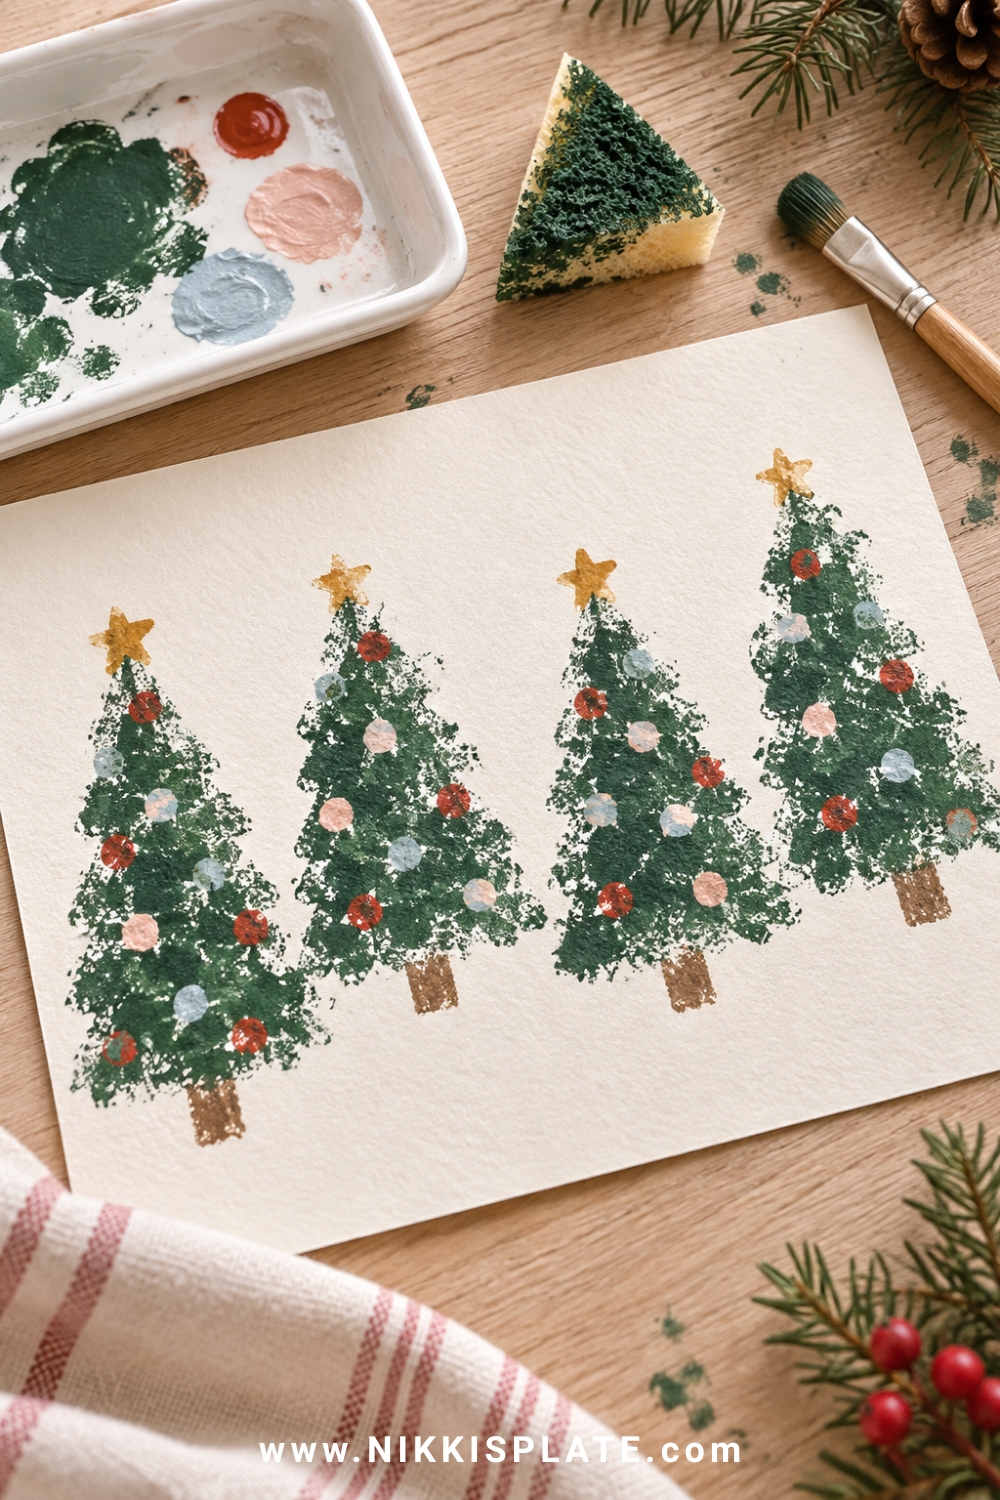
Quick guide: Best for ages 2 to 7 | Time: 15 minutes plus drying | Mess level: Medium
Materials: Heavy white paper, clean kitchen sponge, washable paint, shallow paint tray and marker
How to make it:
- Have an adult cut a clean sponge into a simple triangle and pour a thin layer of green paint into a shallow tray.
- Press the sponge into the paint, blot once on scrap paper and stamp a row of trees across the page.
- When the paint dries, add trunks, stars, snow dots or fingerprint ornaments.
Helpful tip: Use one sponge for green paint and a cotton swab for ornaments. A rimmed baking sheet makes cleanup much faster.
3. Tissue Paper Christmas Tree Sun Catcher
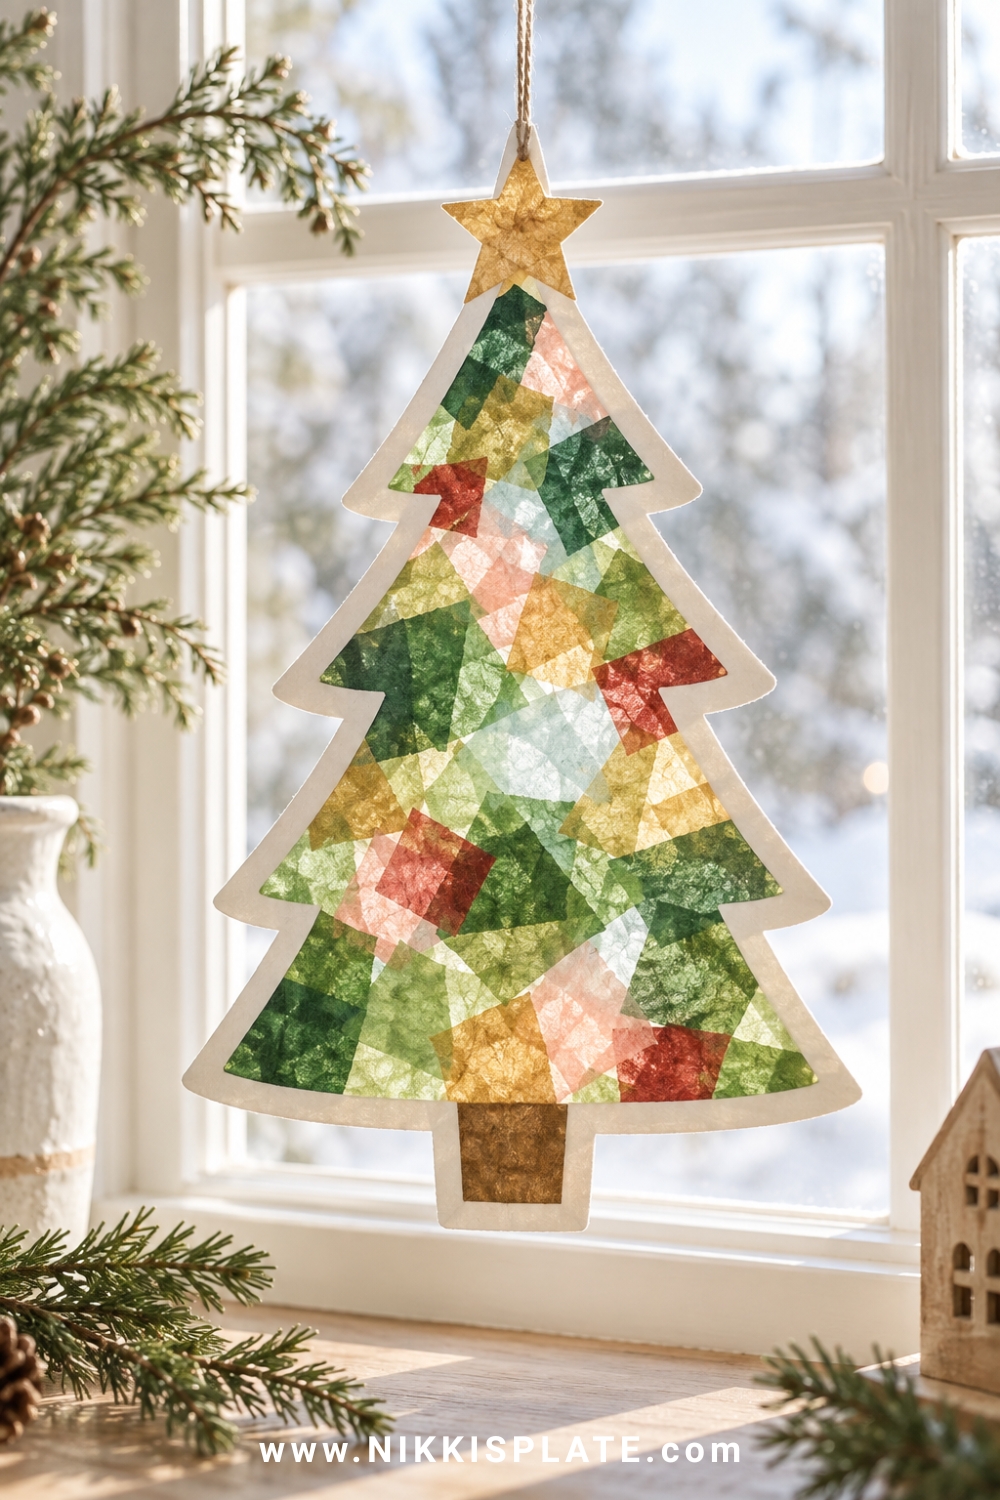
Quick guide: Best for ages 3 to 8 | Time: 20 minutes | Mess level: Low
Materials: Green cardstock, clear contact paper, tissue paper squares, scissors, tape, and ribbon
How to make it:
- Cut a large tree-shaped opening from green cardstock and place clear contact paper behind it with the sticky side facing up.
- Cover the opening with overlapping tissue paper squares in green, blush, pale blue, gold and red.
- Seal the back with a second sheet of contact paper, trim the edges and tape the tree to a sunny window.
Helpful tip: Prepare the frame and contact paper in advance for preschoolers so their job is simply choosing and placing the colours.
4. Accordion Fold Christmas Tree Cards
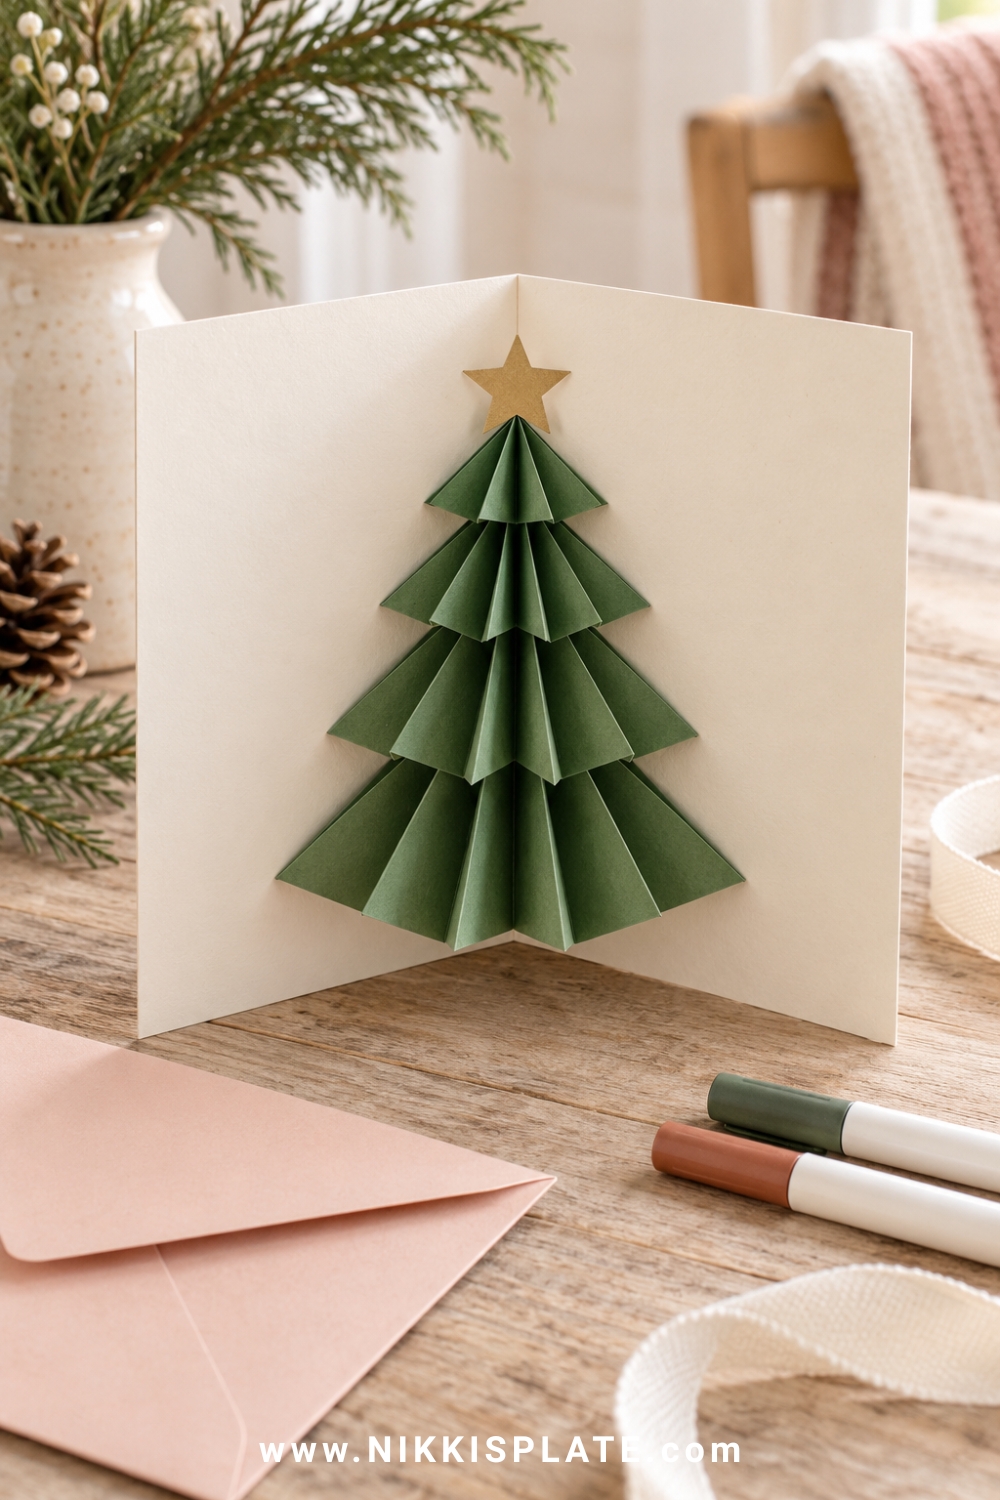
Quick guide: Best for ages 5 to 10 | Time: 25 minutes | Mess level: Low
Materials: Cardstock, green paper, glue stick, star cutout, markers and optional ribbon
How to make it:
- Fold a sheet of cardstock in half to make the card base.
- Accordion-fold a rectangle of green paper, fold it in half and glue the two inside edges together to form a fan-shaped tree.
- Glue the tree inside the card, then add a paper star and a short handwritten holiday message.
Helpful tip: Pre-mark even fold lines for younger children, or use patterned scrapbook paper to make the card feel extra special.
Adult prep and safety: Supervise scissors and keep the finished card flat until the glue is fully dry.
5. Cardboard Roll Christmas Trees
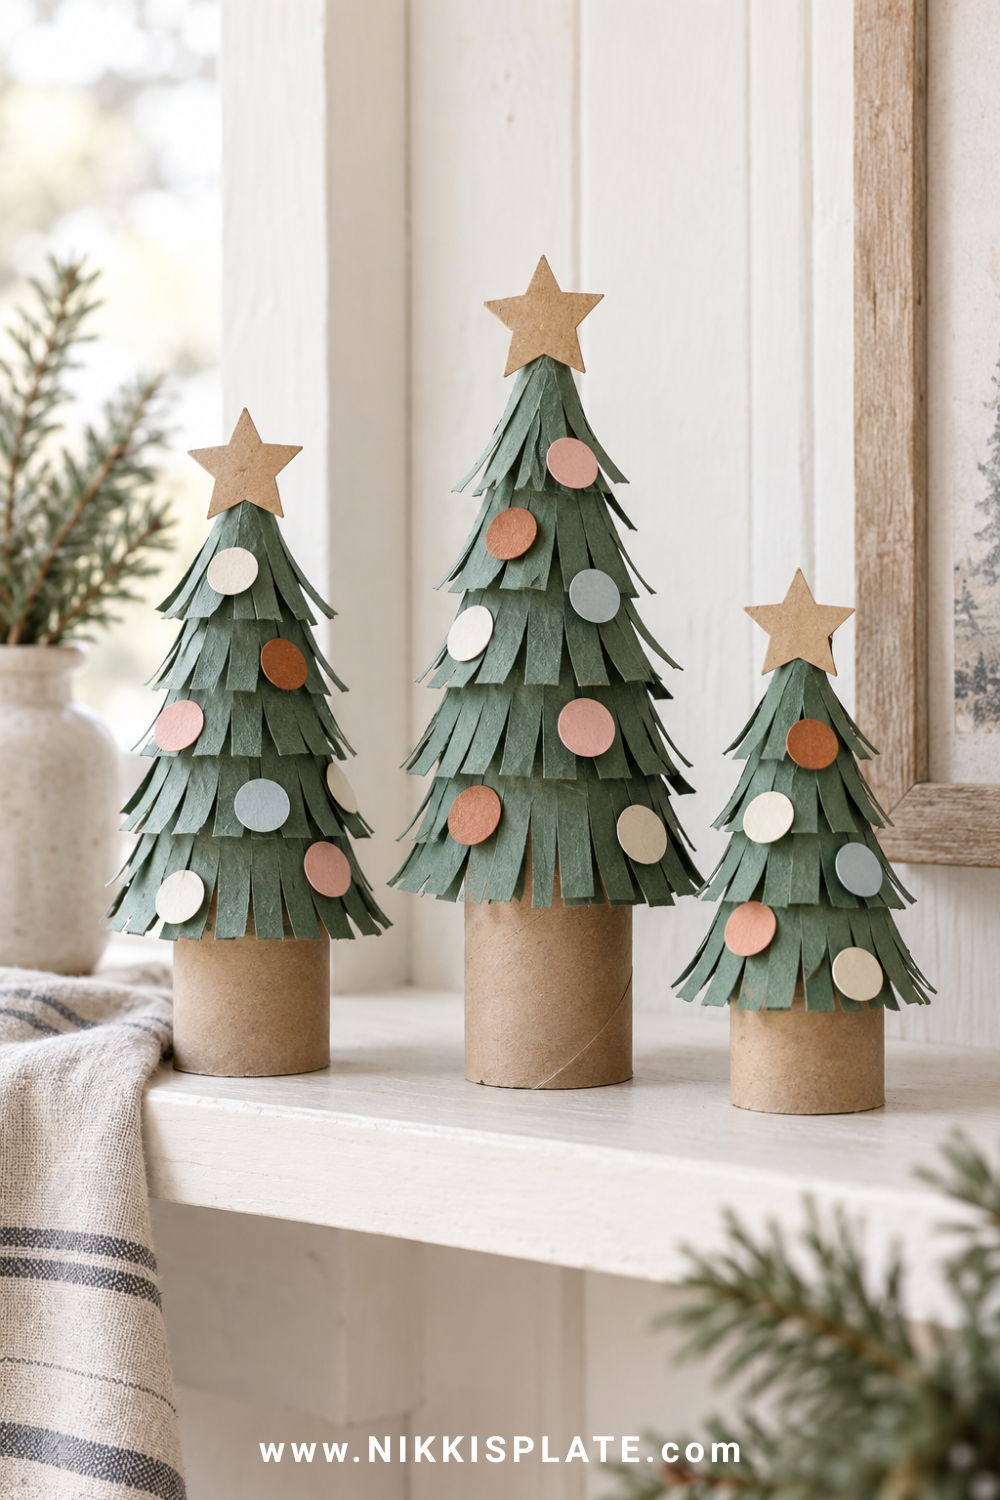
Quick guide: Best for ages 3 to 8 | Time: 25 minutes plus drying | Mess level: Medium
Materials: Cardboard tubes, green paper or paint, paper circles, glue and star cutouts
How to make it:
- Cover a cardboard tube with green paper or washable paint.
- Cut several slits down from the top, then gently fan the strips outward to create layered branches.
- Glue on paper ornaments and a star, then stand the tree on a shelf or add a paper base for stability.
Helpful tip: If cutting the fringe feels too tricky, wrap a simple green paper cone around the tube instead.
Adult prep and safety: Adults should make the starter cuts for young children and check that recycled tubes are clean and dry.
6. Popsicle Stick Christmas Tree Ornaments
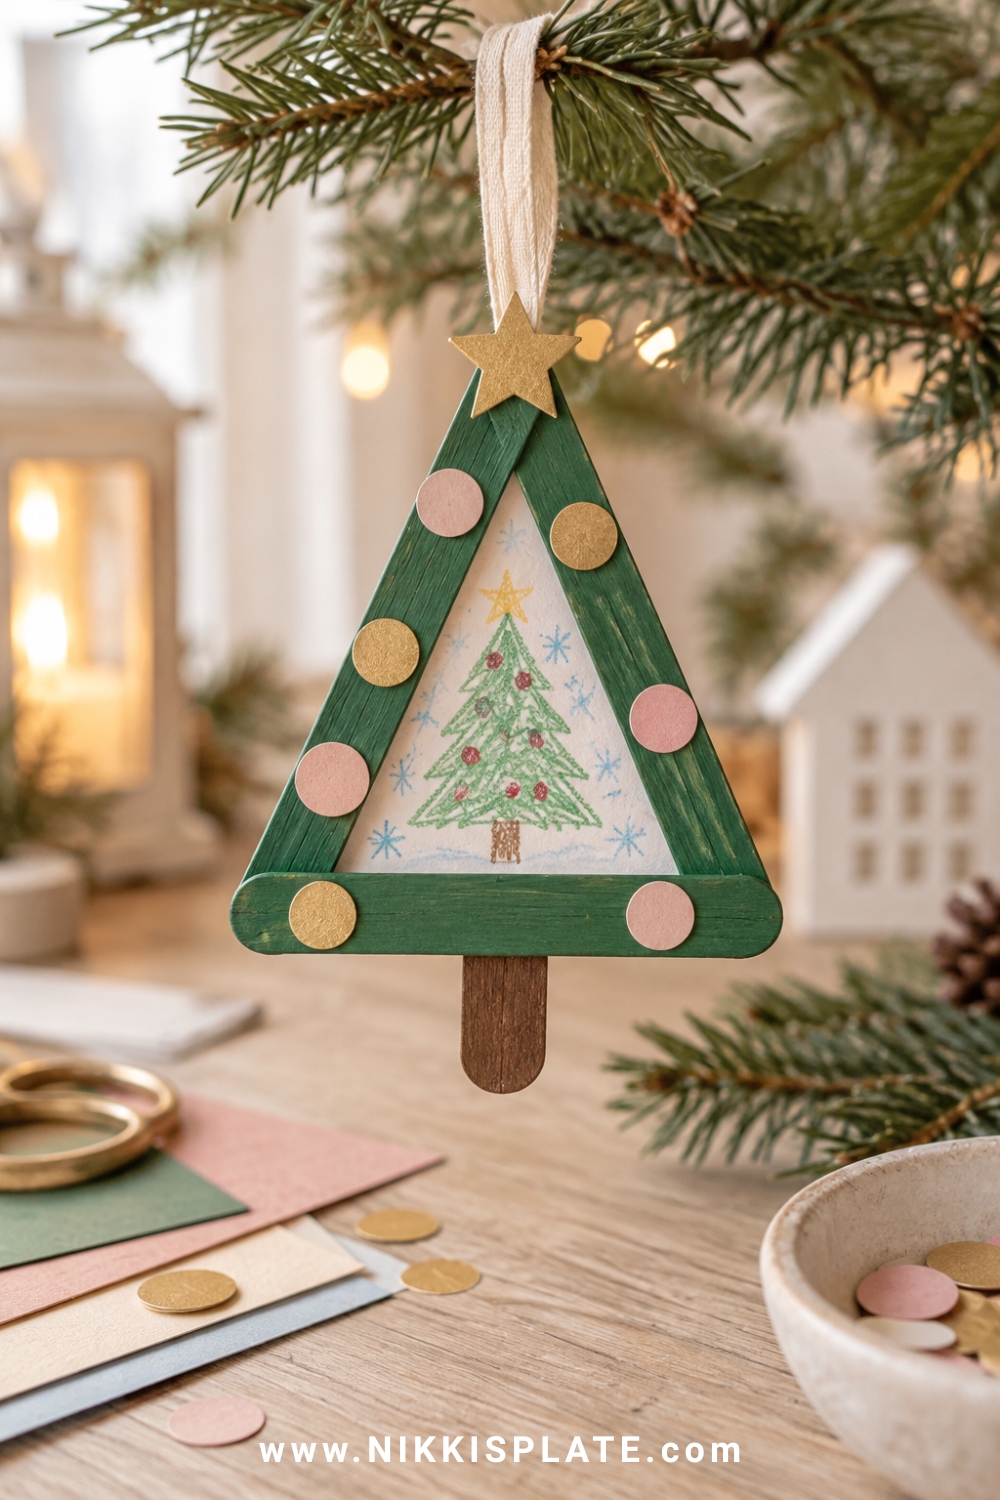
Quick guide: Best for ages 4 to 10 | Time: 25 minutes plus drying | Mess level: Medium
Materials: Three craft sticks, green paint, glue, paper decorations, ribbon and a small photo if desired
How to make it:
- Paint three craft sticks green and let them dry.
- Glue the sticks into a triangle and add a short piece across the bottom as a trunk.
- Decorate the frame, attach ribbon to the back and add a small photo or paper backing if you want a keepsake ornament.
Helpful tip: Make one ornament for each child and write the name and year on the back before it goes on the tree.
Adult prep and safety: An adult should handle hot glue if stronger adhesion is needed; children can use tacky craft glue instead.
7. Paper Plate Santa
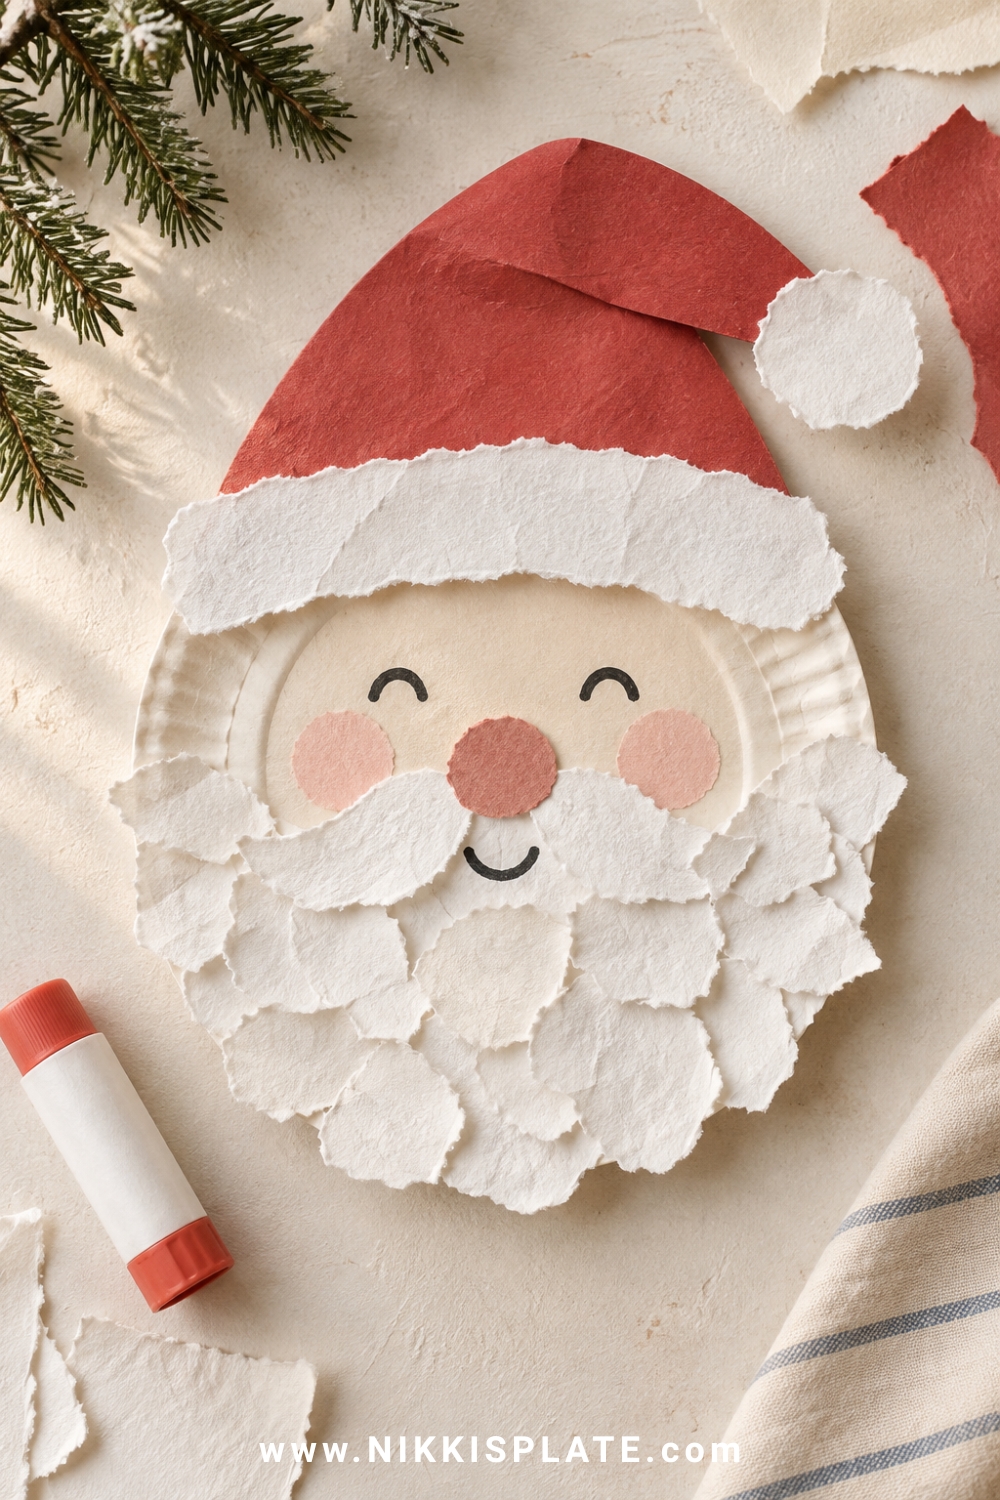
Quick guide: Best for ages 2 to 7 | Time: 20 minutes | Mess level: Low to medium
Materials: Paper plate, red and blush paper, cotton balls or torn white paper, glue and marker
How to make it:
- Use the paper plate as Santa's face and add a red paper hat across the top.
- Glue cotton balls or torn white paper around the lower edge to build a fluffy beard.
- Add paper eyes, a round nose and rosy cheeks, then finish the hat with a white trim and pom-pom.
Helpful tip: Torn paper makes a safer large-piece alternative to cotton balls for toddlers who still mouth craft materials.
8. Handprint Santa Beard Keepsake
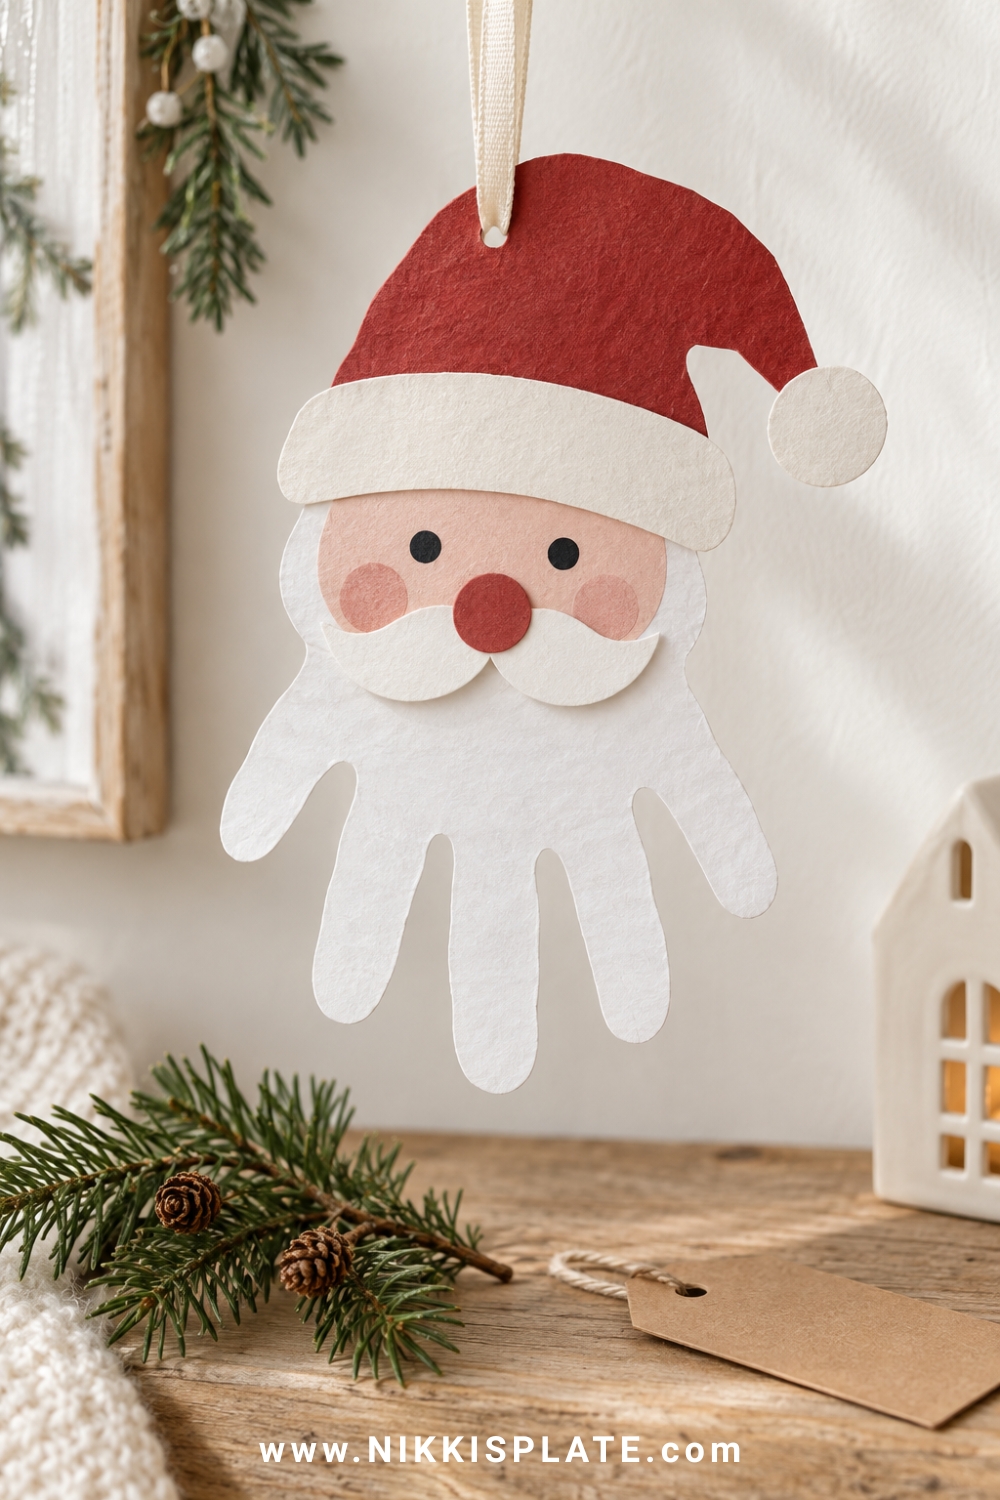
Quick guide: Best for ages 2 to 8 with adult help | Time: 20 minutes | Mess level: Low
Materials: White and red cardstock, pencil, scissors, glue, marker and optional ribbon
How to make it:
- Trace the child's hand on white cardstock and cut it out with the fingers pointing down to form Santa's beard.
- Add a small paper face and red hat above the palm area.
- Write the child's name and year on the back, then add a ribbon loop for hanging.
Helpful tip: Trace several handprints at once so you can make matching keepsakes for grandparents without repeating the setup.
Adult prep and safety: Adults should do the detailed cutting for toddlers and preschoolers.
9. Paper Bag Santa Puppet
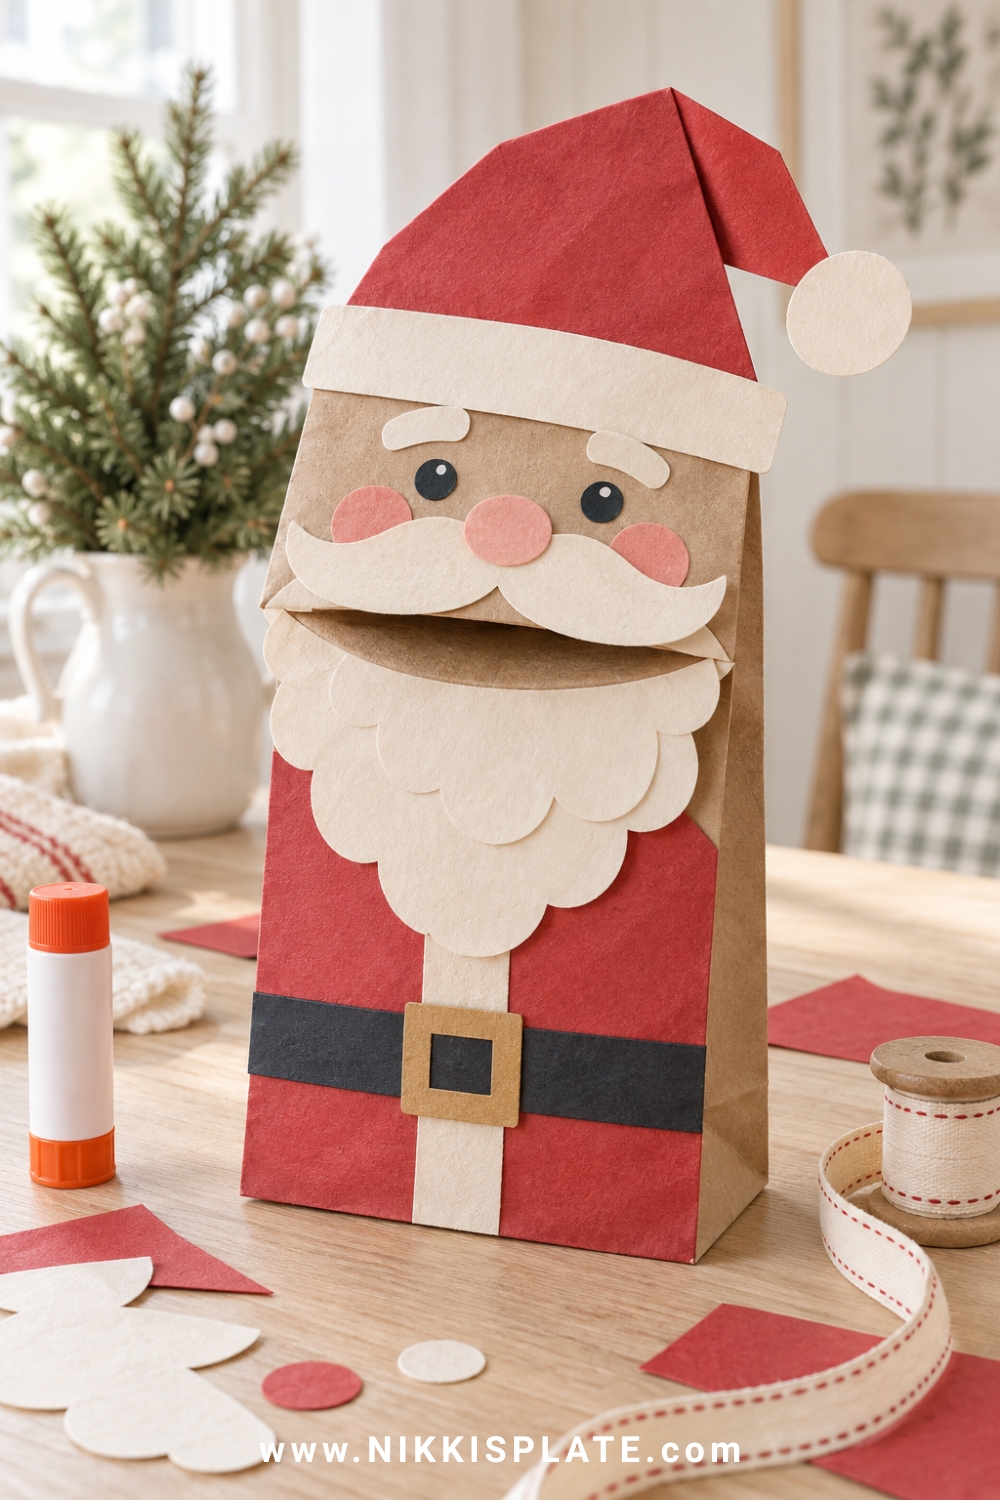
Quick guide: Best for ages 3 to 8 | Time: 20 minutes | Mess level: Low
Materials: Brown or white paper lunch bag, coloured paper, glue stick, marker and yarn or torn paper
How to make it:
- Lay the paper bag flat with the folded flap facing up and use the flap as Santa's moving mouth.
- Add a paper face, hat, beard and suit, keeping the pieces clear of the fold.
- Let the glue dry, then use the puppet for Christmas stories or a simple family puppet show.
Helpful tip: Set out a few pre-cut hats, beards and buttons, but let children decide how their Santa should look.
10. Cotton Ball Santa Hat
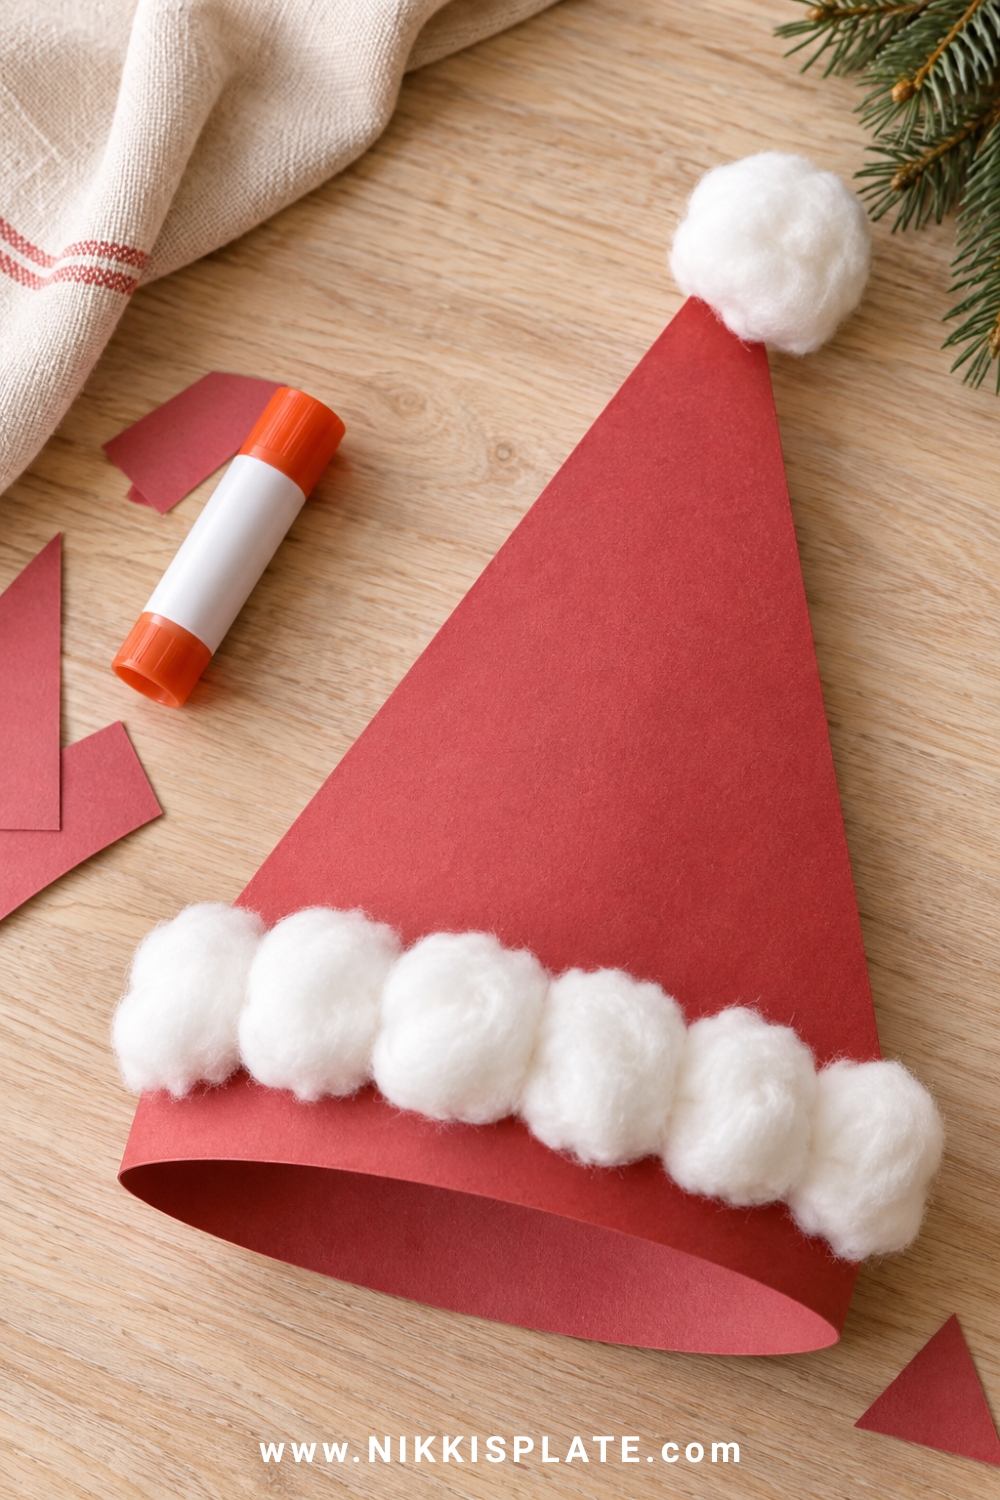
Quick guide: Best for ages 2 to 6 | Time: 15 minutes | Mess level: Low
Materials: Red cardstock, cotton balls or torn white tissue, glue stick and elastic or paper headband
How to make it:
- Cut a large red triangle and a long strip of cardstock for the headband.
- Add white cotton or torn tissue along the bottom edge and one fluffy piece at the point.
- Fit the paper band around the child's head, remove it and tape or staple the ends together.
Helpful tip: A paper-only version stays flatter, stores easily and avoids loose fibres during classroom use.
11. Paper Plate Reindeer
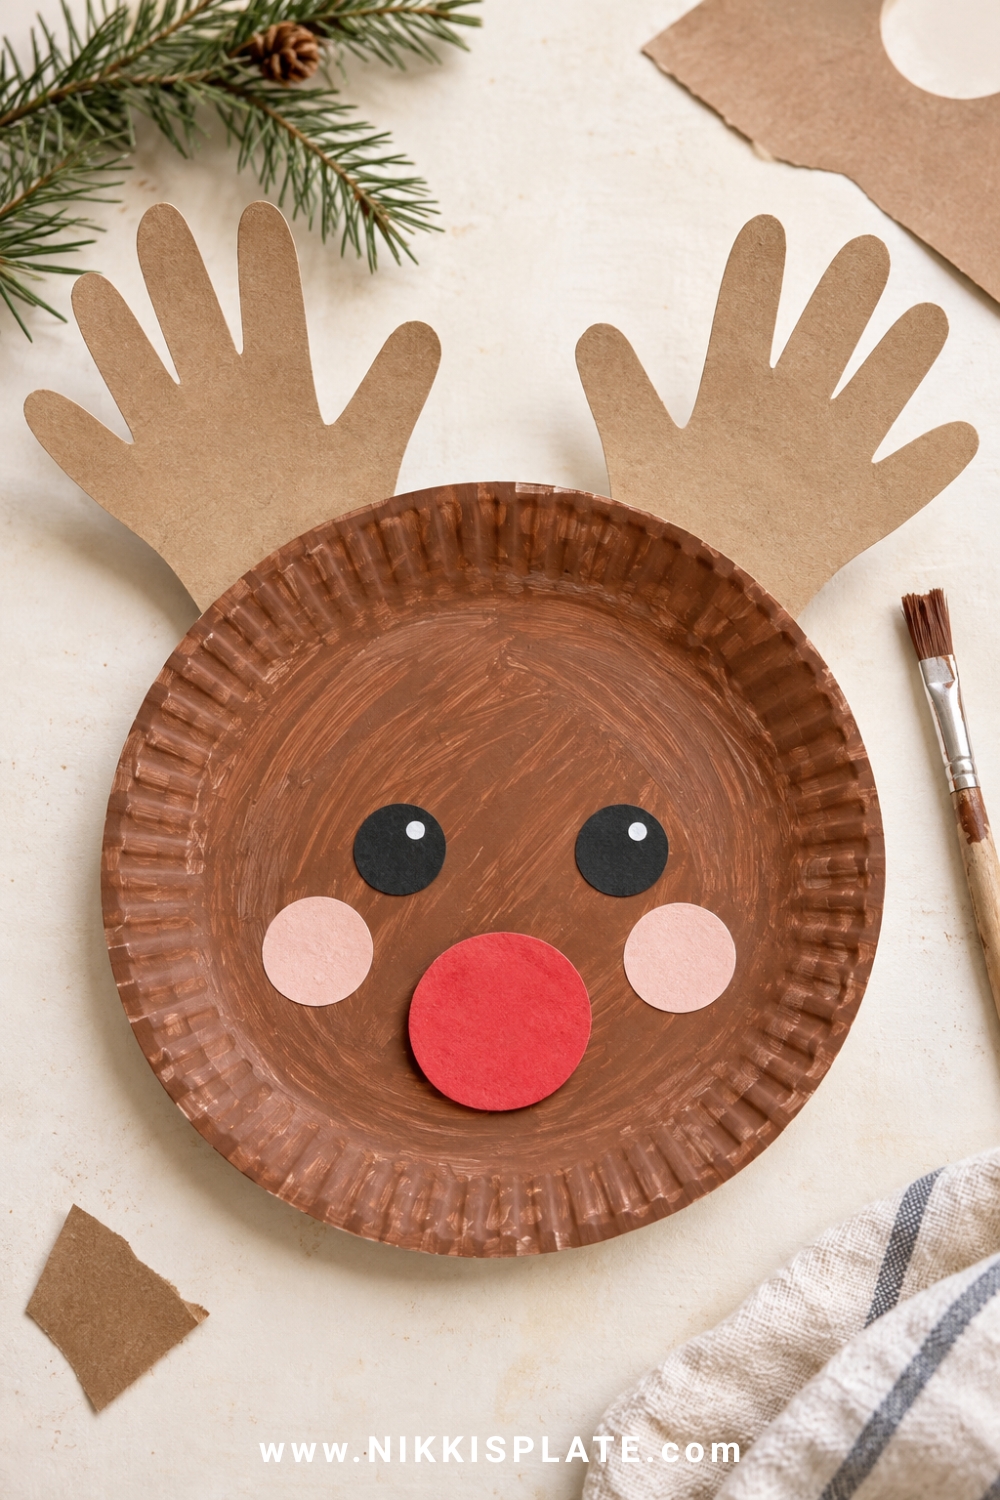
Quick guide: Best for ages 2 to 7 | Time: 20 minutes plus drying | Mess level: Medium
Materials: Paper plate, brown washable paint, kraft paper, red paper, glue, and marker
How to make it:
- Paint the paper plate brown and allow it to dry.
- Trace and cut two handprints from kraft paper for antlers, then glue them behind the top of the plate.
- Add eyes, ears, and a red paper nose to make a cheerful Rudolph face.
Helpful tip: Use a clothespin to hold a sponge brush so younger children can paint without covering their whole hand.
Adult prep and safety: Adults should cut the handprint antlers and supervise small facial pieces.
12. Handprint Reindeer Keepsake
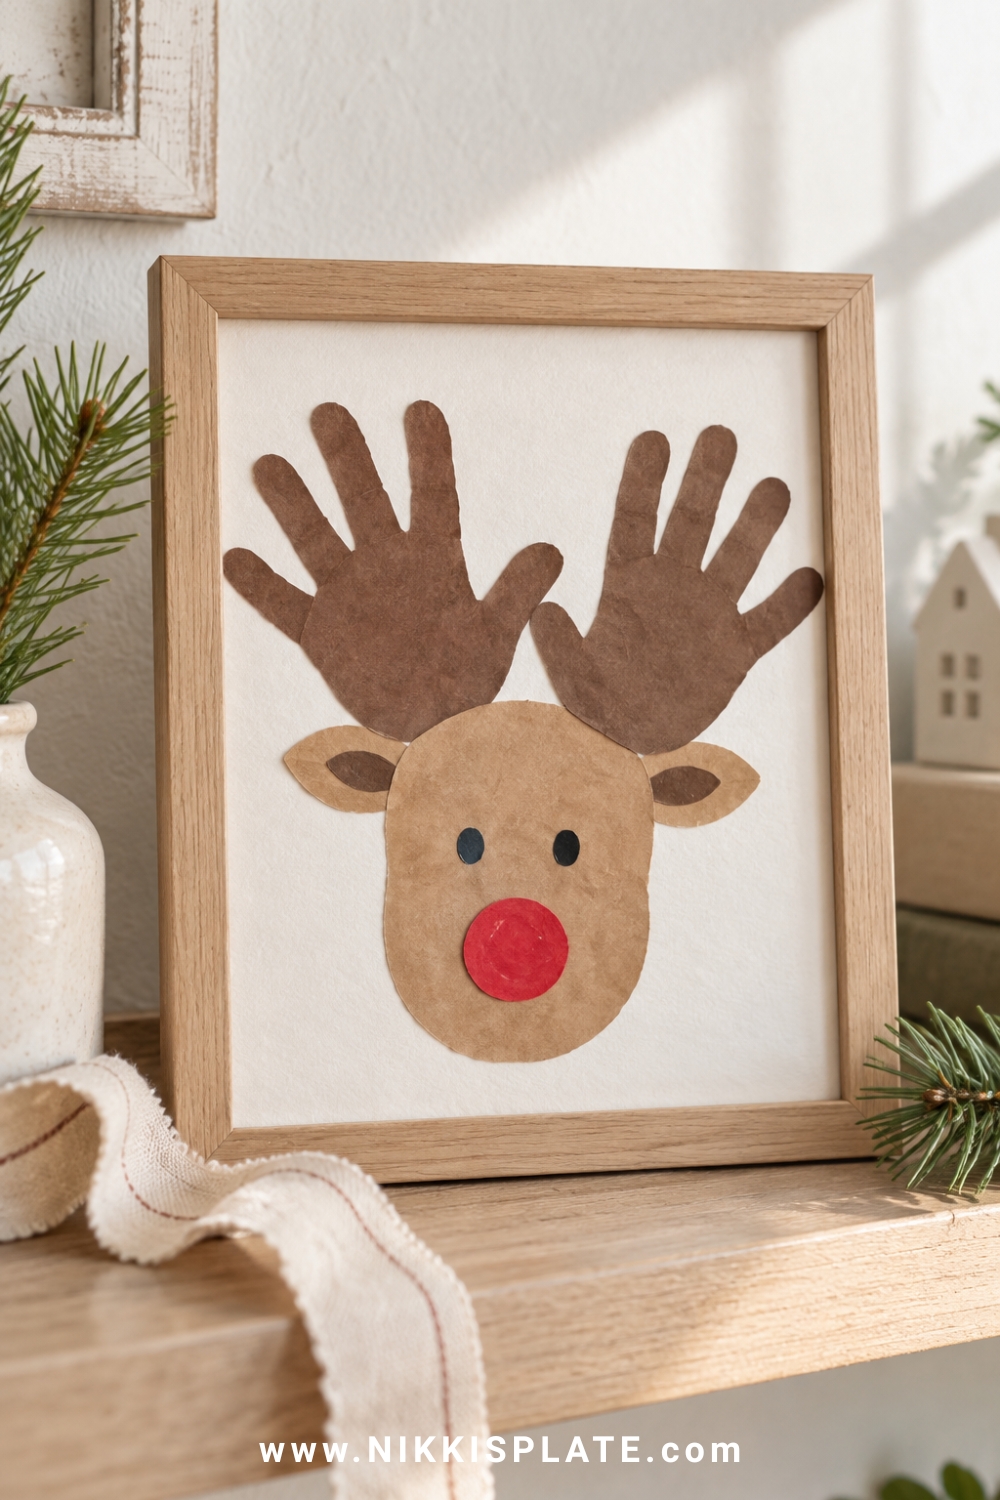
Quick guide: Best for ages 2 to 8 with adult help | Time: 20 minutes | Mess level: Low
Materials: Brown and cream cardstock, pencil, scissors, glue, marker and red paper
How to make it:
- Trace both hands on brown cardstock and cut them out for antlers.
- Cut a simple reindeer head from lighter paper and attach the antlers behind it.
- Add eyes, a red nose and the child's name and year to turn it into a keepsake.
Helpful tip: Mount the finished reindeer on an 8 x 10-inch sheet so it can be framed or added to a holiday memory binder.
Adult prep and safety: Adults should handle the cutting when children are too young for scissors.
13. Cardboard Tube Reindeer
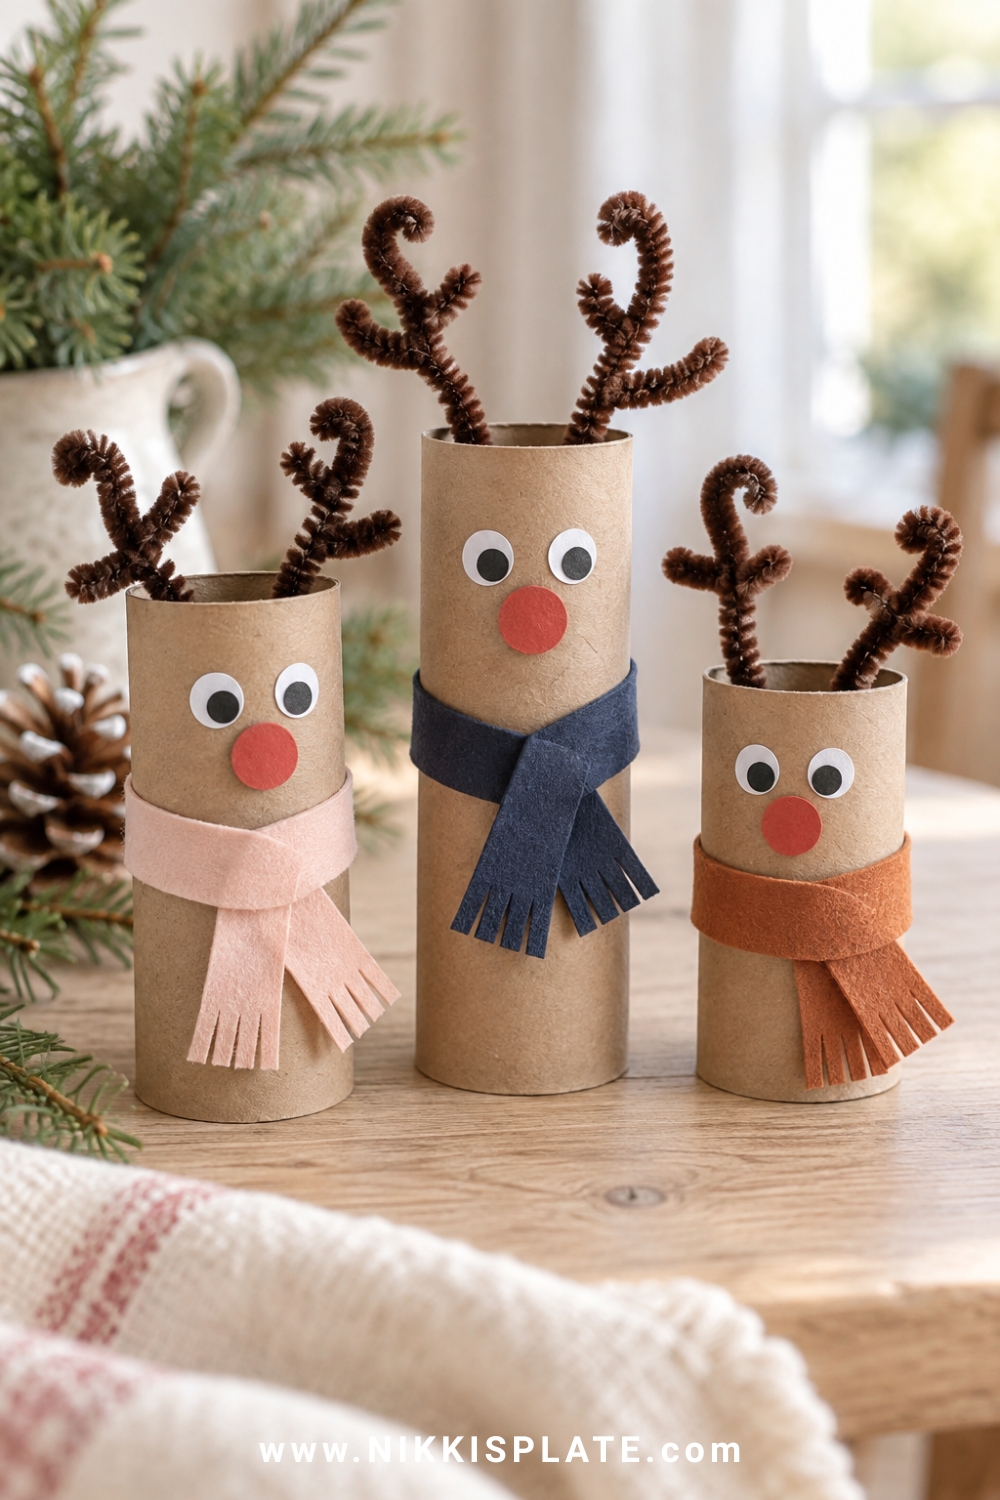
Quick guide: Best for ages 4 to 9 | Time: 25 minutes | Mess level: Low to medium
Materials: Cardboard tube, brown paper or paint, pipe cleaners, red paper, glue and marker
How to make it:
- Cover a cardboard tube with brown paper or washable paint.
- Twist two pipe cleaners into simple antler shapes and attach them inside the top of the tube.
- Add paper ears, eyes and a red nose, then draw small hooves or a scarf.
Helpful tip: Make a whole reindeer team and label each one with a different reindeer name for pretend play.
Adult prep and safety: Fold over sharp pipe-cleaner ends and have an adult secure the antlers.
14. Popsicle Stick Reindeer Ornament
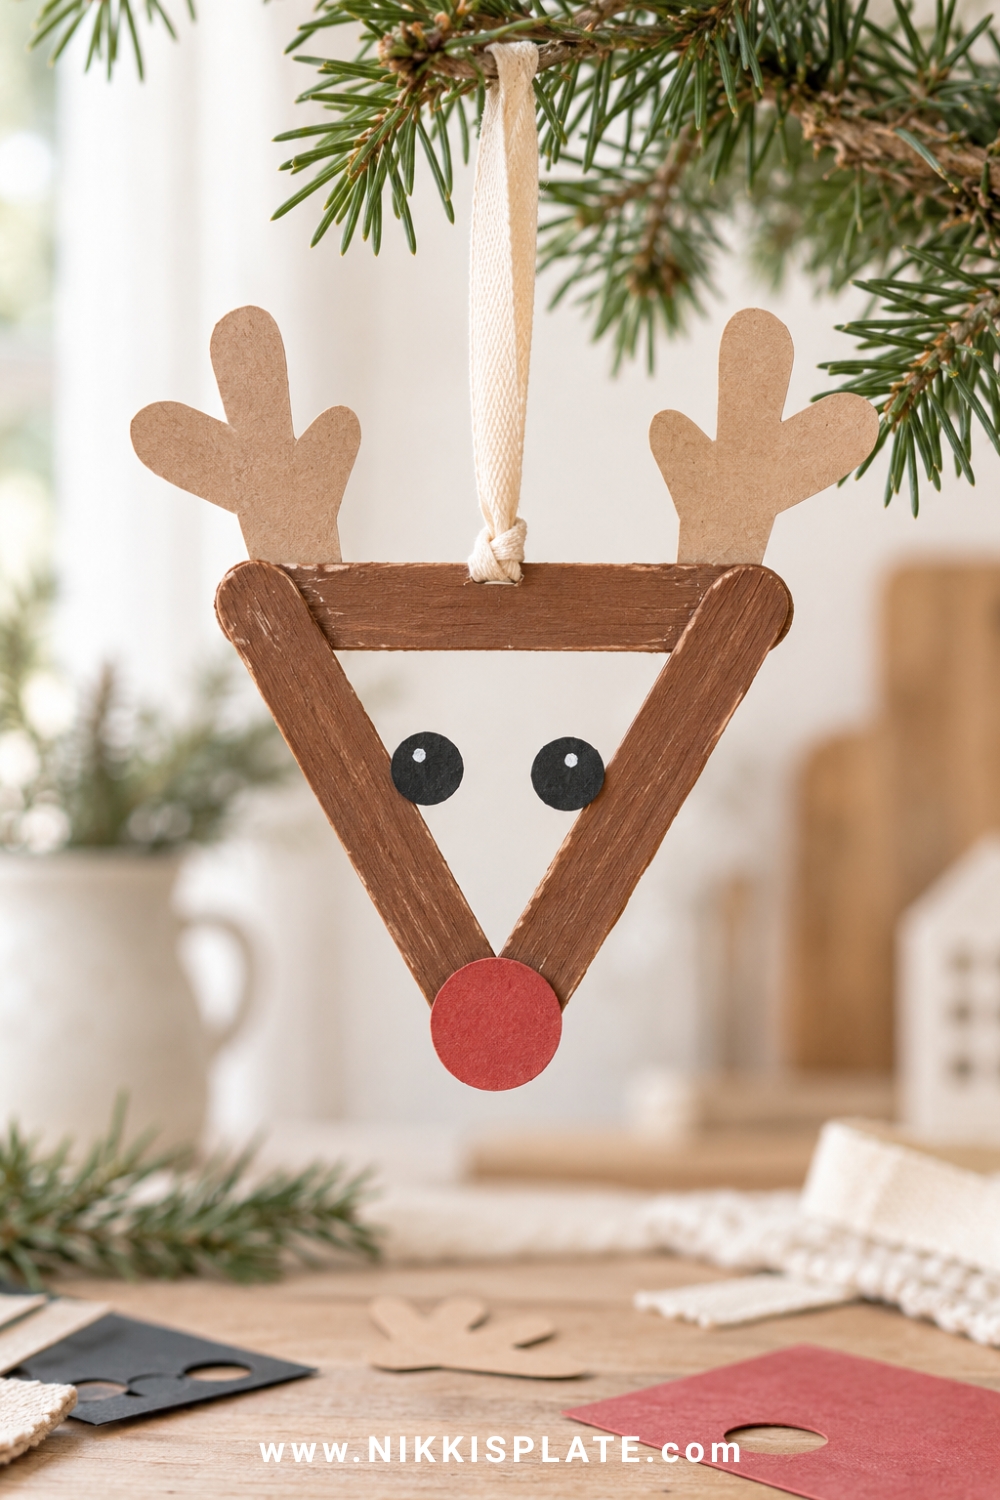
Quick guide: Best for ages 4 to 10 | Time: 20 minutes plus drying | Mess level: Medium
Materials: Three craft sticks, brown paint, glue, red paper, marker and ribbon
How to make it:
- Paint three craft sticks brown and let them dry.
- Glue the sticks into a triangle, then turn the point downward to form the reindeer's face.
- Add paper antlers, eyes, a red nose and a ribbon loop on the back.
Helpful tip: Write a short message or the year on the back before hanging it on the tree.
Adult prep and safety: Use tacky glue for children and reserve hot glue for adult assembly only.
15. Paper Plate Snowman
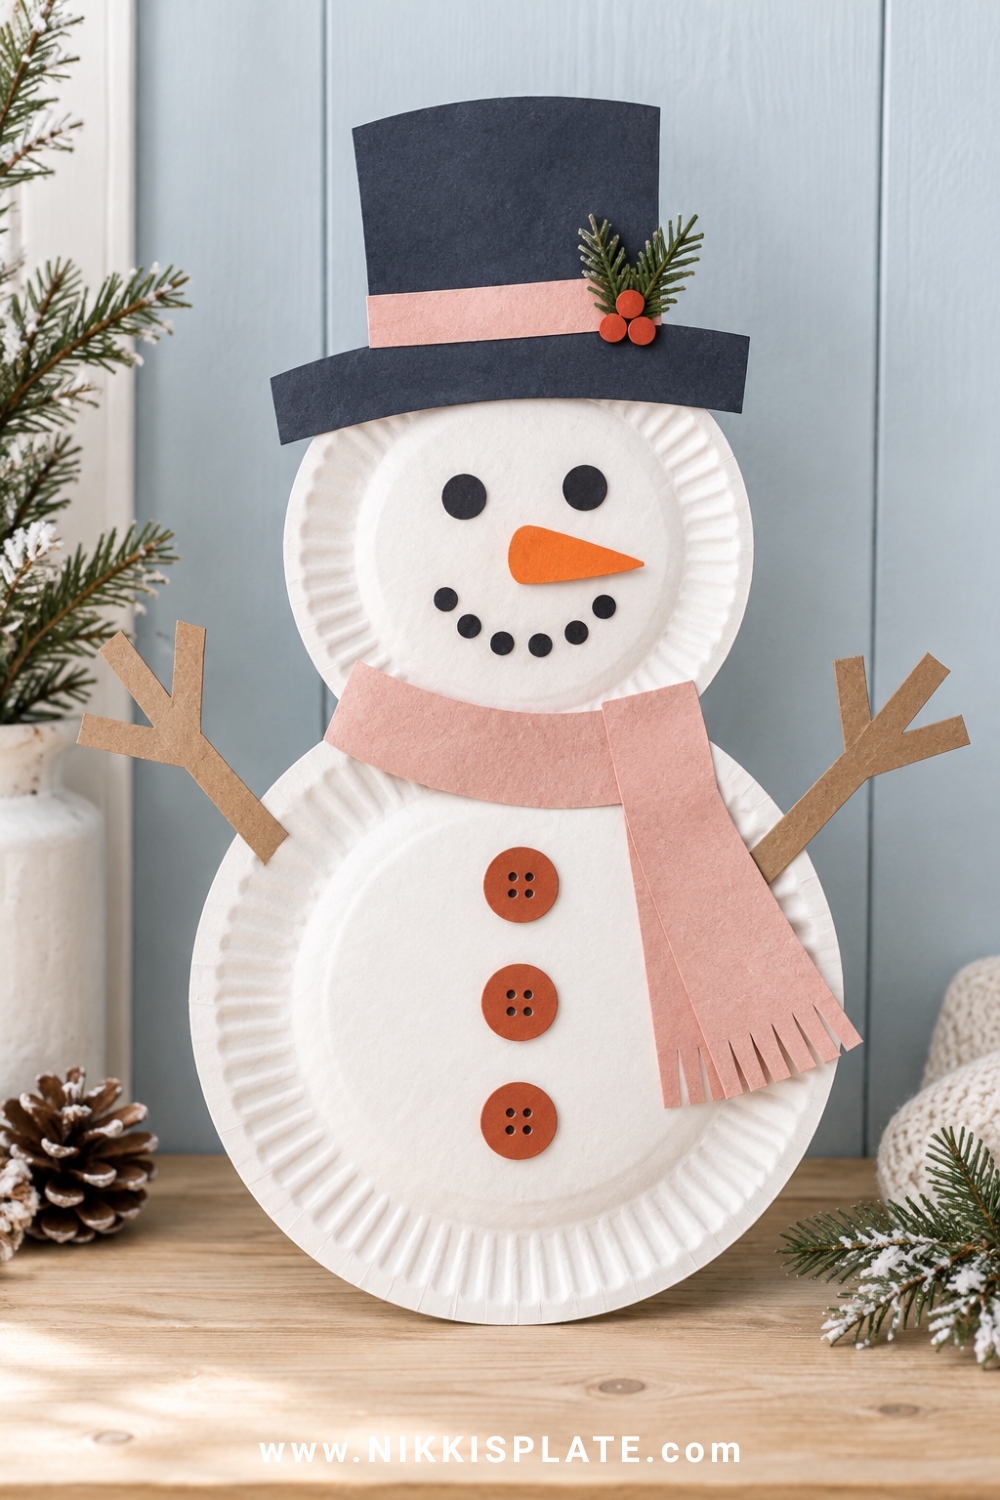
Quick guide: Best for ages 2 to 7 | Time: 20 minutes | Mess level: Low
Materials: Two paper plates, coloured paper, glue, marker, ribbon or yarn and optional buttons
How to make it:
- Overlap two paper plates and glue or tape them together to form the snowman's head and body.
- Add a paper hat, carrot nose, scarf and large paper buttons.
- Draw the face and twig arms, then display the snowman on a door or playroom wall.
Helpful tip: Use large paper shapes instead of buttons or pom-poms when crafting with toddlers.
Adult prep and safety: Secure all decorations well and avoid small loose pieces for children under three.
16. Melted Snowman Collage
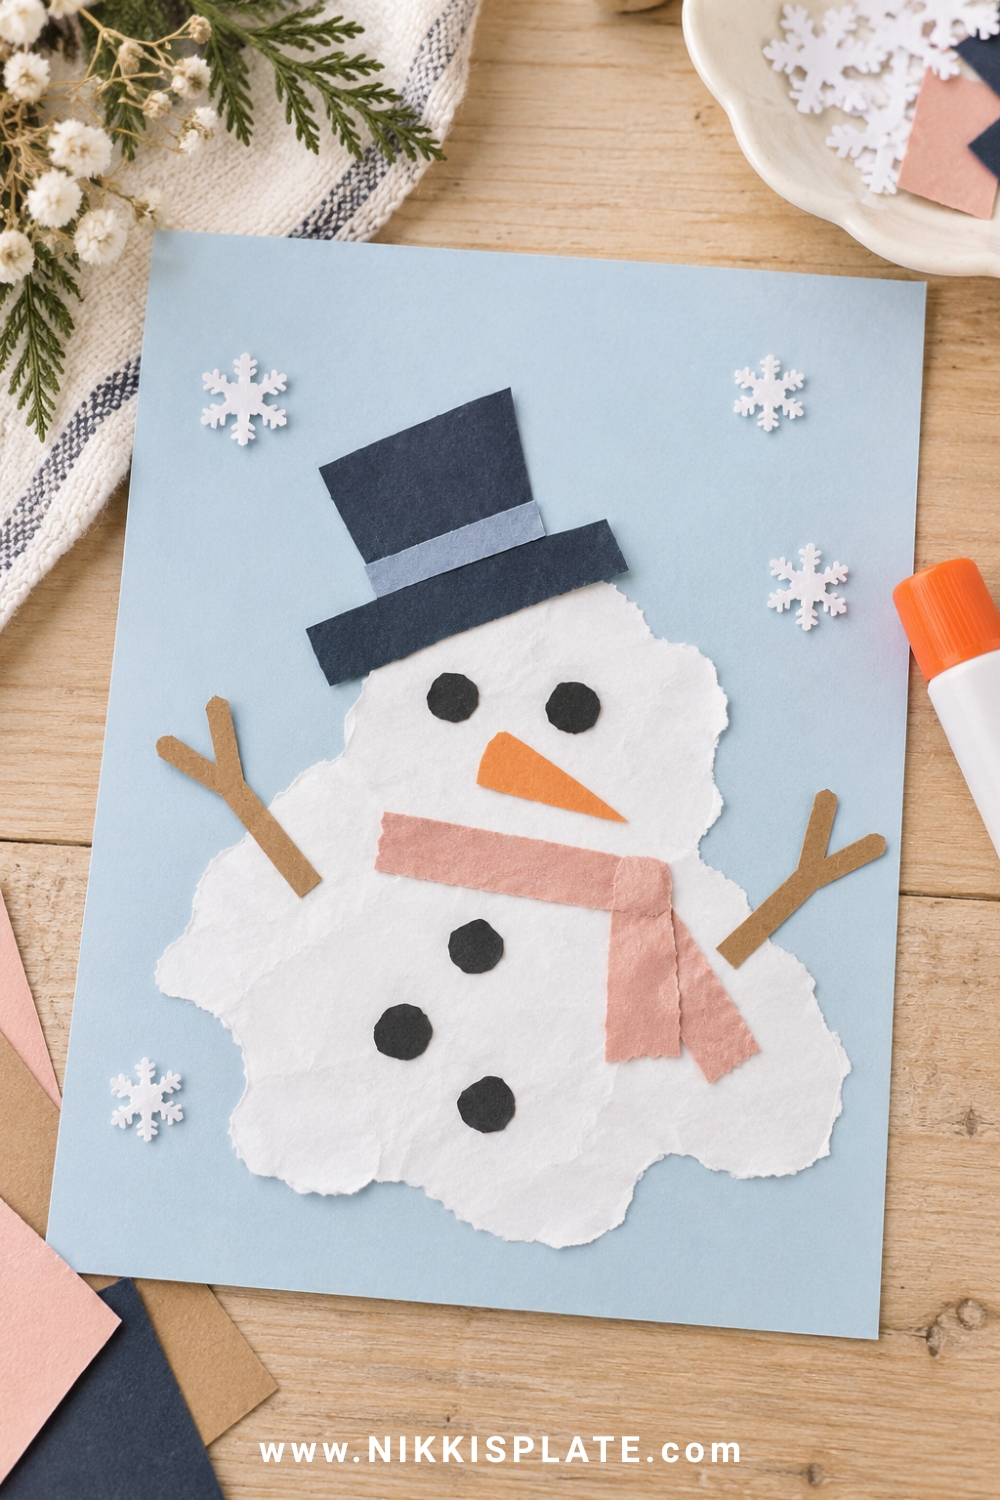
Quick guide: Best for ages 3 to 8 | Time: 20 minutes | Mess level: Low
Materials: White paper, blue cardstock, glue, black paper, orange paper and small scarf scraps
How to make it:
- Cut or tear an uneven white puddle shape and glue it to pale blue cardstock.
- Add a tilted hat, carrot nose, eyes, buttons and stick arms as though the snowman has melted.
- Finish with paper snowflakes or a short caption written by an older child.
Helpful tip: There is no exact placement for the pieces, which makes this an easy open-ended craft for mixed-age groups.
Adult prep and safety: Pre-cut the smallest shapes for young children and supervise scissors.
17. Cotton Pad Snowman Garland
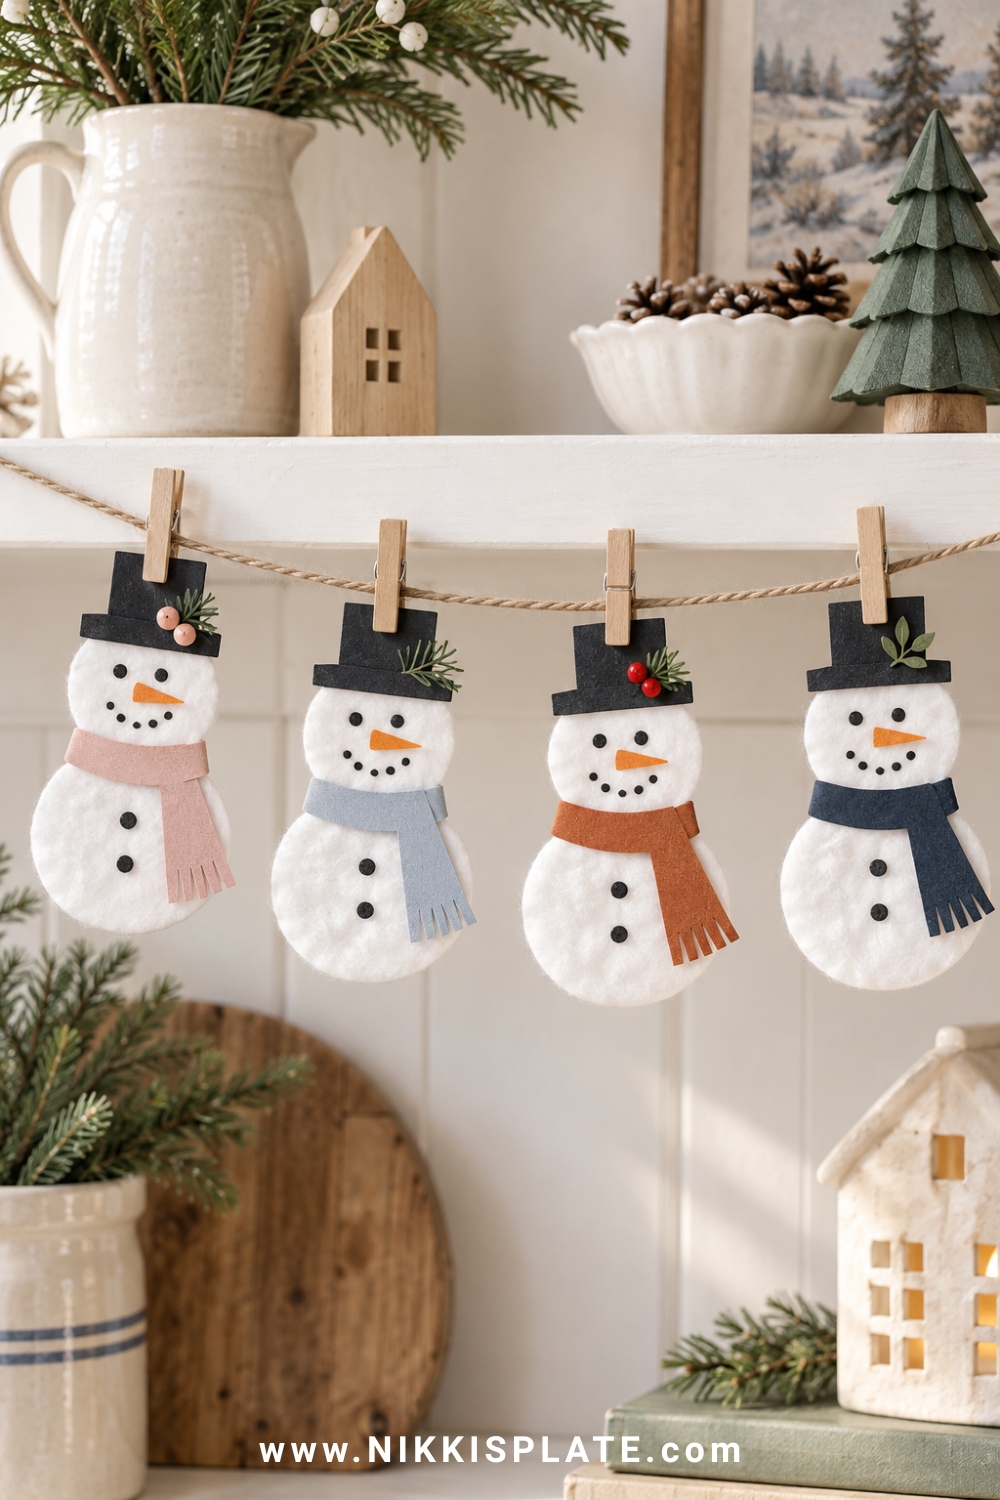
Quick guide: Best for ages 4 to 9 | Time: 30 minutes | Mess level: Low
Materials: Round cotton pads, cardstock, glue, markers, mini clothespins and twine
How to make it:
- Glue two cotton pads to a narrow strip of cardstock for each snowman.
- Add a paper hat, scarf, nose, and a simple drawn face.
- Clip the finished snowmen to twine and hang the garland across a shelf or classroom window.
Helpful tip: Make the cardstock backing slightly narrower than the cotton pads so it supports the snowman without showing.
Adult prep and safety: Mini clothespins are small parts, so use tape instead when crafting with younger children.
18. Snowman Name Craft
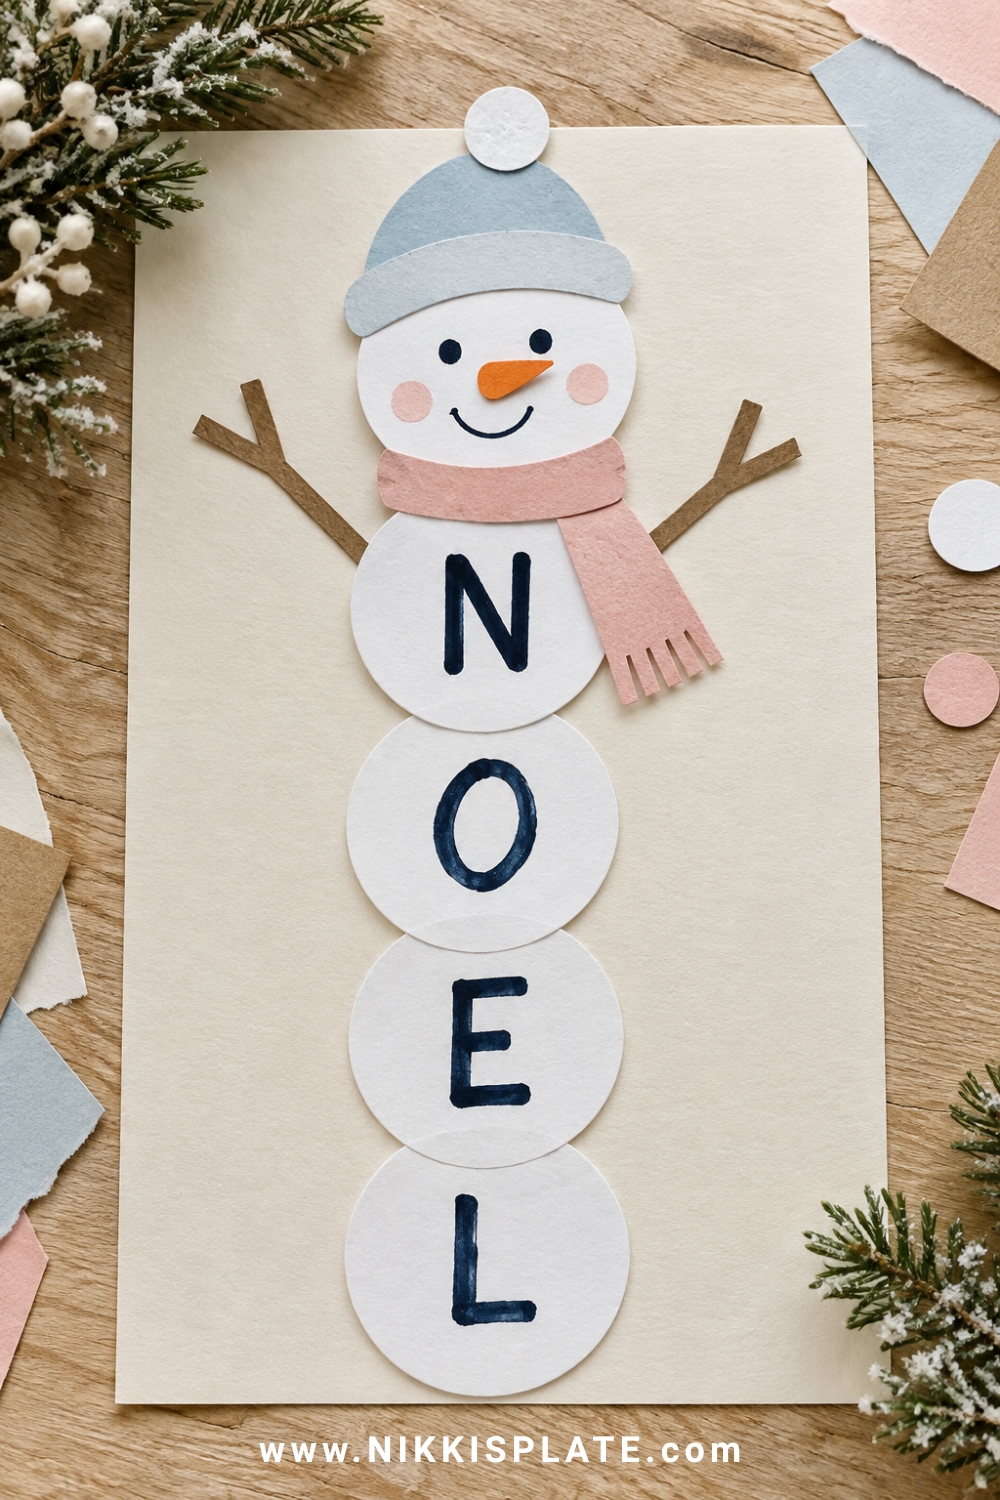
Quick guide: Best for ages 3 to 7 | Time: 20 minutes | Mess level: Low
Materials: White paper circles, coloured cardstock, glue stick, marker, and paper hat
How to make it:
- Prepare one white circle for each letter in the child's name, plus one larger circle for the head.
- Write one letter on each body circle and help the child arrange the name from top to bottom.
- Glue the circles in place, then add a face, hat, scarf and paper arms.
Helpful tip: Mix the letter circles first and turn assembly into a simple name-recognition game.
Adult prep and safety: Use large circles for preschoolers and keep small decorations out of reach of toddlers.
19. Coffee Filter Snowflakes
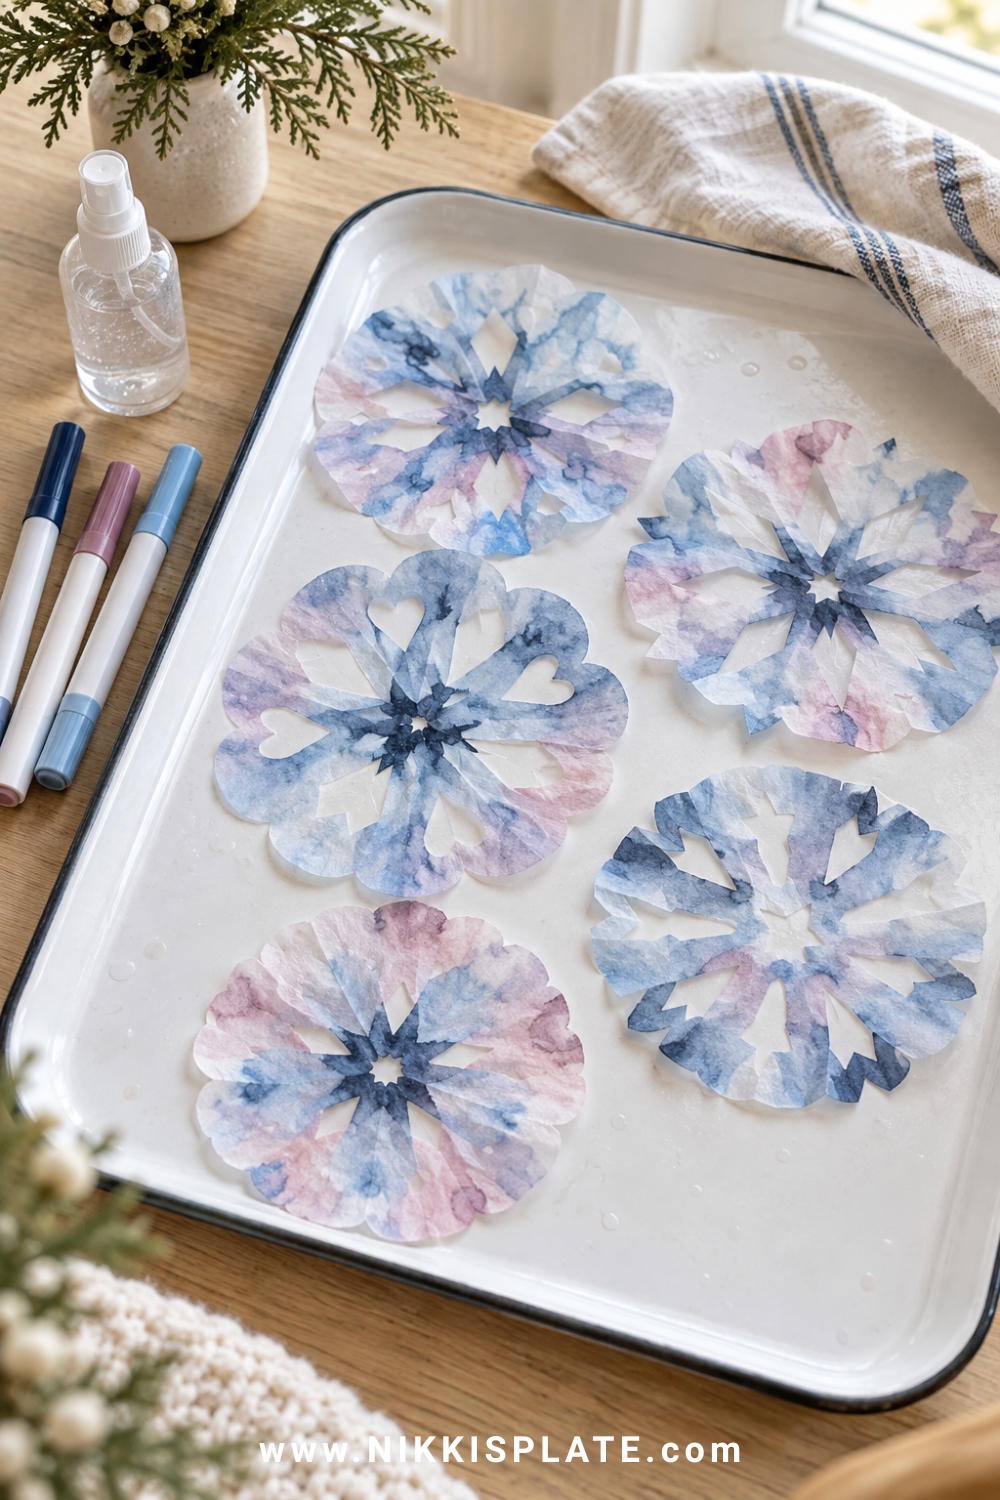
Quick guide: Best for ages 4 to 10 | Time: 20 minutes plus drying | Mess level: Medium
Materials: White coffee filters, washable markers, water mister, scissors and protective tray
How to make it:
- Colour the coffee filter with pale blue, mauve and navy washable marker lines.
- Mist lightly with water on a tray and let the colours blend, then dry completely.
- Fold the filter and cut small shapes from the edges before opening it into a delicate snowflake.
Helpful tip: Use very little water so the colours spread without soaking the paper into a fragile pulp.
Adult prep and safety: Adults should supervise folding and cutting, especially when several layers are thick.
20. Fold and Cut Paper Snowflakes
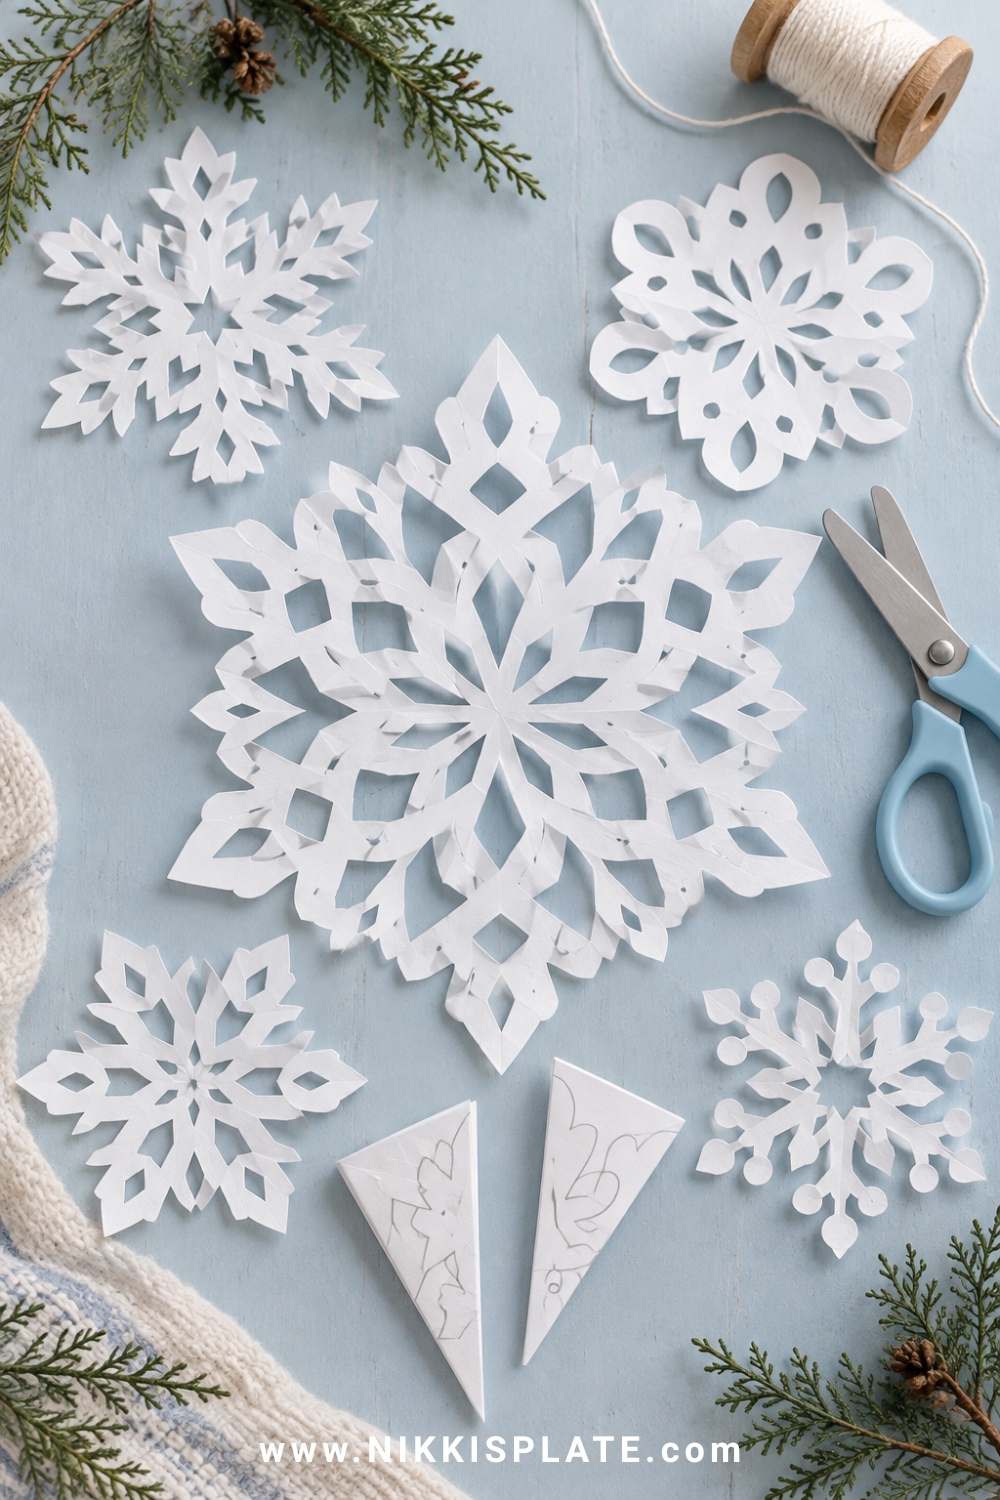
Quick guide: Best for ages 6 to 12 | Time: 15 minutes | Mess level: Low
Materials: Square white paper, pencil, kid-safe scissors and optional thread
How to make it:
- Fold a square sheet of paper diagonally, then fold it into smaller wedges.
- Cut triangles, curves and small notches along the folded edges without cutting all the way across.
- Open the paper carefully and flatten the snowflake beneath a book before hanging it.
Helpful tip: Practice on scrap paper first and remind children that asymmetrical cuts often make the prettiest designs.
Adult prep and safety: This craft is best for children who can control scissors safely; adults should help with thick folds.
21. Beaded Pipe Cleaner Snowflakes
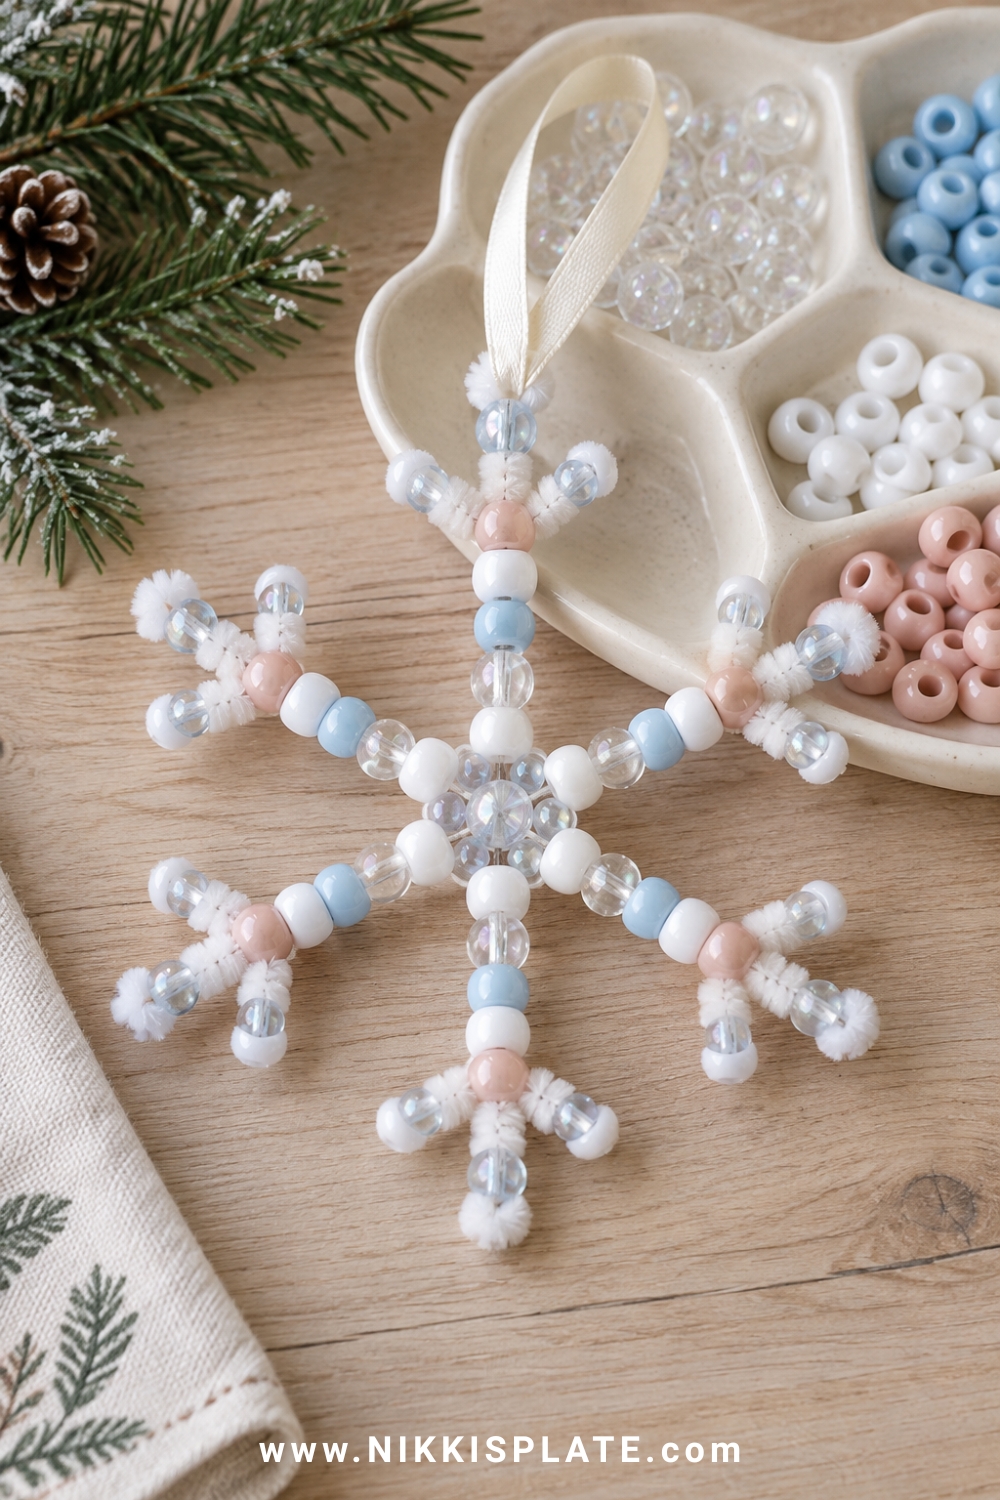
Quick guide: Best for ages 6 and older | Time: 20 minutes | Mess level: Low
Materials: Pipe cleaners, pony beads, ribbon and a shallow sorting tray
How to make it:
- Twist three pipe cleaners together at their centres to create six snowflake arms.
- Thread pony beads onto each arm, leaving a short space at the end.
- Fold each tip into a tight loop, then add ribbon to one arm for hanging.
Helpful tip: Limit the palette to clear, white, pale blue and blush beads for a polished ornament that still feels playful.
Adult prep and safety: Beads are a choking hazard. Keep this project away from babies and toddlers and supervise every step.
22. Salt Dough Handprint Ornaments
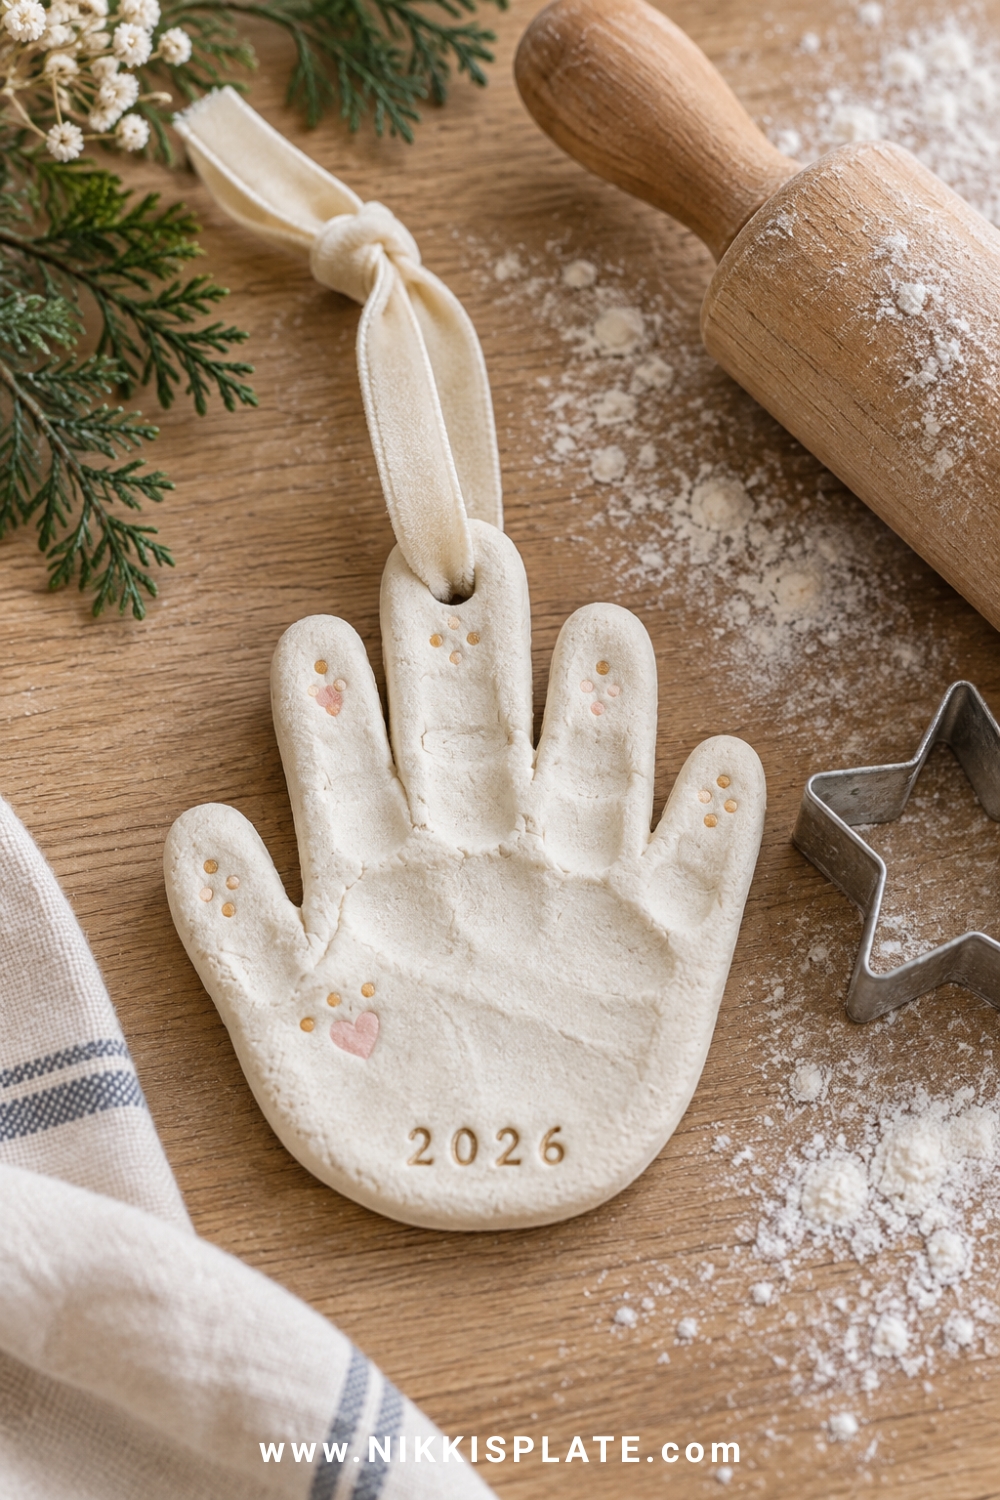
Quick guide: Best for ages 2 and older with adult help | Time: 30 minutes plus drying or baking | Mess level: Medium
Materials: 1 cup flour, ½ cup table salt, about ½ cup water, rolling pin, straw, paint and ribbon
How to make it:
- Mix flour and salt, then add water gradually until a firm dough forms. Roll it to about ¼ inch thick.
- Press a hand gently into the dough, cut around the print, and make a hanging hole with a straw.
- Have an adult bake the ornament at 200 F (95 C) until fully hard, usually 2 to 3 hours depending on thickness, or air-dry it completely. Paint and ribbon it only after it is cool and dry.
Helpful tip: Press the year into the back before drying and use a thin, even thickness to reduce cracking.
For more memory-filled ornaments, browse these DIY photo ornament ideas and choose a version that suits your child's age.
23. Cinnamon Applesauce Ornaments
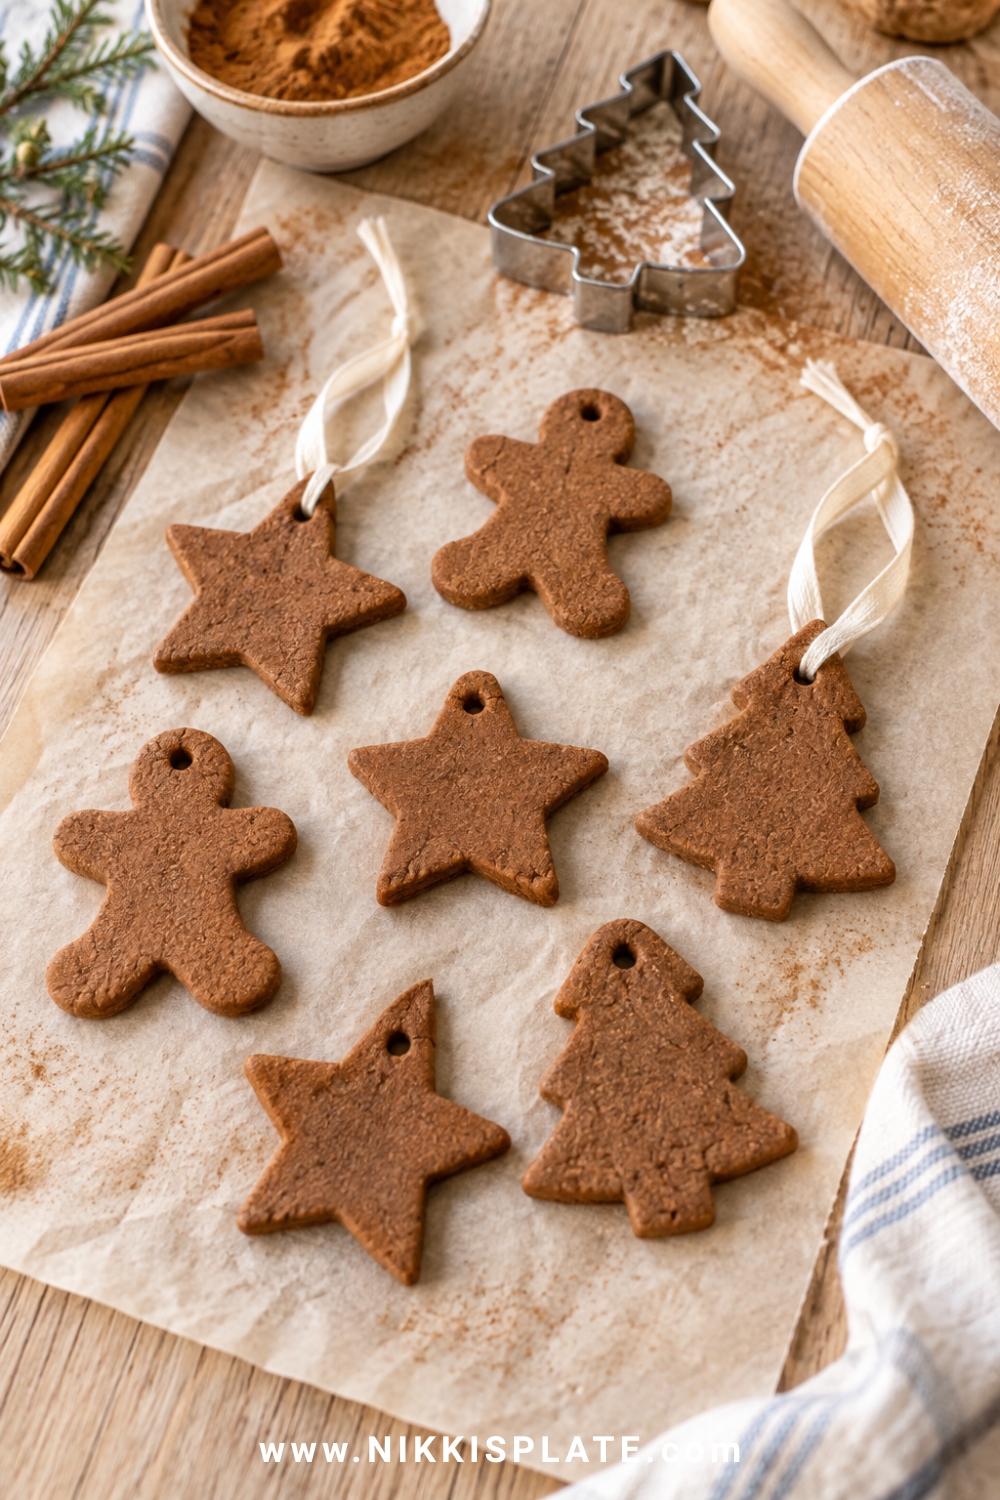
Quick guide: Best for ages 4 and older with adult help | Time: 30 minutes plus 24 to 48 hours drying | Mess level: Medium
Materials: 1 cup ground cinnamon, ¾ cup unsweetened applesauce, 2 tablespoons white craft glue, cookie cutters, straw and ribbon
How to make it:
- Mix the cinnamon, applesauce and glue into a firm dough. Add a little more cinnamon if it feels sticky.
- Roll the dough between parchment sheets, cut holiday shapes and make a ribbon hole with a straw.
- Air-dry the ornaments on a lined tray, turning occasionally, until they are completely firm before adding ribbon.
Helpful tip: Use simple shapes such as stars, trees and gingerbread people because narrow details can break as the ornaments dry.
Adult prep and safety: These ornaments are decorative and not edible. Check for ingredient sensitivities, supervise the glue and keep them away from pets.
24. Contact Paper Bauble Suncatchers
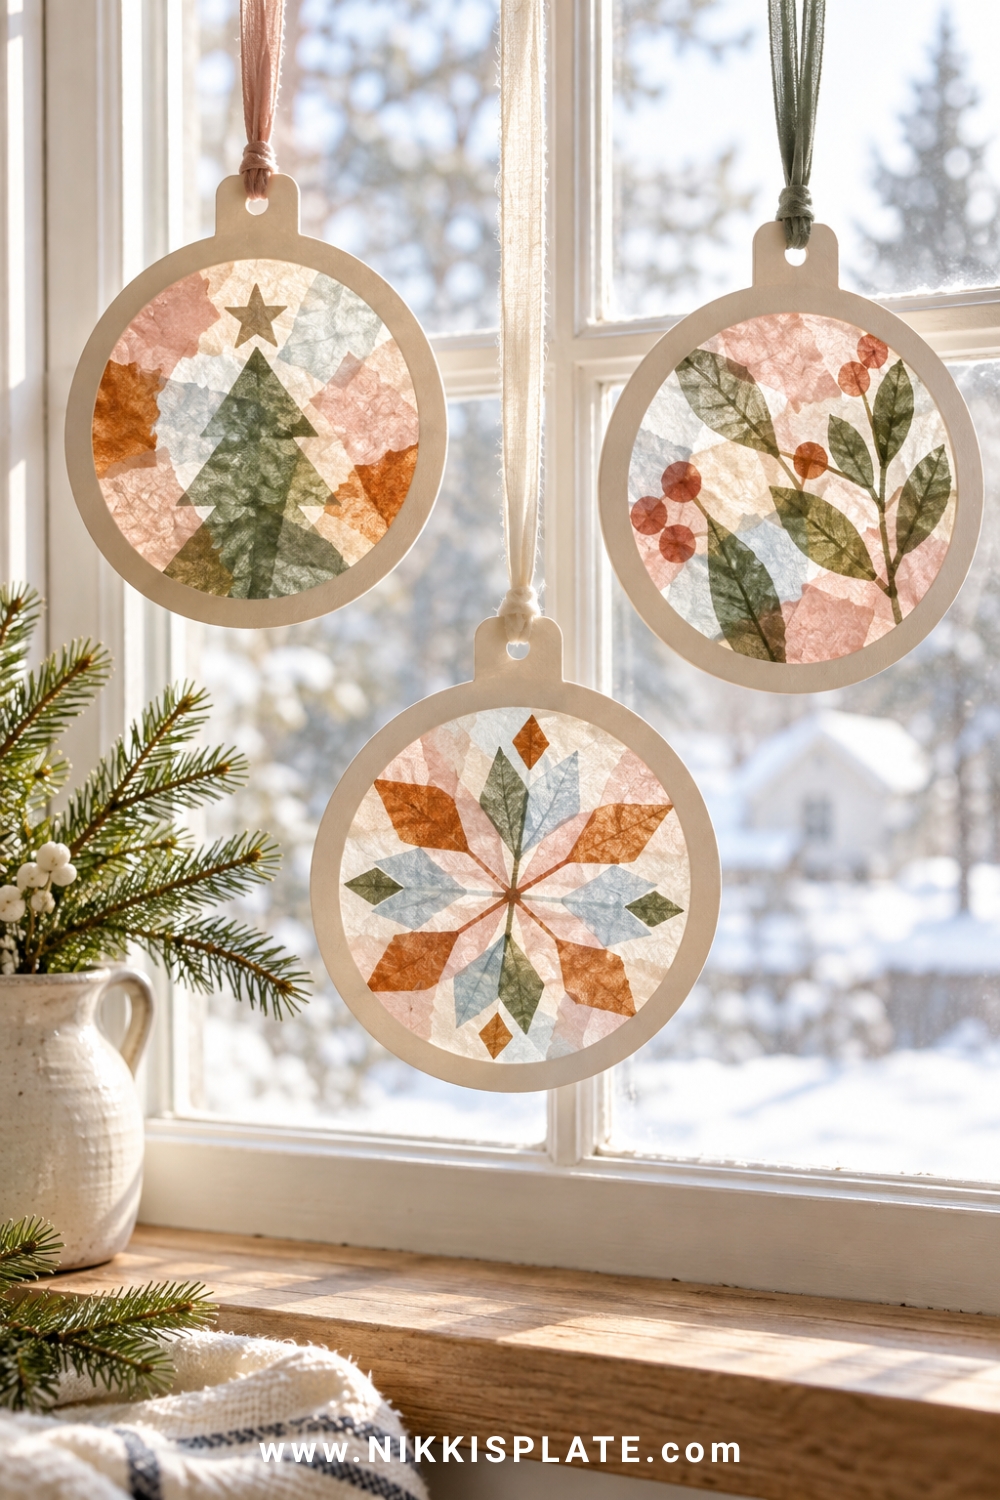
Quick guide: Best for ages 2 to 7 | Time: 15 minutes | Mess level: Low
Materials: Clear contact paper, cardstock rings, tissue paper, ribbon and tape
How to make it:
- Cut a large bauble-shaped frame from cardstock and attach clear contact paper behind the opening.
- Let children cover the sticky area with torn tissue paper, translucent paper or large sequins for older children.
- Seal the back, add a paper cap and ribbon, then tape the bauble to a bright window.
Helpful tip: Offer only three or four coordinated colours so the finished window display feels cohesive.
25. Paper Strip Baubles
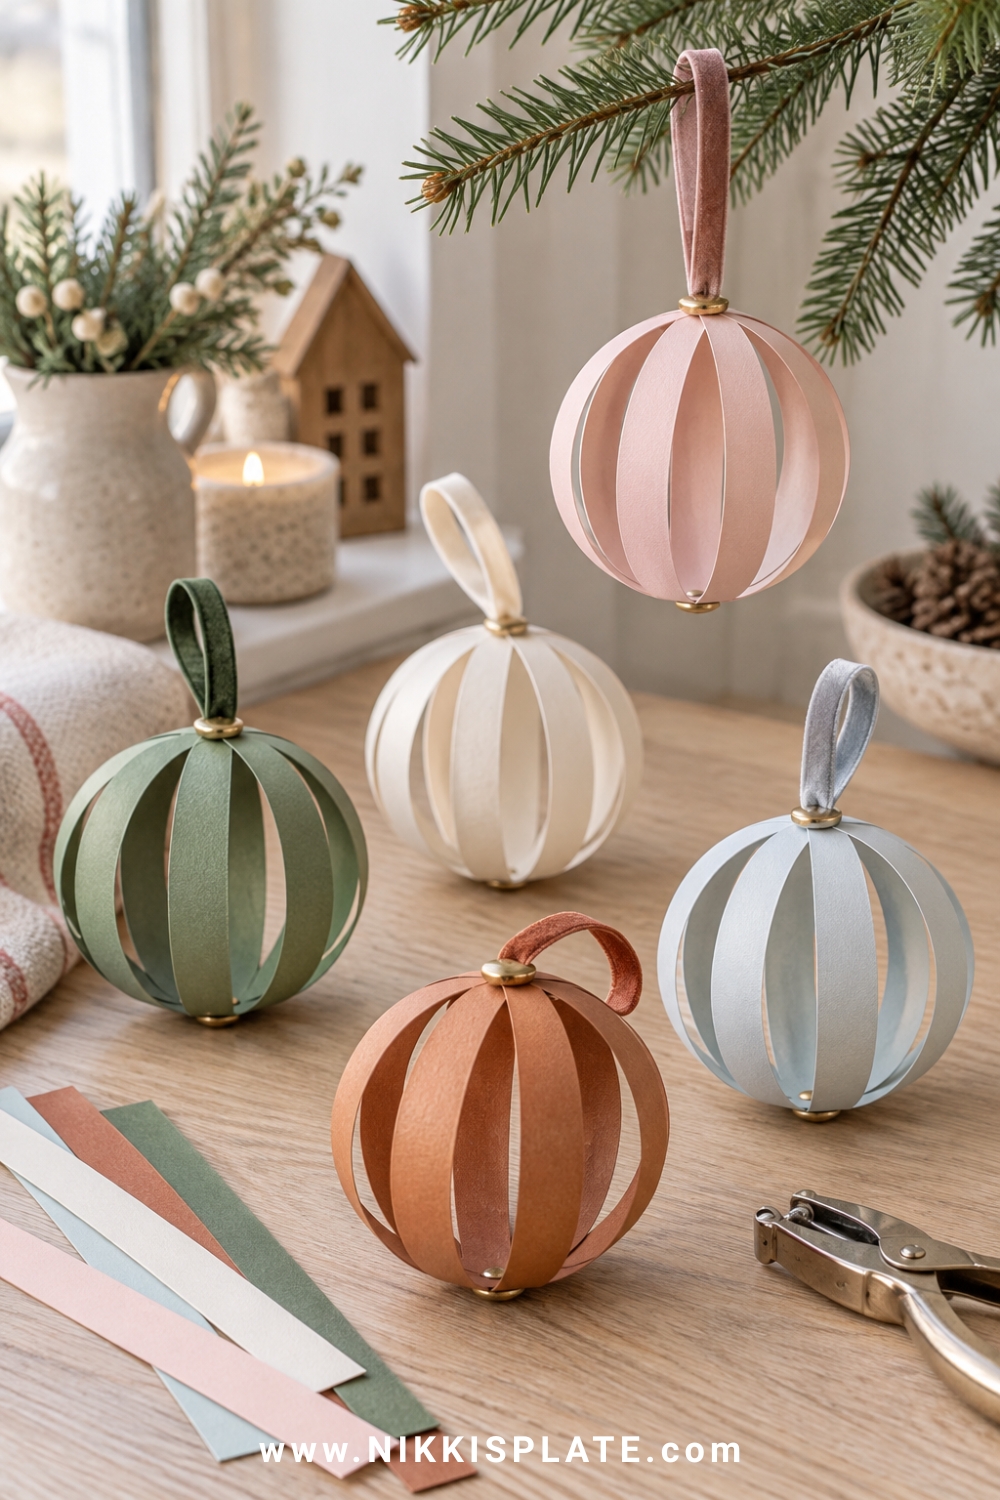
Quick guide: Best for ages 5 to 10 | Time: 25 minutes | Mess level: Low
Materials: Cardstock strips, hole punch, paper fasteners or strong tape, ribbon and decorative paper
How to make it:
- Cut six to eight equal paper strips and stack them neatly.
- Secure the strips at the top and bottom with paper fasteners, then fan them evenly into a round bauble shape.
- Add a ribbon loop and a small paper cap at the top.
Helpful tip: Mix solid paper with one patterned strip for dimension without making the ornament look busy.
26. Yarn Wrapped Cardboard Ornaments
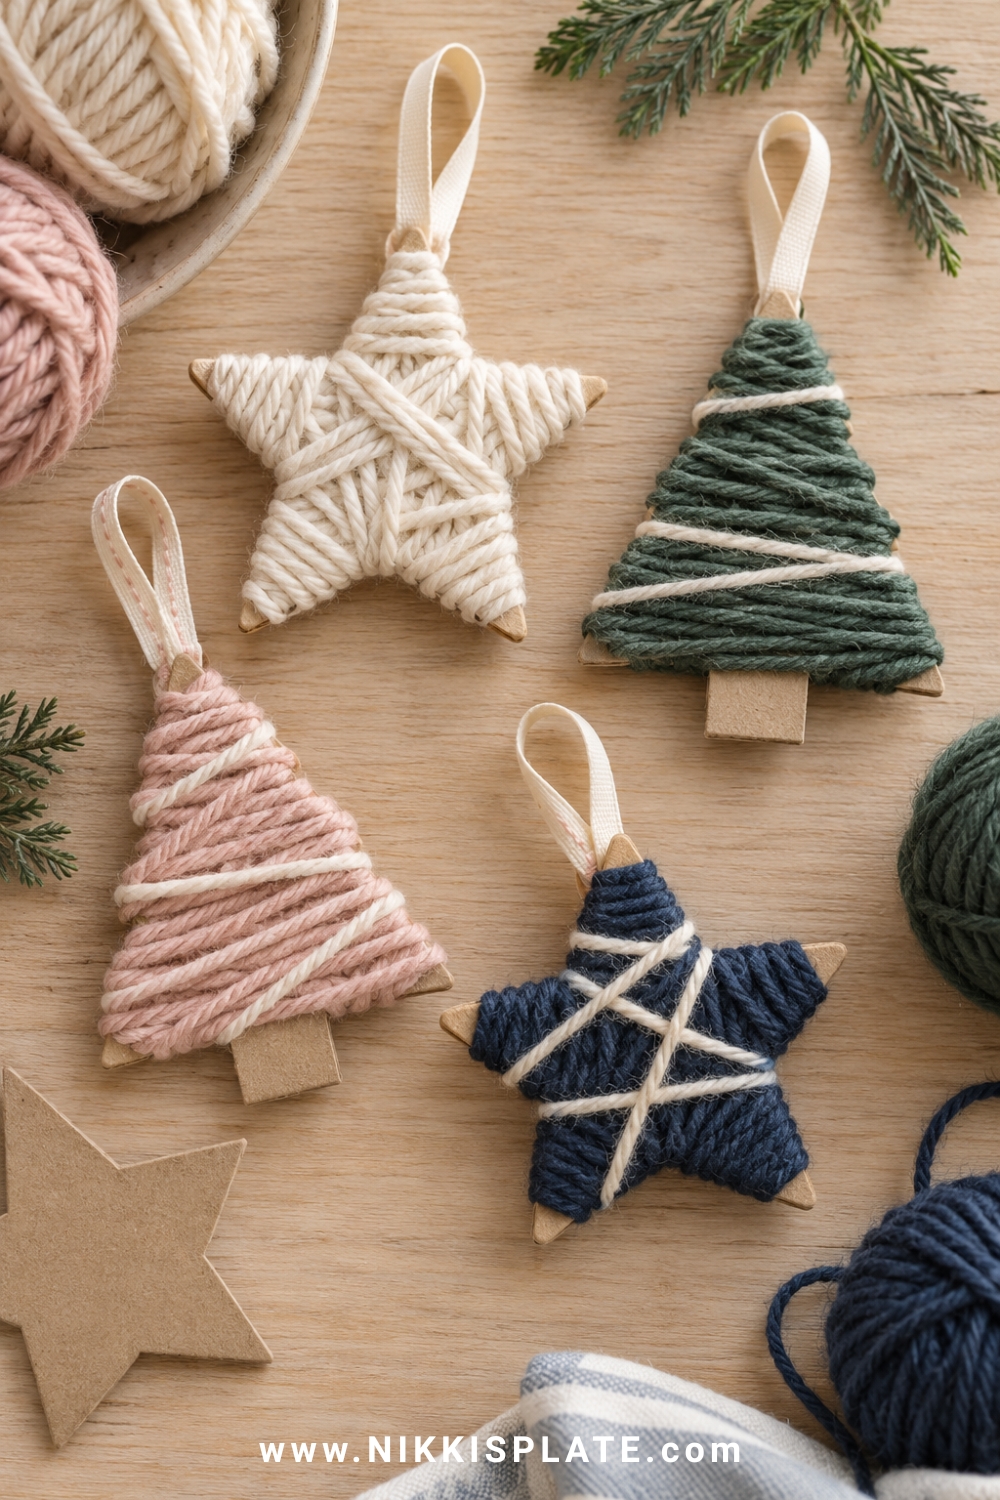
Quick guide: Best for ages 4 to 10 | Time: 25 minutes | Mess level: Low
Materials: Recycled cardboard, yarn, scissors, tape, ribbon and paper embellishments
How to make it:
- Cut simple stars, trees or circles from sturdy cardboard and make small notches around the edges.
- Tape one end of the yarn to the back and wrap it across the shape, catching the yarn in the notches.
- Tie or tape the end securely, then add a ribbon loop and one simple paper decoration.
Helpful tip: Chunky yarn fills the shape quickly and is easier for preschoolers to grip than thin string.
27. Pom Pom Wreath Ornaments
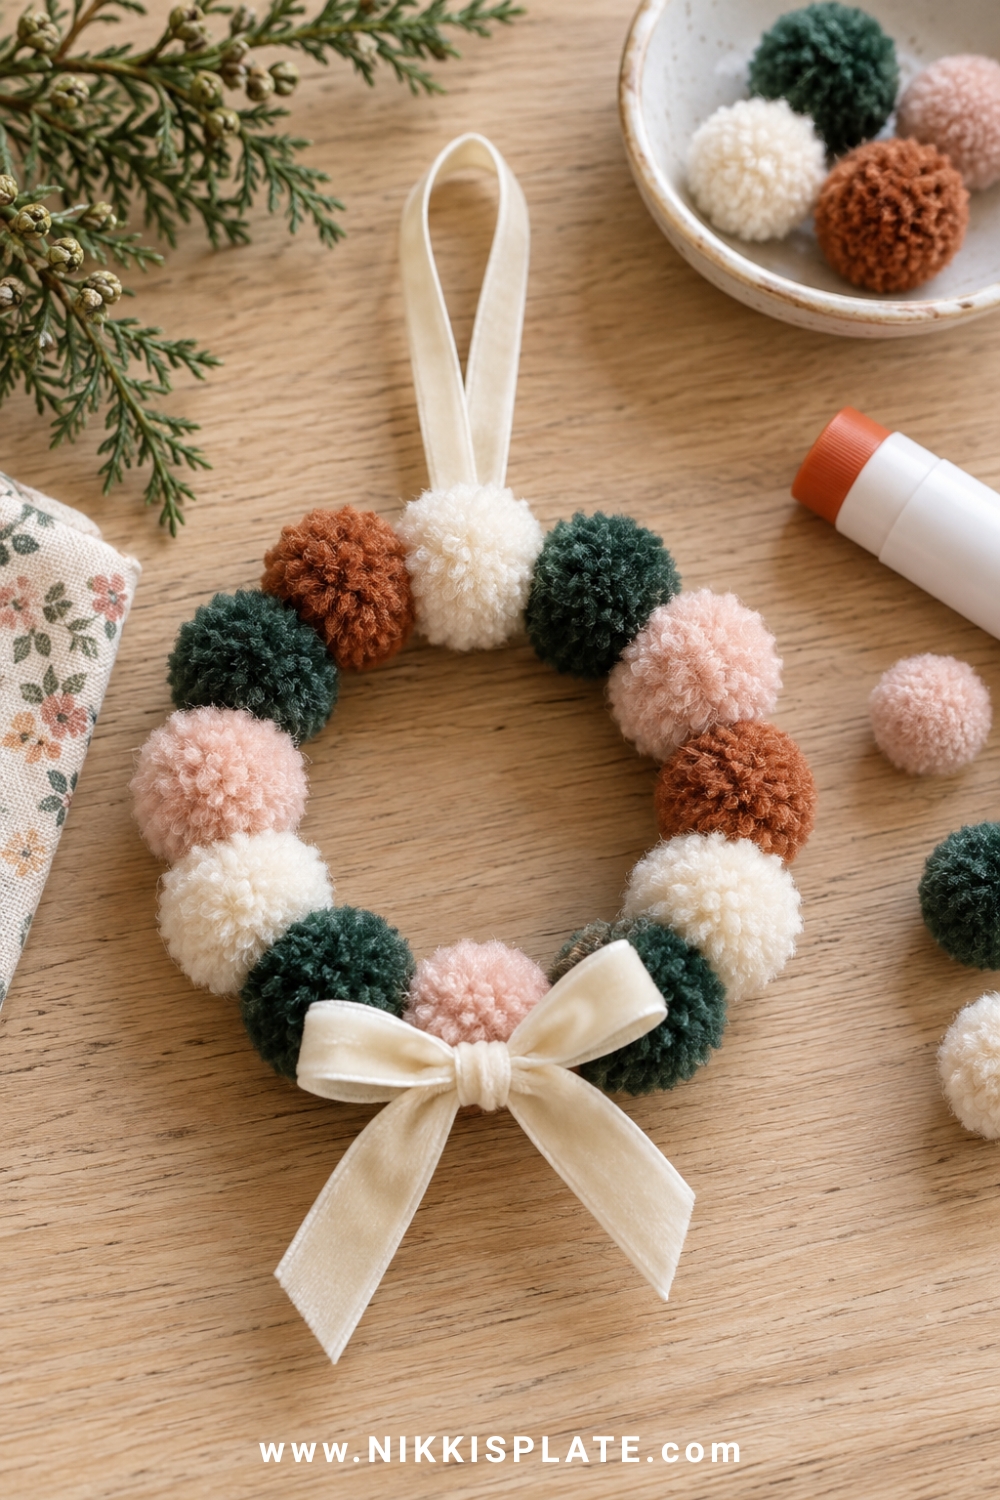
Quick guide: Best for ages 4 and older | Time: 20 minutes | Mess level: Low
Materials: Cardboard ring, pom-poms, tacky glue, ribbon and paper bow
How to make it:
1. Cut a small ring from recycled cardboard.
2. Cover the ring with tacky glue and press pom-poms close together across the front.
3. Let it dry flat, then add a ribbon hanger and a paper or fabric bow.
Helpful tip: Use several sizes of pom-poms in a limited palette to create texture while keeping the wreath balanced.
28. Paper Plate Christmas Wreath
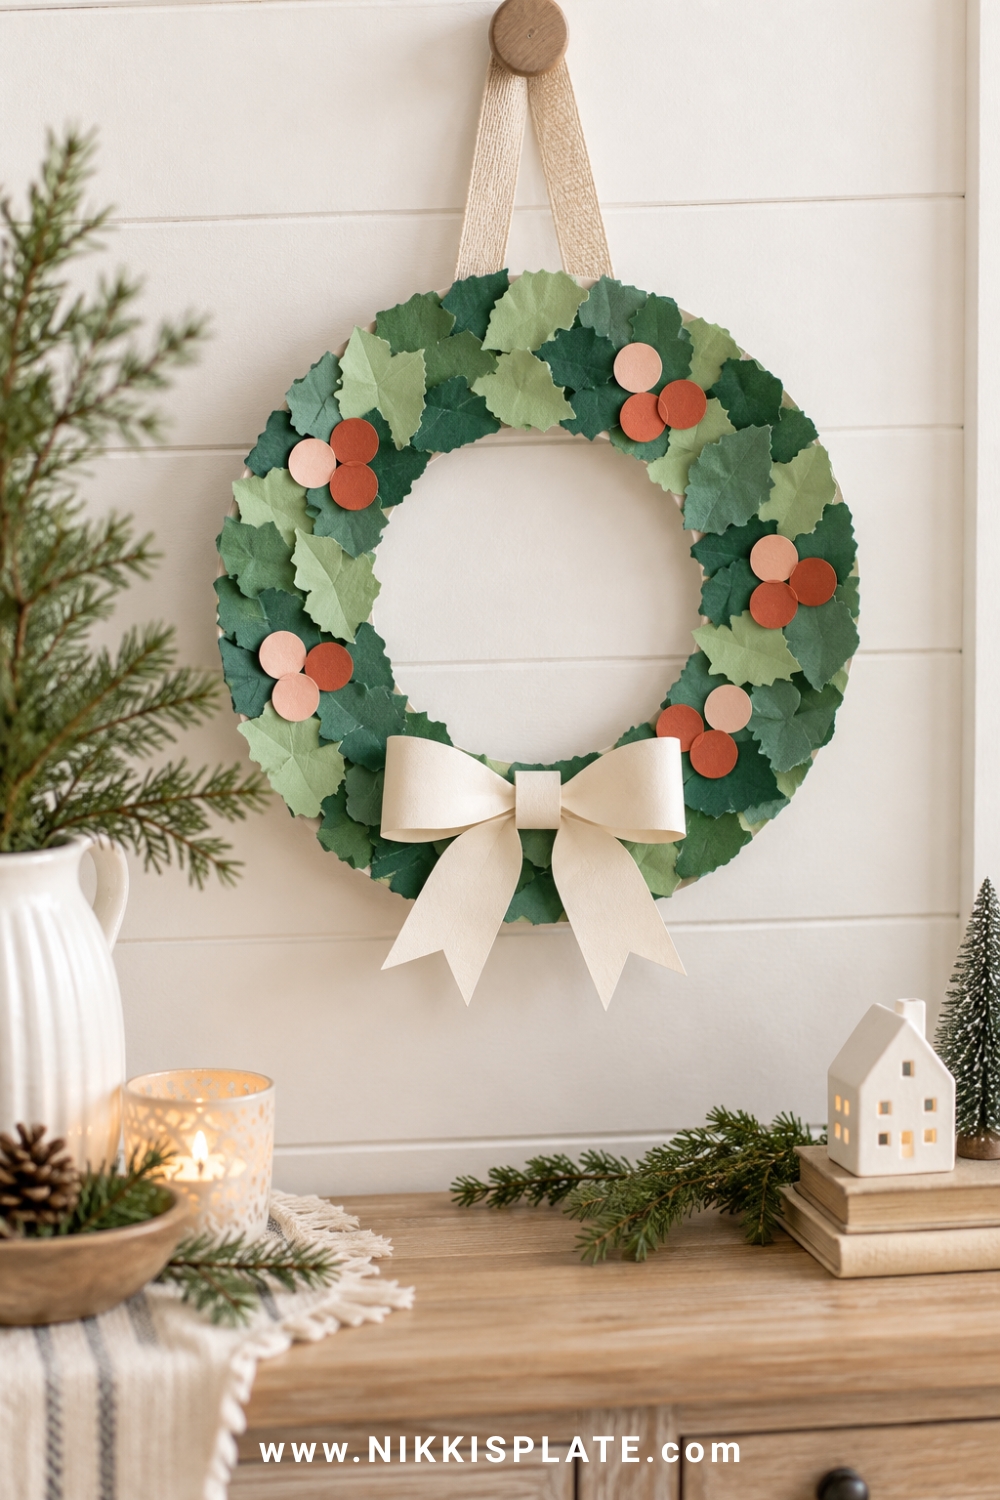
Quick guide: Best for ages 2 to 7 | Time: 20 minutes | Mess level: Low to medium
Materials: Paper plate, green paint or paper, tissue squares, glue, paper bow and ribbon
How to make it:
- Have an adult cut the centre from a paper plate to create a wreath ring.
- Paint the ring green or cover it with torn green paper pieces.
- Add tissue-paper berries, a paper bow and ribbon for hanging.
Helpful tip: Torn paper gives toddlers an easy, low-pressure way to fill the wreath without trying to paint inside the edges.
Adult prep and safety: Adults should cut the plate centre and avoid small decorations with children under three.
29. Handprint Christmas Wreath
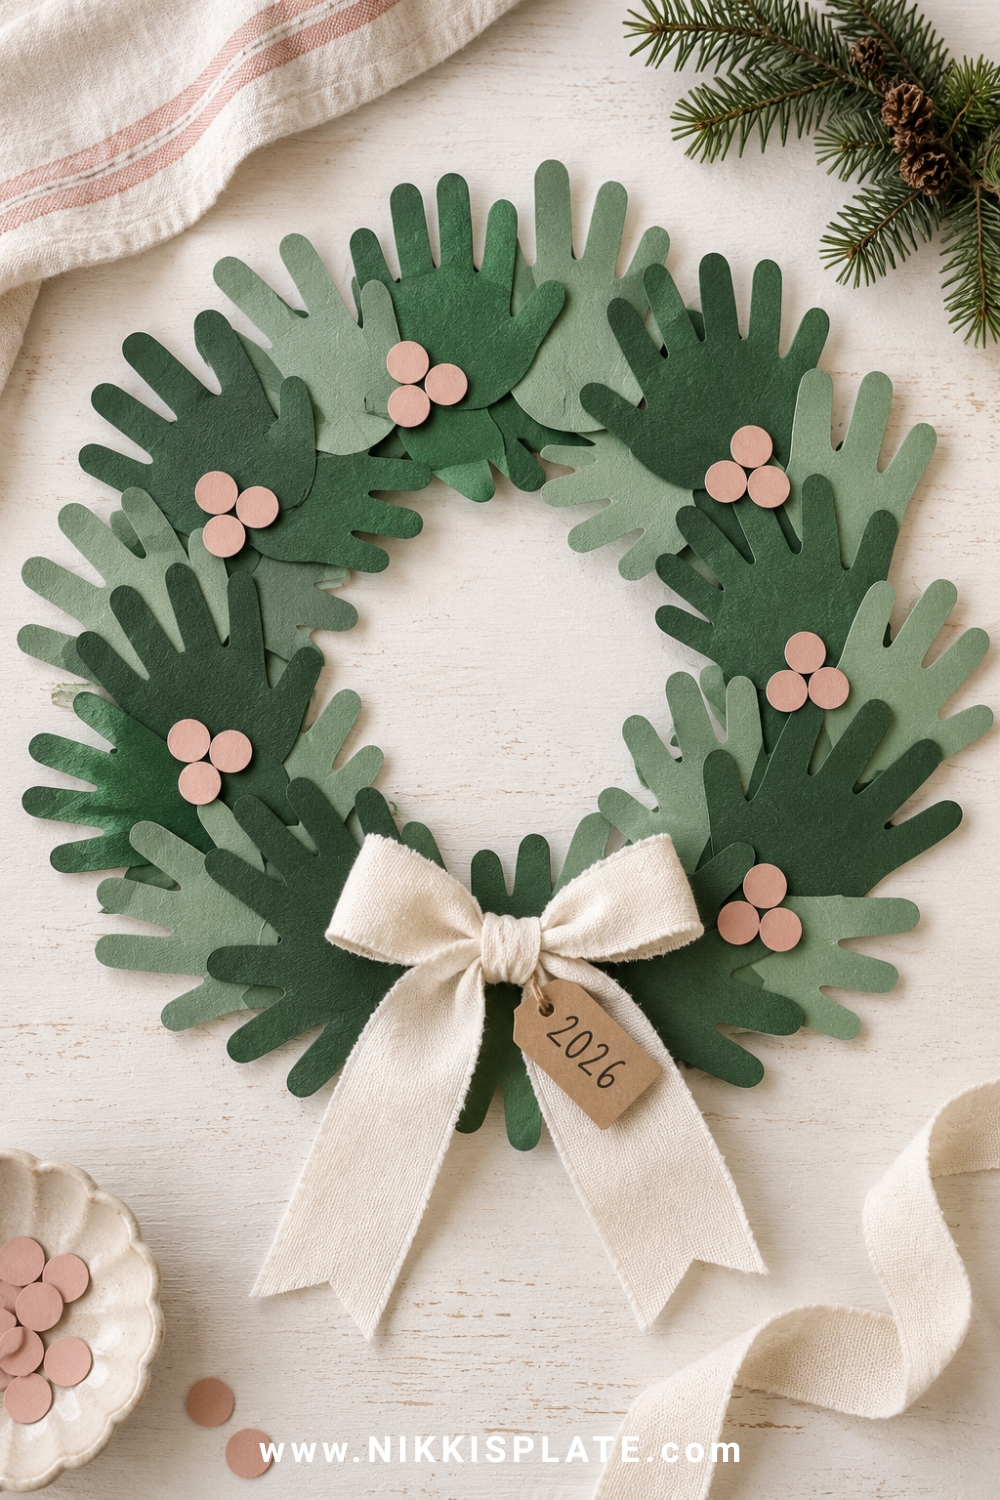
Quick guide: Best for ages 2 to 8 with adult help | Time: 30 minutes | Mess level: Low
Materials: Green cardstock in two shades, pencil, scissors, glue, red or blush paper and ribbon
How to make it:
1. Trace the child's hand several times on two shades of green cardstock and cut out the shapes.
2. Arrange the handprints in an overlapping circle with the fingers pointing outward.
3. Glue them together, then add paper berries, a bow and the child's name and year on the back.
Helpful tip: Use handprints from siblings in alternating colours to create one family wreath keepsake.
30. Gingerbread House Paper Bag
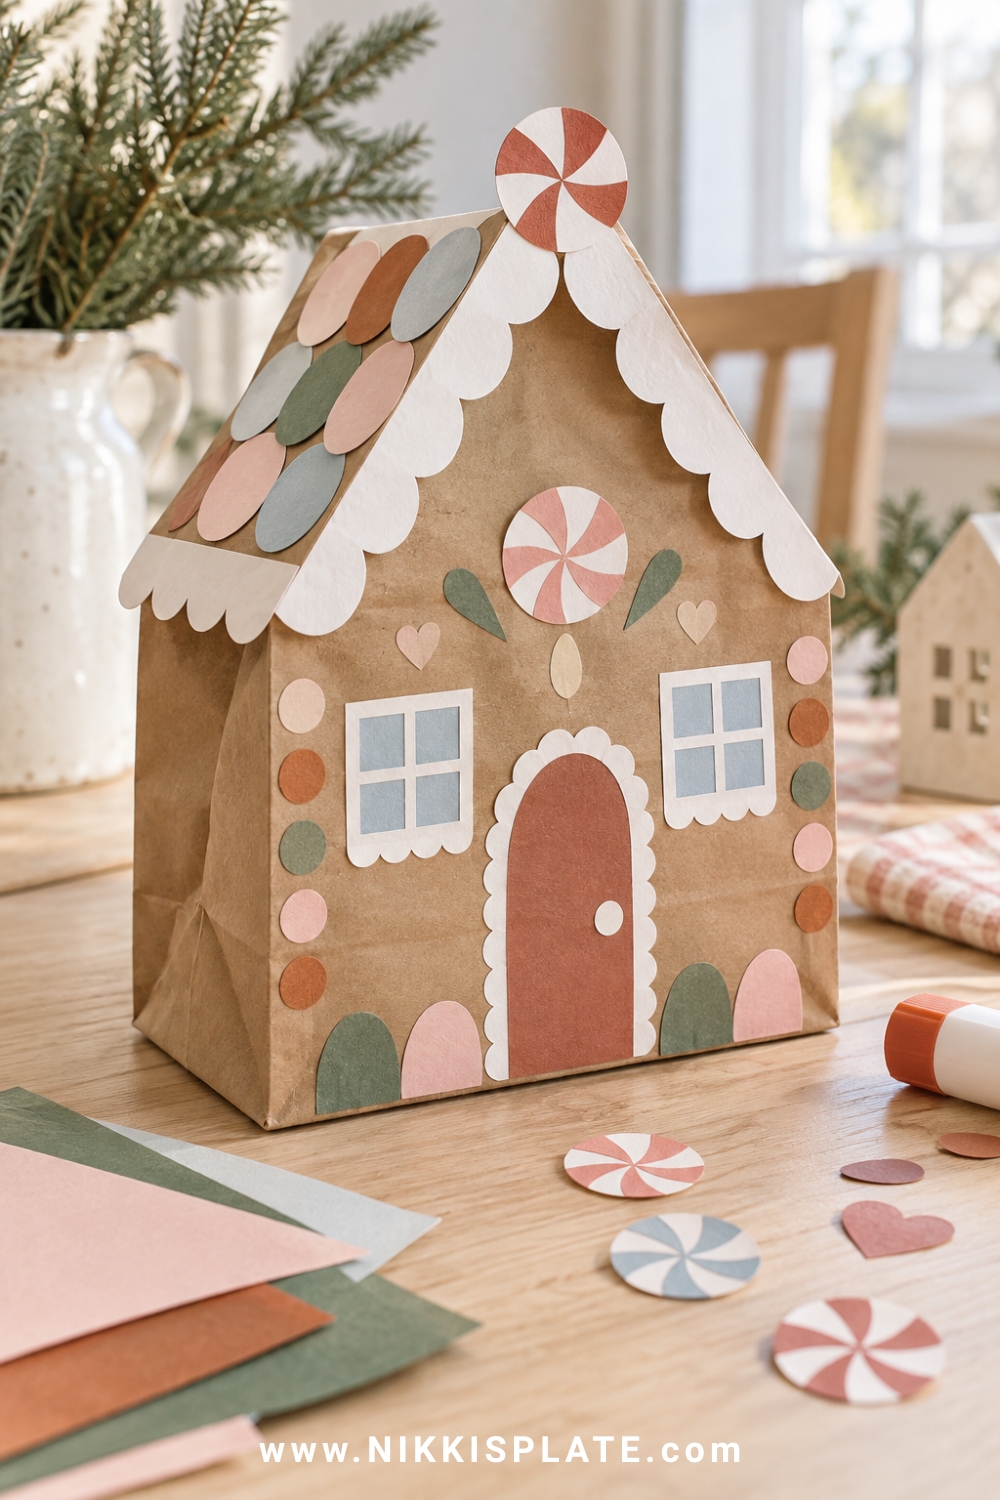
Quick guide: Best for ages 3 to 9 | Time: 25 minutes | Mess level: Low
Materials: Brown paper lunch bag, white paper, coloured paper scraps, glue stick, markers and tissue paper
How to make it:
- Fold the top of a brown paper bag into a roof shape and secure it with glue or tape.
- Add white paper icing along the roofline, then decorate the front with windows, a door and candy-inspired paper shapes.
- Stuff the bag lightly with tissue paper and close the top so the house can stand on a shelf.
Helpful tip: Keep the candy pieces oversized and graphic so younger children can build the design independently.
Adult prep and safety: Use paper decorations instead of real candy around toddlers and pets, and supervise scissors.
31. Cardboard Gingerbread People
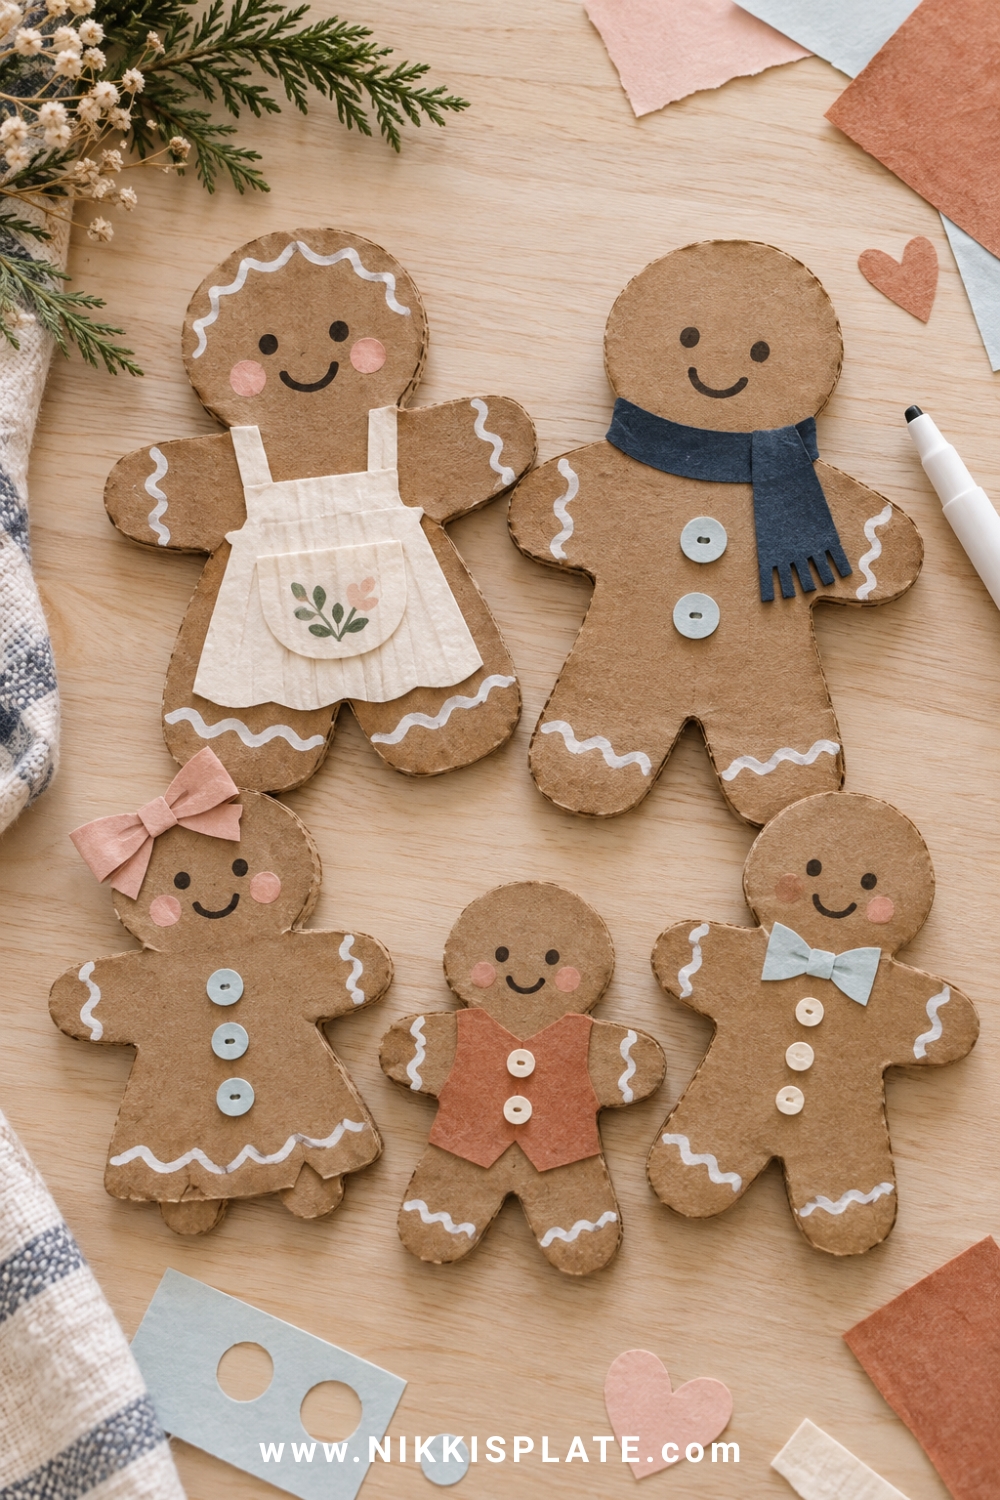
Quick guide: Best for ages 3 to 10 | Time: 25 minutes | Mess level: Low
Materials: Thin cardboard, pencil, scissors, white marker or paint pen, yarn, paper scraps and glue
How to make it:
- Trace a large gingerbread-person shape onto thin cardboard and have an adult cut it out.
- Decorate with drawn icing lines, paper buttons, a bow tie, apron or tiny scarf.
- Add yarn hair or a ribbon loop if the gingerbread person will become an ornament.
Helpful tip: Provide the same base shape to everyone and let the clothing, faces and accessories stay completely open-ended.
32. Fingerprint Christmas Light Cards
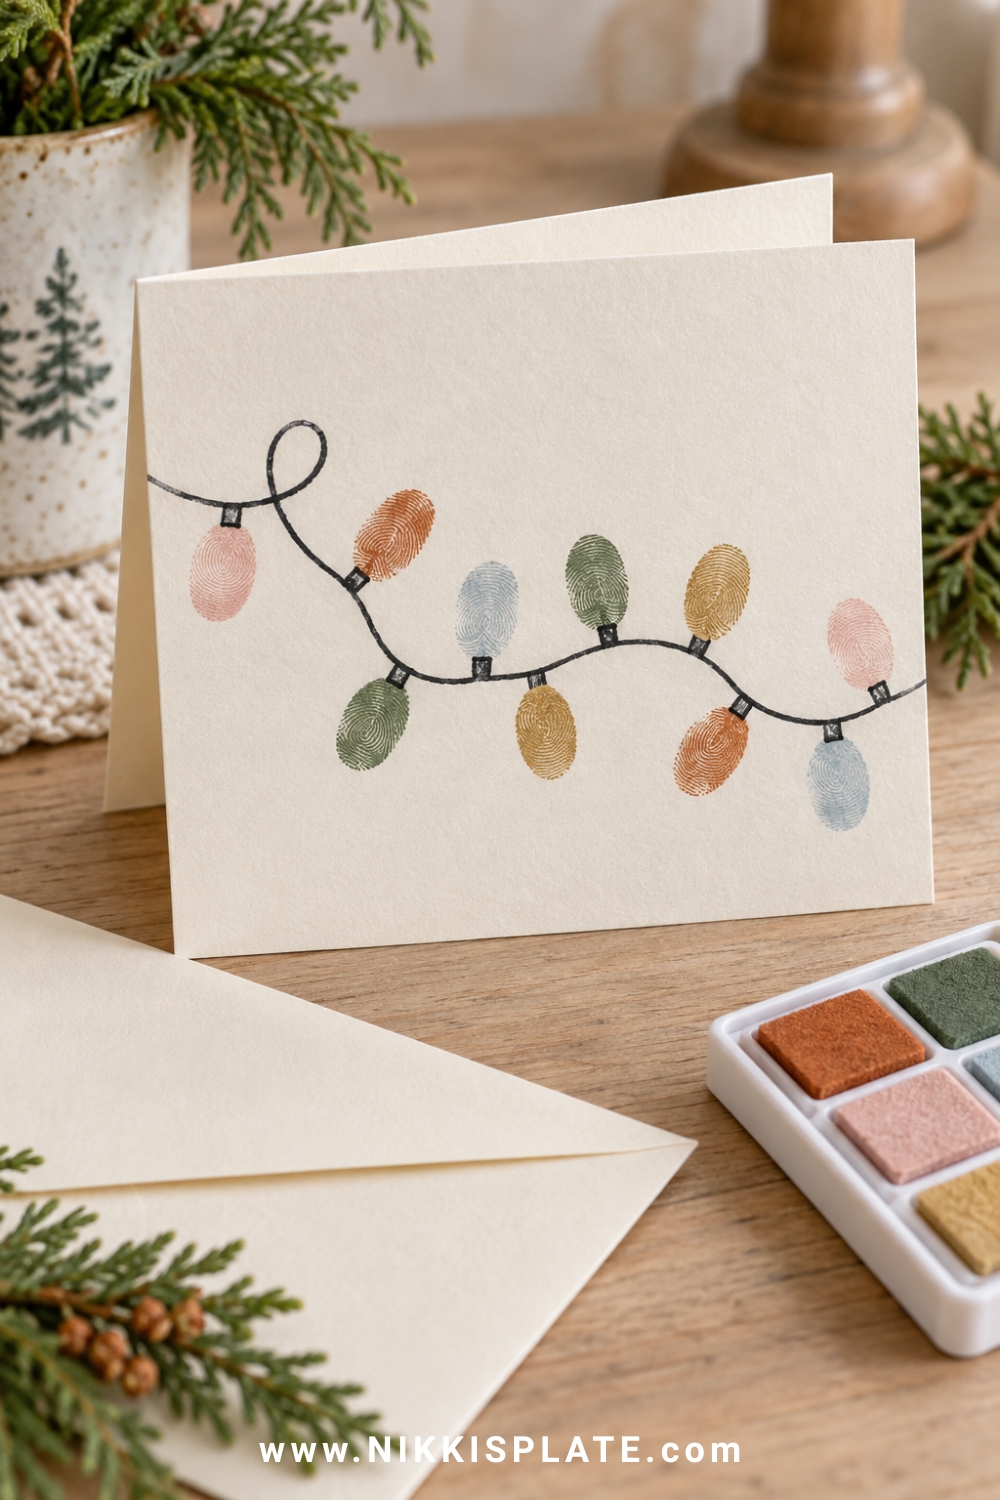
Quick guide: Best for ages 2 to 8 | Time: 15 minutes plus drying | Mess level: Medium
Materials: Blank cards, washable paint, black marker, wipes and shallow paint tray
How to make it:
- Draw a loose looping line across the front of a blank card.
- Dip one fingertip into washable paint and add colourful prints along the line.
- When the prints dry, draw a tiny black bulb base beside each one and write a short greeting inside.
Helpful tip: Place a damp cloth beside the paint tray so children can switch colours without tracking fingerprints through the room.
Pair the finished cards with my free Christmas gift tags for an easy handmade wrapping set.
33. Christmas Paper Chain Countdown
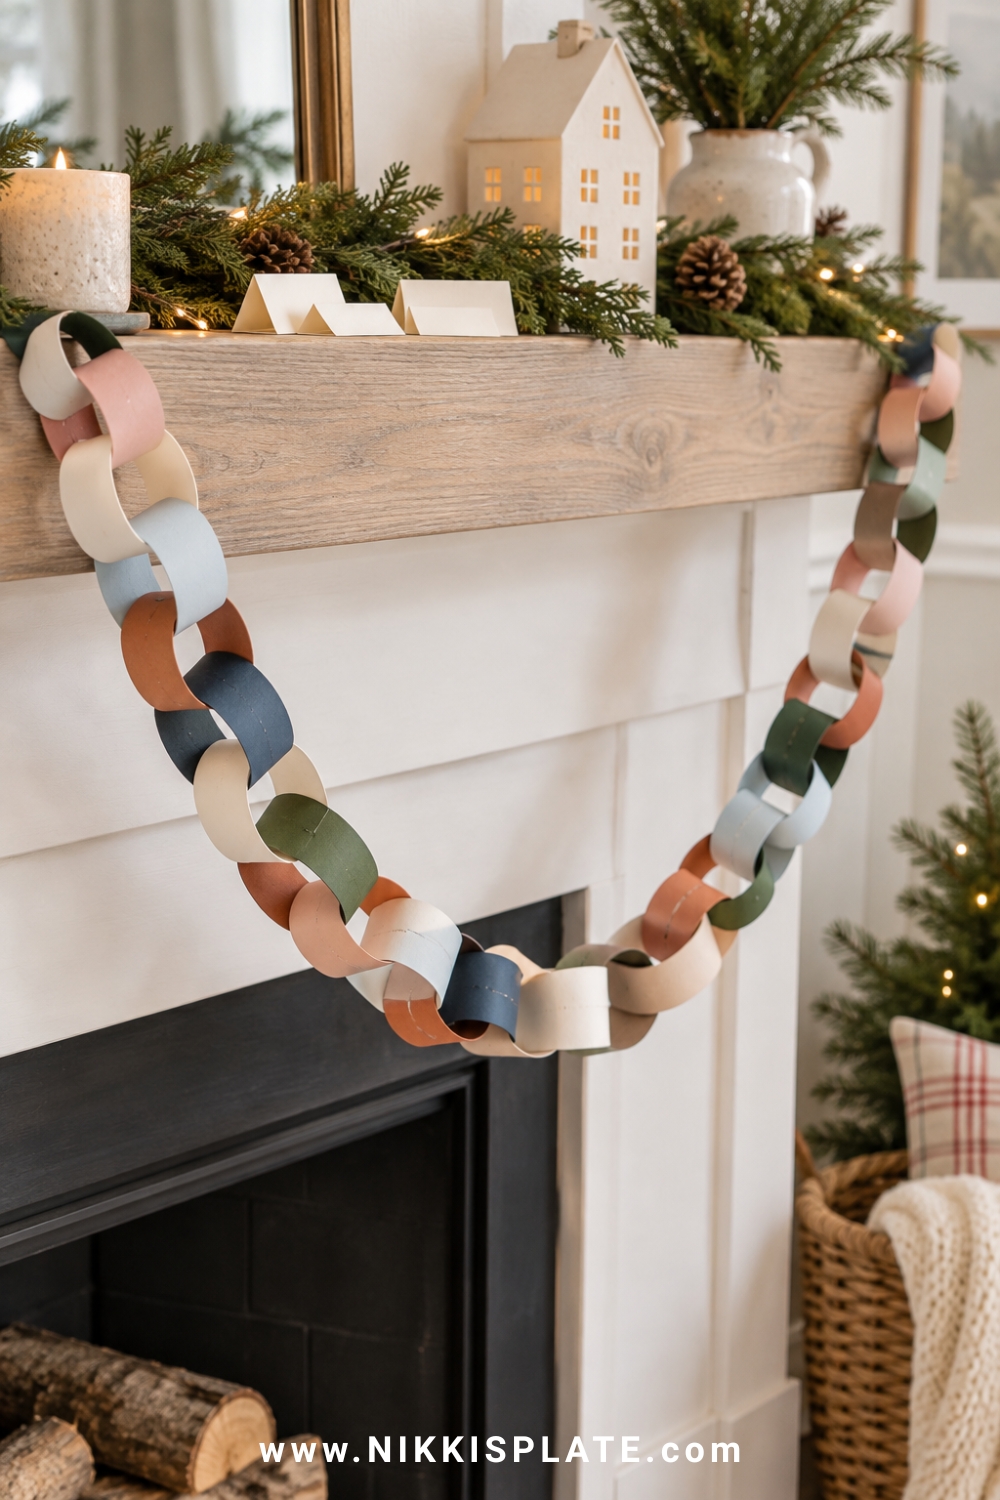
Quick guide: Best for ages 3 to 10 | Time: 25 minutes | Mess level: Low
Materials: Paper strips, glue stick or tape, marker and optional activity notes
How to make it:
- Cut 24 equal paper strips in a coordinated holiday palette.
- Write a small activity, kind deed or family tradition on selected strips if you want more than a simple countdown.
- Form the first strip into a loop, then thread and secure each new strip through the previous one. Remove one link each day.
Helpful tip: Mix activity links with ordinary links so the countdown stays realistic during a busy December.
Adult prep and safety: Use glue sticks or tape for younger children; adults should operate staplers.
If your family loves a December countdown, see my Christmas activity advent calendar and these DIY Christmas advent calendar ideas for more ways to build the tradition.
34. Pinecone Christmas Trees
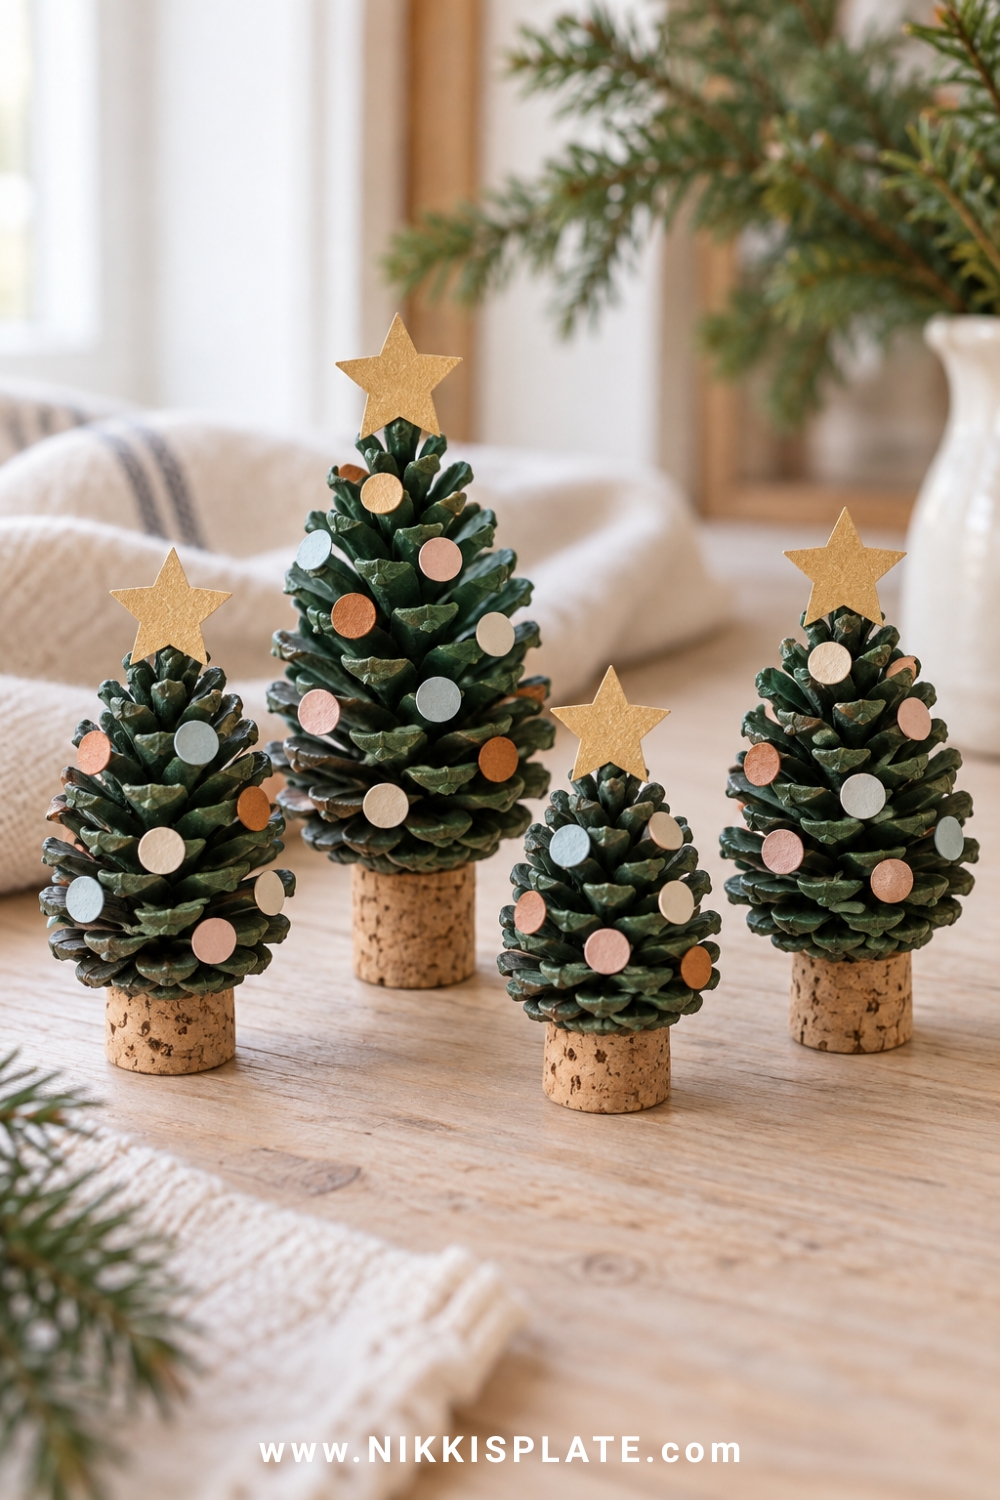
Quick guide: Best for ages 4 to 10 | Time: 30 minutes plus drying | Mess level: Medium
Materials: Clean dry pinecones, green paint, small paper dots, cork or wood base, glue and paper stars
How to make it:
1. Brush or sponge green paint onto a clean, fully dry pinecone and leave the tips partly natural for texture.
2. Glue on small paper dots and a paper star after the paint dries.
3. Attach the pinecone to a cork or cardboard base so it stands like a miniature tree.
Helpful tip: Check outdoor pinecones for dirt and insects before bringing them inside, or use clean craft-store pinecones.
35. Paper Nativity Scene
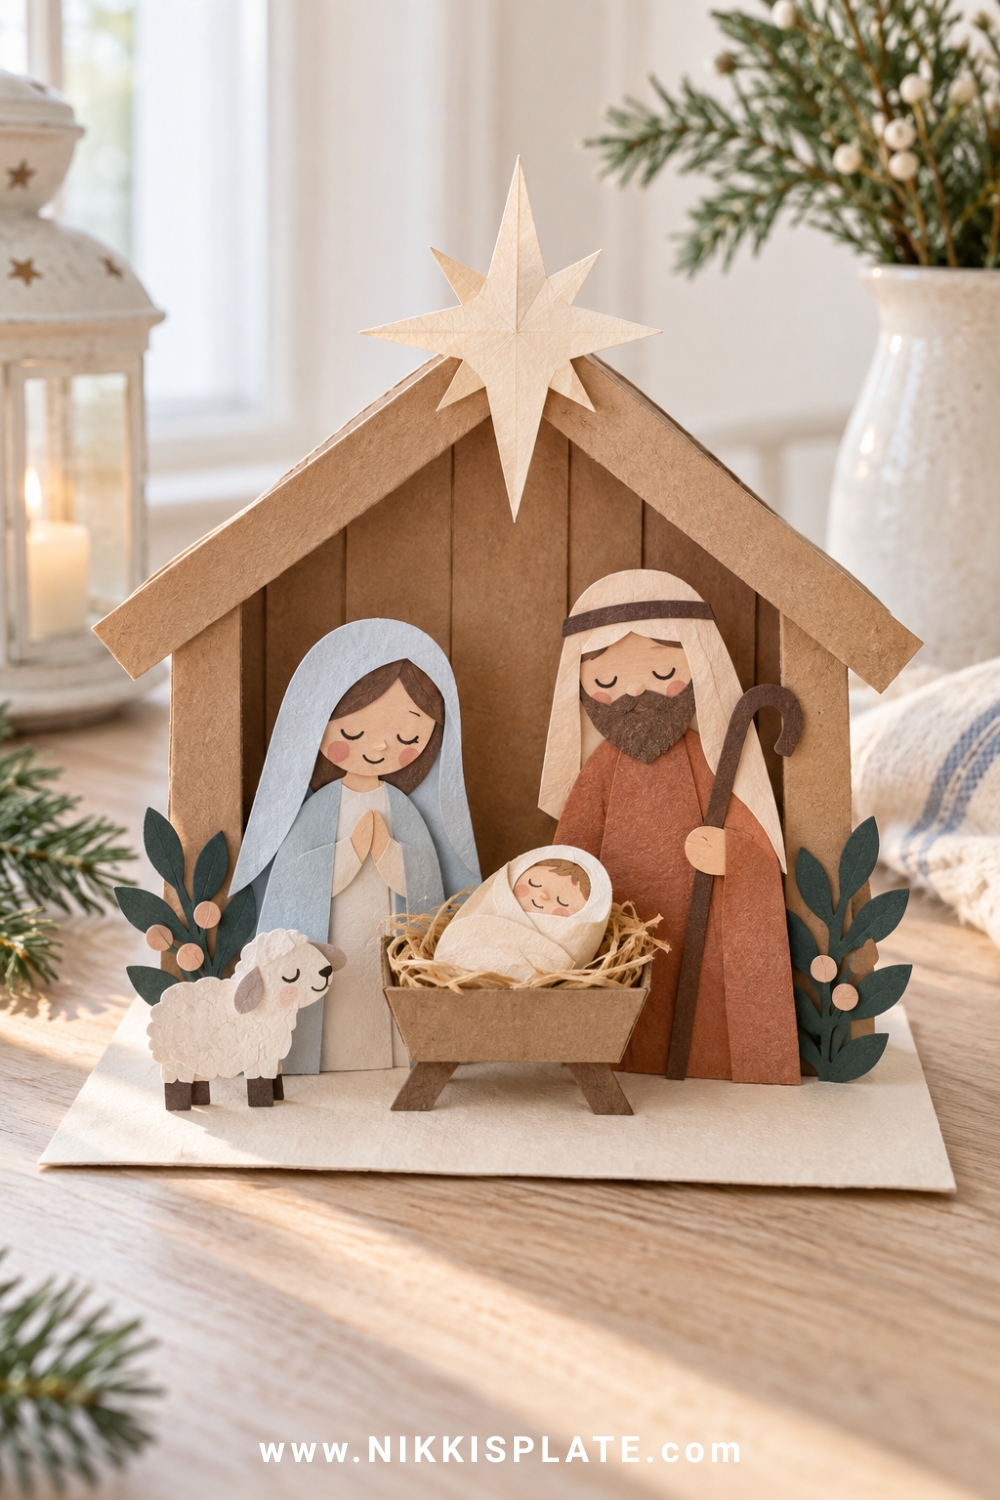
Quick guide: Best for ages 5 to 10 | Time: 35 minutes | Mess level: Low
Materials: Cardstock, kraft paper, glue stick, scissors, markers, craft sticks and a folded paper base
How to make it:
- Cut a simple stable silhouette from kraft paper and glue it to a folded cardstock base.
- Create simple paper figures for Mary, Joseph, baby Jesus and an angel using circles, rectangles and soft fabric or paper scraps.
- Arrange the figures inside the stable and add a large star above the roof.
Helpful tip: Keep the shapes simple and let children choose skin tones and clothing colours for their own meaningful version of the scene.
Best Christmas Crafts by Age
Age ranges are only a starting point. Choose the craft that matches your child's current fine-motor skills, attention span and ability to use tools safely.
Best Christmas Crafts for Toddlers
Toddler crafts work best with large pieces, one or two simple actions and most cutting completed ahead of time. Focus on stamping, sticking, tearing and dabbing rather than making the finished project look exactly like the example.
- Sponge-painted Christmas trees
- Paper plate Santa
- Cotton-ball Santa hat using torn paper instead
- Paper plate reindeer
- Paper plate snowman
- Contact-paper bauble suncatchers
Best Christmas Crafts for Preschoolers
Preschoolers often enjoy projects with a clear theme and enough choices to make the result their own. Pre-cut difficult shapes, but let them arrange, glue, colour and decorate independently whenever possible.
- Paper plate Christmas trees
- Tissue-paper tree suncatchers
- Paper bag Santa puppets
- Handprint reindeer keepsakes
- Melted snowman collages
- Paper plate wreaths
- Gingerbread house paper bags
Best Christmas Crafts for Older Kids
School-age children may enjoy careful folding, threading, pattern-making, and projects they can turn into gifts or room decorations.
- Accordion-fold Christmas tree cards
- Fold-and-cut paper snowflakes
- Beaded pipe-cleaner snowflakes
- Salt dough ornaments
- Paper-strip baubles
- Yarn-wrapped ornaments
- Paper nativity scenes
For more detailed projects, try these Christmas rock painting ideas or let older children help plan a few Christmas window painting ideas.
Low-Mess Christmas Crafts for Busy Days
When you want a festive activity without paint water, glitter or a long cleanup, choose a paper, yarn or contact-paper project. Put the exact supplies for one craft on a tray and keep everything else stored away until it is needed.
- Accordion-fold Christmas tree cards
- Handprint Santa beard keepsakes
- Paper bag Santa puppets
- Melted snowman collages
- Snowman name crafts
- Fold-and-cut paper snowflakes
- Paper-strip baubles
- Yarn-wrapped cardboard ornaments
- Gingerbread house paper bags
- Christmas paper chains
For an even simpler activity, set out crayons with the free vintage Christmas coloring pages linked above.
How to Set Up a Calm Christmas Craft Session
- Choose one project. Too many choices and supplies can make the table feel chaotic before anyone begins.
- Prepare the adult-only parts first. Cut thick cardboard, open contact paper and set up glue or paint before inviting children to the table.
- Use a rimmed tray. A baking sheet or shallow tray contains beads, paper scraps and paint and can be moved if you need the table back quickly.
- Offer a limited colour palette. Three to five colours still give children creative freedom while helping the finished crafts look cohesive when displayed together.
- Expect imperfect results. The uneven cuts, unusual faces and unexpected colour choices are what make children's crafts worth keeping.
- Add the name and year. A quick note on the back turns an ordinary afternoon project into a family keepsake.
- Match small parts to the child's age. The CPSC small-parts guidance explains that small objects can present choking, aspiration or ingestion hazards for children under three.
Frequently Asked Questions
The easiest options use one main action, such as stamping, sticking or wrapping. Try sponge-painted Christmas trees, paper plate Santa, a melted snowman collage, contact-paper baubles or a paper chain countdown.
Choose crafts with large pieces and very little cutting, such as sponge-painted trees, torn-paper wreaths, paper plate reindeer or tissue-paper suncatchers. Prepare the base first and stay within arm's reach throughout the activity.
Skip loose glitter and use sticker dots, metallic paper or washable paint for sparkle and colour. Set up one shallow tray, cover the table, pour only a small amount of paint and keep a damp cloth beside the work area.
Handprint keepsakes, salt dough ornaments, fingerprint cards, yarn-wrapped ornaments and popsicle-stick photo frames all make meaningful gifts. Add the child's name and year so the recipient can keep track of when it was made.
Choose versatile materials that work across several projects: cardstock, paper plates, glue sticks, washable paint, blunt-tip scissors, tissue paper and yarn. Avoid tiny pieces for mixed-age groups and prepare one labelled tray per table.
For toddlers and preschoolers, aim for 10 to 25 minutes of active crafting, not including drying time. Older children may enjoy projects that take 30 to 45 minutes, especially when they are making a gift or ornament.
Choose one display zone, such as a length of twine, a playroom shelf or a single window. Rotate the crafts during December, photograph the favourites and store only the most meaningful keepsakes after the season.
More Christmas Ideas
Keep the creativity going with these 30 DIY photo ornaments, Christmas rock painting ideas and Christmas window painting ideas. They are especially fun for older kids who are ready for a project with more detail.
You can also plan a family countdown with my Christmas activity advent calendar, or browse the full Nikki's Plate Christmas collection for printables, decorating ideas, recipes and more.
Final Thoughts on Christmas Crafts for Kids
The sweetest Christmas crafts for kids are not necessarily the most elaborate ones. A paper tree, a lopsided snowman or a tiny handprint ornament can become part of your family's holiday story when children are free to create and adults keep the setup simple.
Choose one idea that fits the time and supplies you have today, then enjoy the process together. When you are ready for another cozy activity, save this list and explore my other Christmas ideas for the rest of the season.
Until next time,



As Seen on TikTok
Come behind the scenes of our farmhouse build, decor projects, and cozy everyday life. Tap a video to watch, then follow @nikkisplate on TikTok for more.
Watch this video on TikTok
Watch this video on TikTok
Watch this video on TikTok

Leave a Reply